Hello to all,
Welcome to the new edition of the SOLIDWORKS® Support Monthly News! This monthly news blog is co-authored by members of the SOLIDWORKS® Technical Support teams worldwide. Here is the list of topics covered in this month’s Blog :
-
Understanding the files generated in [Administrative image directory]x64Logs[machine_name] folder.
-
SOLIDWORKS® Manage: Unable to send a Record from SOLIDWORKS Manage to a Process? These are the things you should make sure of!
-
Managing Decal Files on the 3DExperience Platform
-
One Minute Tip: Understanding Equations in Assemblies – Part I
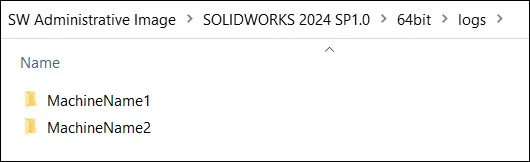
1. Understanding the files generated in [Administrative image directory]x64Logs[machine_name] folder
-by Deepika PUJARI
SOLIDWORKS® Installation Manager log files are available to assist you in troubleshooting installation problems.
- These log files are located in this folder:
- C:UsersusernameAppDataRoamingSOLIDWORKSInstallation Logsinstalled_version
- If you run the Installation Manager from a system account, the logs are located in this folder:
- C:WindowsSysWOW64configsystemprofileAppDataRoamingSOLIDWORKS
In case of Administrative Image Installations: If you enable the Administrative Options “Create a diagnostic log during each installation”, the SOLIDWORKS Installation Manager requires that all clients have write access to the Logs directory that is created as part of the administrative image, which is “[Administrative image directory]x64Logs”. Client installations will fail if the client is unable to write to this location.
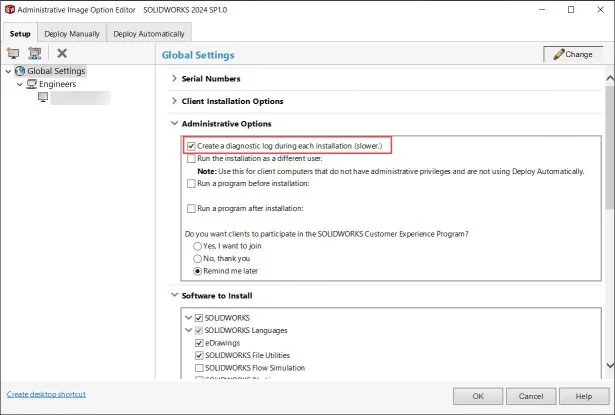
If you see the message: “You must set write permission to the logs directory or client installations will fail,” click OK and modify the permissions to the newly created logs directory, where needed, before performing a client installation.
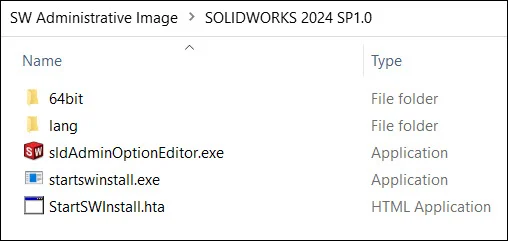
Files created in the [Administrative image directory]x64Logs[machine_name] folder based on the deploy method are listed below;
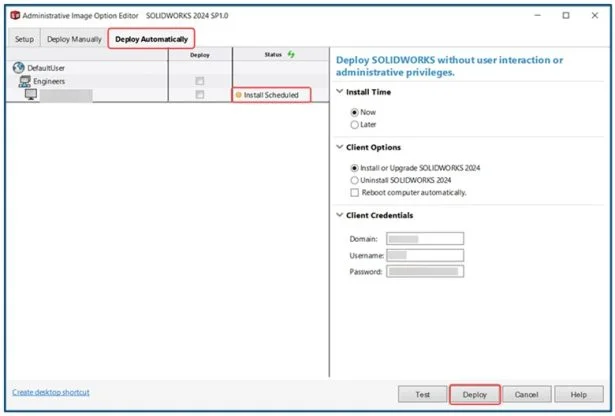
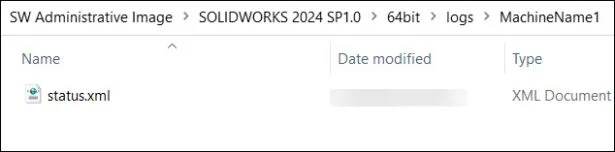
- Status file: The “Status.xml” file contains the status information like Install Scheduled, Installing, Install Successfully or Install Failed.

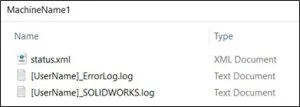
- Error log: The “*_ErrorLog” files are created by the SOLIDWORKS Installation Manager. Basically, these files are copies of the sldlMLog file.
- For Manual/Pull Install it is “[UserName]log”
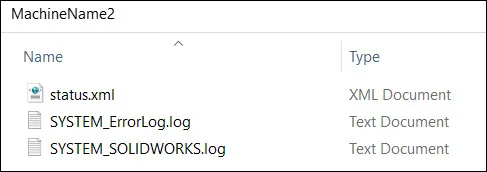
- For Automatic/Push Install it is “log“
- Product log: The logs that contain the product name are the Windows® Installer(Verbose) logs. These logs are created by the Microsoft® Installer (or MSI), that installs each product.They contain information that corresponds to the product specified in the file name. For instance, the “[UserName]_SOLIDWORKS.log” file will contain information only about the solidworks.msi installation. Upon installation of other products, there will be addition of product name log files.
- For Manual/Pull Install it is “[UserName]_[ProductName].log”
- For Automatic/Push Install it is “SYSTEM_[ProductName].log“
- For Manual/Pull Install it is “[UserName]_[ProductName].log”
In order to review the Installation Manager or Windows Installer logs, I would suggest you to follow SOLIDWORKS Knowledge Base article QA00000117097.
You can open these log files with Notepad to view the Installation activities and note down the ErrorCodes or error/warning messages, if any.
You can then search for relevant Q&A articles in our DSxClient Knowledge Base that will assist you to troubleshoot the problem.
If the issue continues to occur even after following the steps in relevant Q&A articles, you can always raise the issue with your Partner in order to create a Service Request and let us help you resolve the problem.
2. SOLIDWORKS® Manage: Unable to send a Record from SOLIDWORKS Manage to a Process? These are the things you should make sure of!
-by Rohit MAGAR
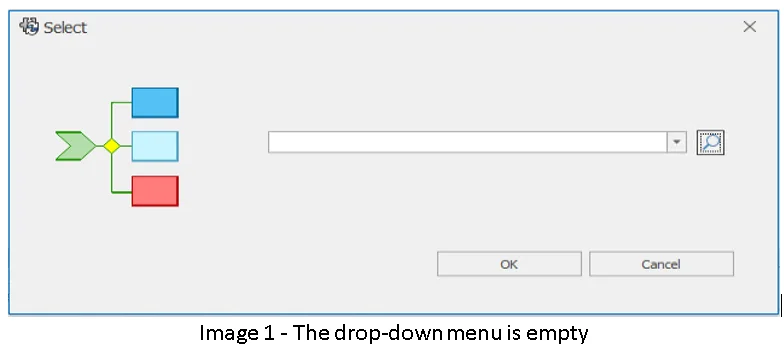
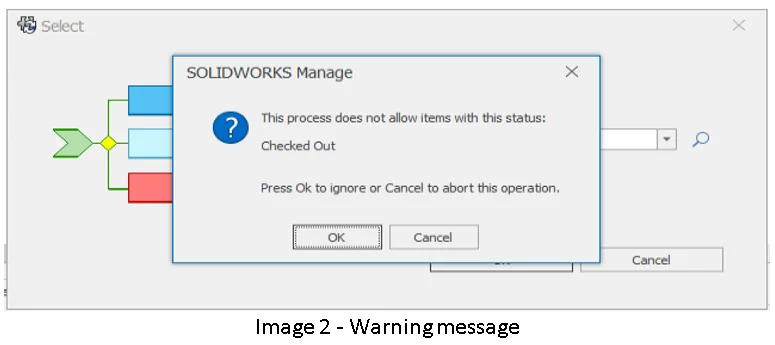
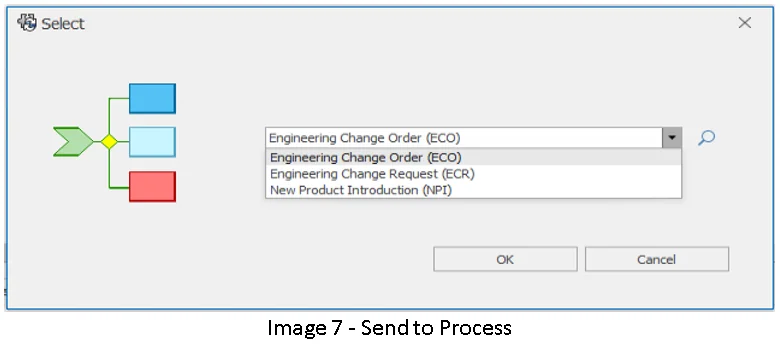
The Send to Process option allows a record to be sent straight to a process. If the Send to Process button is clicked, the user must select a process from the drop-down list in the popup window. Most of the time, while configuring a new process in SOLIDWORKS Manage, System Administrators forget to include certain options. When a user attempts to send a record to a new process, the drop-down menu is empty, or the notice “This process does not allow items with this status: Checked Out. Press Ok to ignore or Cancel to abort this operation” appears.
To rectify this behavior, the system administrator must update the process. Go to Options > Administration Options > Structures > Processes and edit the desired process. Ensure that the following settings are configured appropriately:
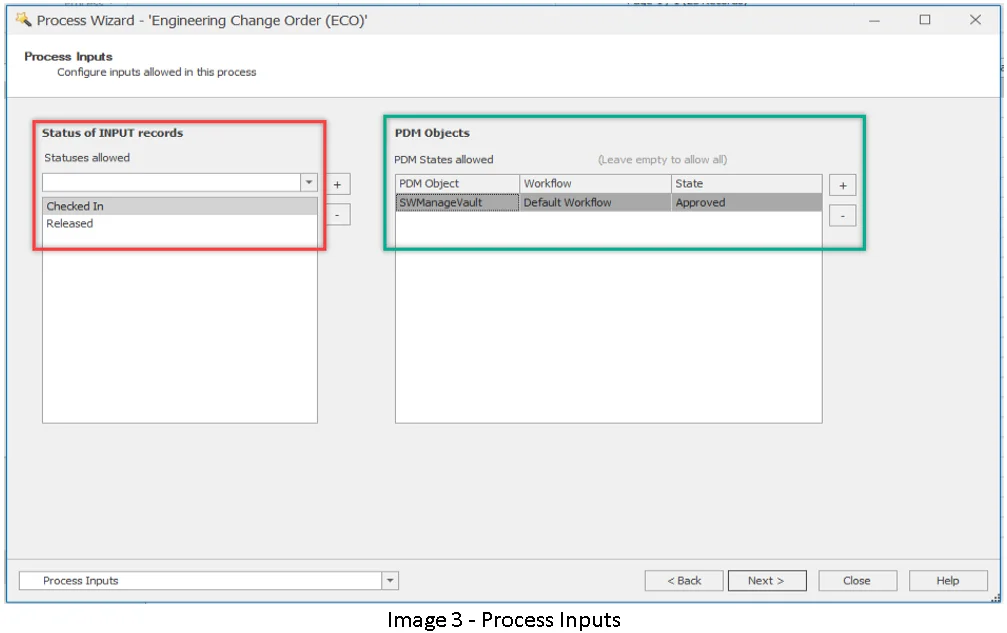
- Process Inputs: Each process has the option to allow or restrict the records that can be sent to the process’s initial stage based on Record Status and/or PDM State. Only records with status added under ‘Status of INPUT records’ will be allowed in the process. For the PDM records status needs to added under ‘PDM Objects’. If there is no status added under PDM Objects, then all PDM States are allowed.Image 2 displays a warning indicating that this process does not allow items with the status Checked Out. Image 3 clearly illustrates that only ‘Checked In’ and ‘Released’ records can be sent to process, and the file with the warning notice is in the Checked-Out state.
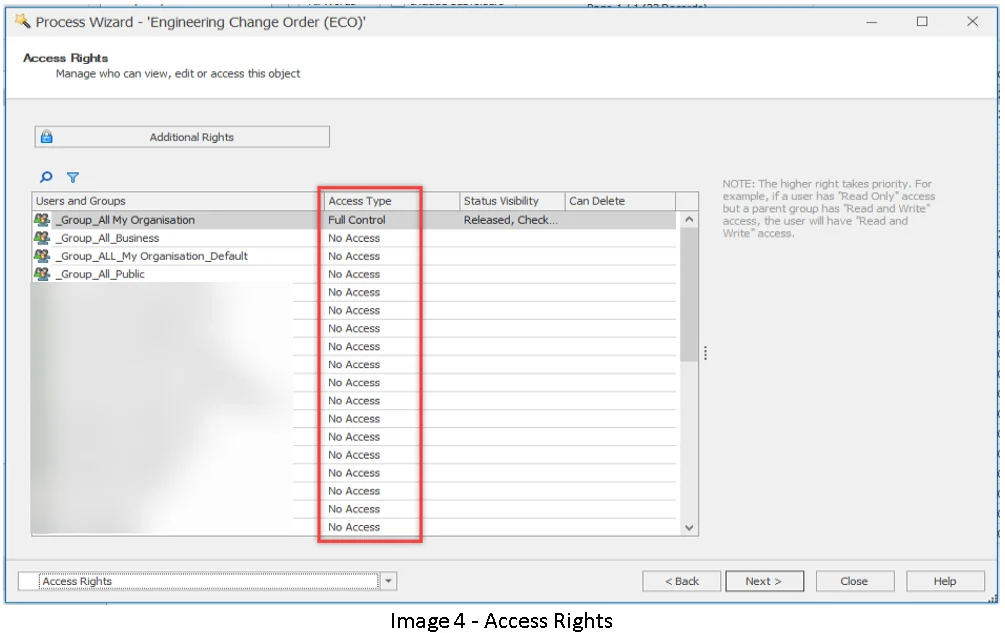
- Access Rights: The Access Rights option determines which Users or Groups have access to this procedure. The group or user that initiated the new process must have Full Control over it. Check the Access Rights tab to ensure that the process has permissions.
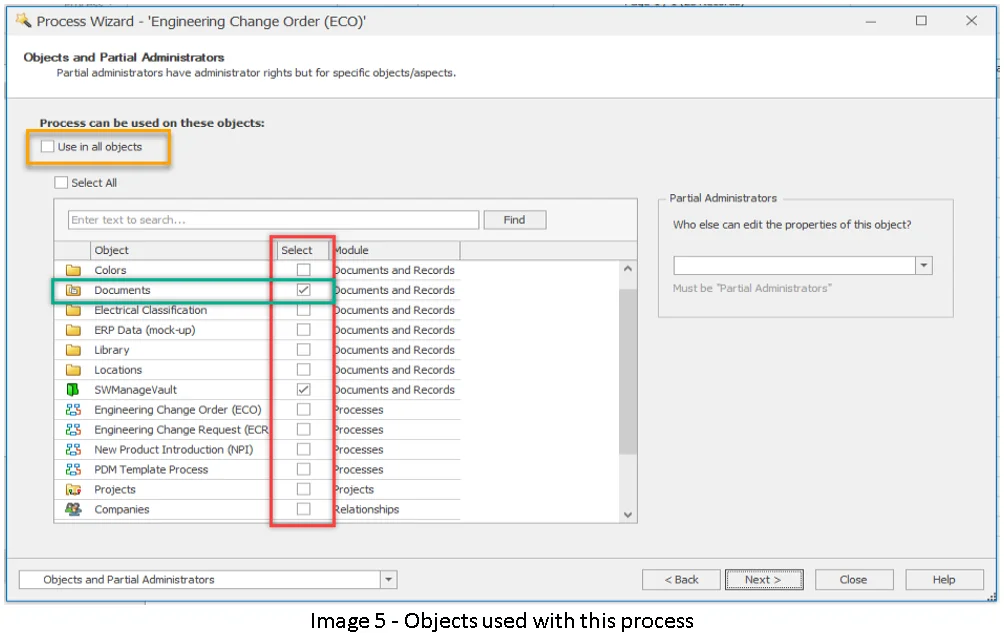
- Objects and Partial Administrators: Choose which objects can be used in this process. This process will thereafter be available when a user provides a record to process from one of the permitted objects. Under Objects and Partial Administrators, ensure that either the object that will initiate the process is selected. You can also select the ‘Use in all objects’ option if all objects require access to this process.
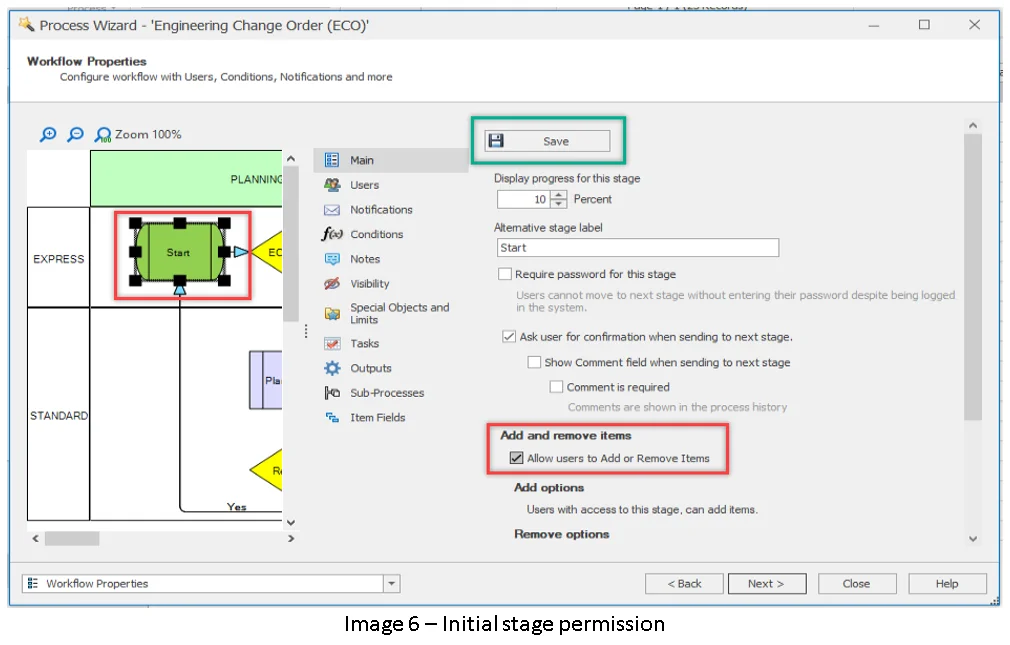
- Workflow Properties:Under Workflow Properties, select the first stage and enable ‘Allow Users to Add or Remove Items’. Once this option is selected, objects can be added or removed from this procedure. Don’t forget to click the Save button on the same page.
You should now be able to submit your object or record to this process.
3. Managing Decal Files on the 3DExperience Platform
-by Ankit GUPTA
Managing decal files efficiently ensures seamless integration and consistent application across projects. In this blog, we’ll explore how to manage decal files effectively within the 3DEXPERIENCE platform.
Understanding Decal File Extension
Decal files in SOLIDWORKS are saved with the extension ‘.p2d’. These files not only contain the path or reference to the image file but also store illumination settings applied to the decal. It’s important to note that the original image file associated with the ‘.p2d’ file is required for insertion.
To streamline decal management on the 3DEXPERIENCE platform, it’s recommended to organize image files in a designated bookmark folder. When launching SOLIDWORKS, these image files automatically download to the Windows folder location:
`C:UsersPublicDocumentsSOLIDWORKSR11xxxxxxxxxxx<FolderName>`
Here is a step-by-step process:
- Save image files in the bookmark folder on the platform.
- Launch SOLIDWORKS > upon launch, the image files will download to the specified Windows folder location. Note: Please ensure that you’ve mapped the bookmark folder correctly to access image files from the platform.
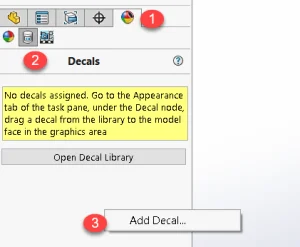
- In SOLIDWORKS, navigate to `Display Manager > Decals`. Right-click in the Display Manager and select “Add Decal.”
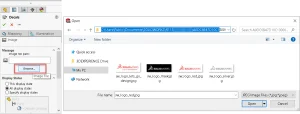
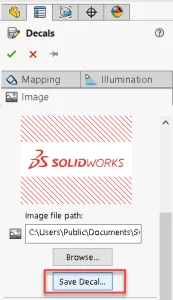
- The Decals Property Manager opens with three tabs: Image, Mapping, and Illumination. From ‘Image’ tab, Select “Browse” and choose the image file from the downloaded folder location to map correctly.
- After configuring the decal settings, save the decal locally within SOLIDWORKS.
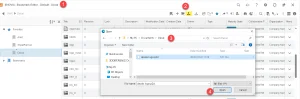
- Once the decal is saved, upload the content back to the platform’s bookmark folder.
Mapping Bookmark Folder
To utilize custom decals efficiently, it’s essential to map the bookmark folder within SOLIDWORKS. By mapping the folder, SOLIDWORKS automatically fetches decal files.

By following these steps, you can effectively manage decal files for SOLIDWORKS within the 3DEXPERIENCE platform, ensuring smooth integration and consistent application of custom decals across projects.
4. One Minute Tip: Understanding Equations in Assemblies – Part I
– by Mario IOCCO
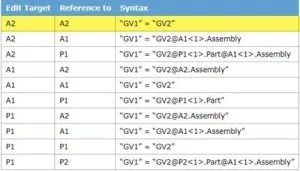
Throughout the years I got several requests to explain with examples the SOLIDWORKS online help “Equations in Assemblies” https://help.solidworks.com/2023/english/solidworks/sldworks/c_equations_in_assemblies.htm.