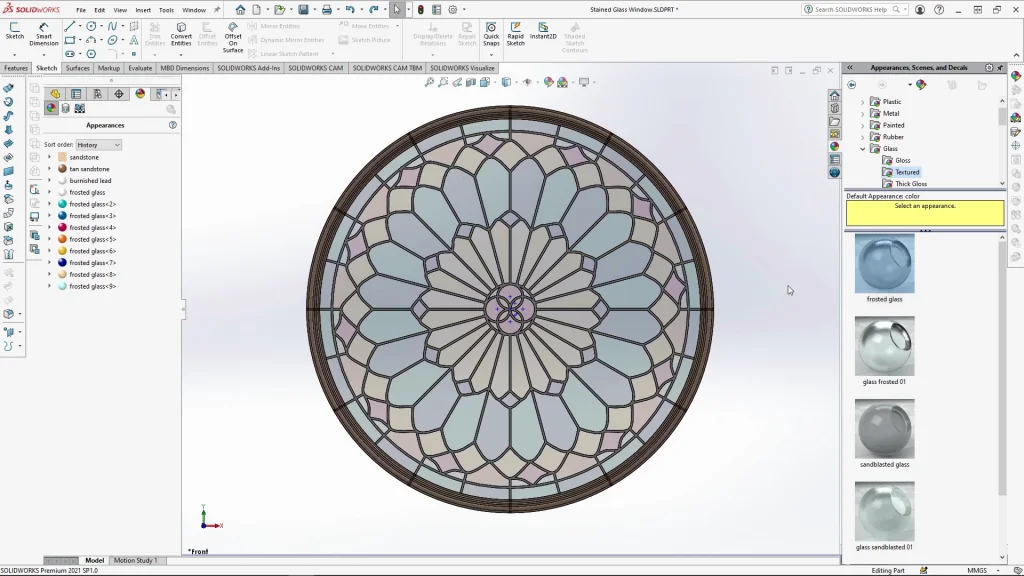

For this tutorial I wanted to highlight the power of Convert Entities select all inner loops. I also showcase the use of circular pattern to create the window architectural molding and the window design itself. During the tutorial you can follow to create the below window design, or create your own design using the techniques from the tutorial, by the end, you will be able to ‘color in’ your window panes to create a beautiful stained glass design.

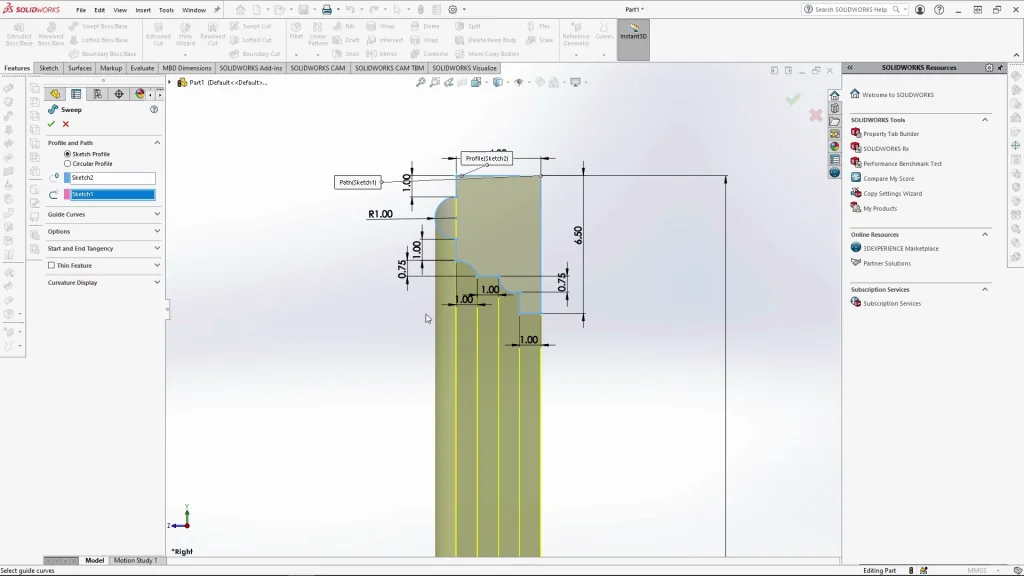
A sweep profile was used to create the outer molding design of the window, as a ceramicist I would use a method called ‘sledging’ which is a similar method or technique as a sweep, you take a profile or template and run it along a path to create a 3d swept profile. This is actually the method used to create architecture plaster moldings you see in homes. The sweep was split into 12 separate bodies using a thin feature, so that I could create a boundary in between each molding piece to look like cement.
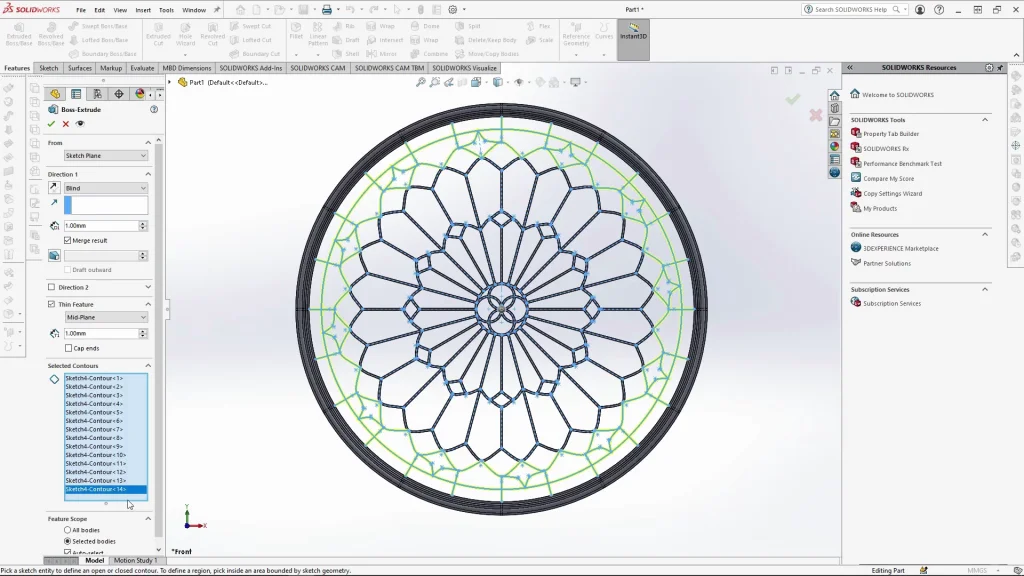
Circular pattern, and the conic sketch tool was used to create most of the sketch for the inner metal frame of the window. The conic sketch tool allowed me to create even pointed arcs that resembled the tips of petals. Circular pattern was used in stages to build up the design, patterning different entities at a time. Once the design was finished, thin feature was used to thicken all of the sketch entities to create the frame, this again was created in stages as SOLIDWORKS began to slow down with all my selections.
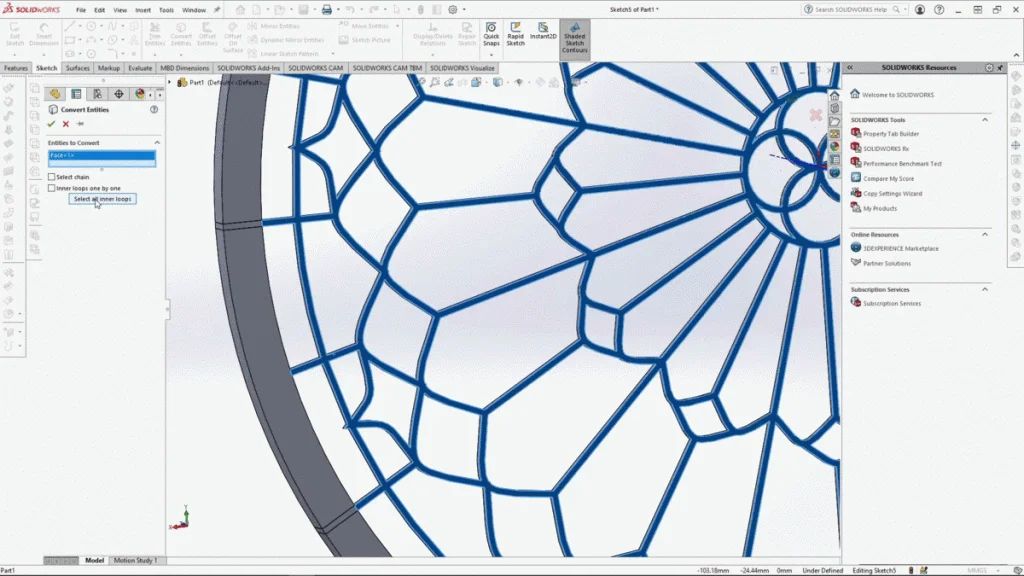
Once the inner window frame was finished and in one whole piece or body, I needed to create a sketch of all the inner loops to create the individual window panes of glass. To do this quickly I used Convert Entities: select all inner loops. This tool can save you so much time, rather than having to select individual loops at a time, I was able to convert all the inner shapes at once, allowing me to simply extrude all the individual glass panes.
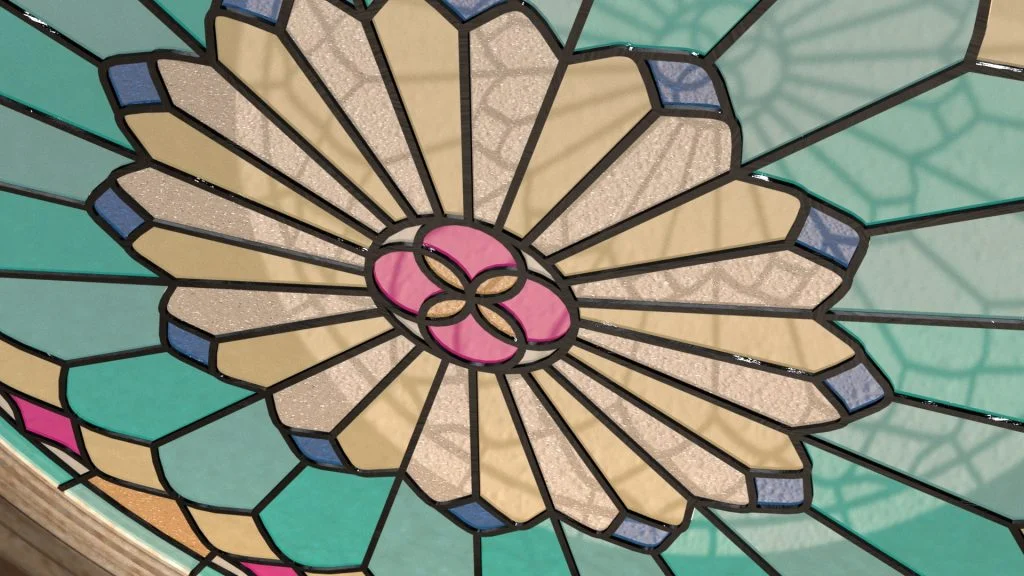
The final part of the tutorial is the fun part, adding color! This is where you can be free to sit back and add color to your window design, almost like a calming coloring book. As I mention in the tutorial, I added the color to the face of each glass pane, rather than to the whole body of each pane, this was to save on time during the tutorial, but if you have the time, and are planning on rendering the window, I would suggest adding the frosted glass appearance with color to the body of the parts too.