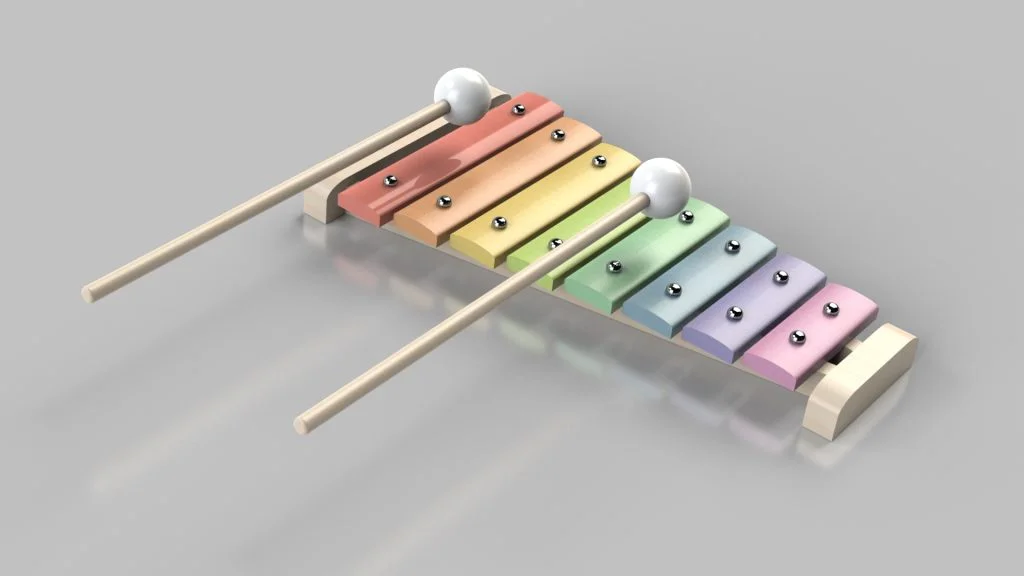

For this SOLIDWORKS tutorial, I wanted to design something where I could test out the new SOLIDWORKS color picker tool to create a colorful wooden xylophone. The jpeg used in the tutorial for the color picking is available to download here, or feel free to use your own colorful jpeg to select colors from for each key. The xylophone mallets are also available within the download. You will need these to follow the final part of the tutorial.
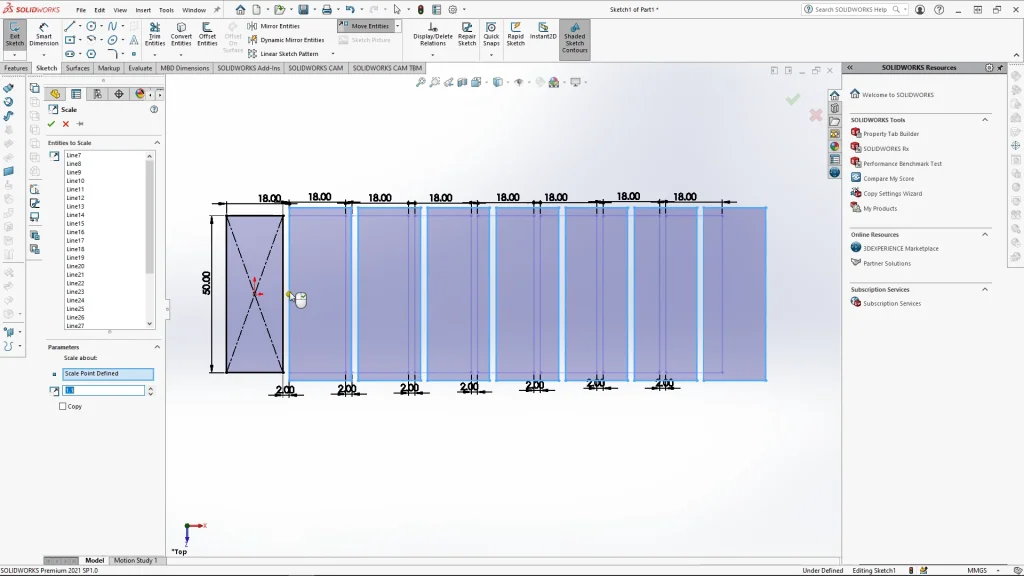
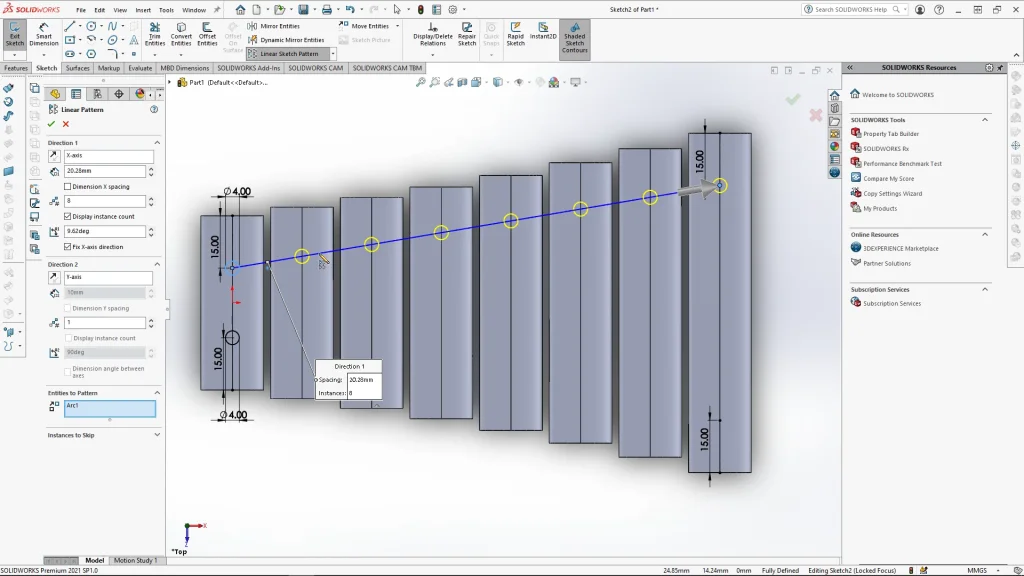
When designing and modelling the keys of the xylophone I had to create a linear pattern of keys, delete the pattern relation, and add smart dimensions to keep the distance between the keys, and the width of each key the same, but, I needed each key to get larger. So, after adding the smart dimensions, I used the scale from point sketch tool, and scaled up all of the keys by 1:1, until all the keys were larger. The good thing about doing it this way is that the keys kept their smart dimensions, even though within the scale preview all of the keys entities enlarged, they would adjust when applied and only scale up in height.
With all the keys scaled, I used guide sketches to create an end point for a linear pattern to create the key holes. The key holes needed to be center to each of the keys along one line. Using the linear pattern tool, I could drag the direction of the pattern from the arrow and snap it to my guide sketch. The same process was used for the bottom row of key holes. The sketch was extrude cut from the keys to create holes in the keys, for them to sit onto pegs of the xylophone.
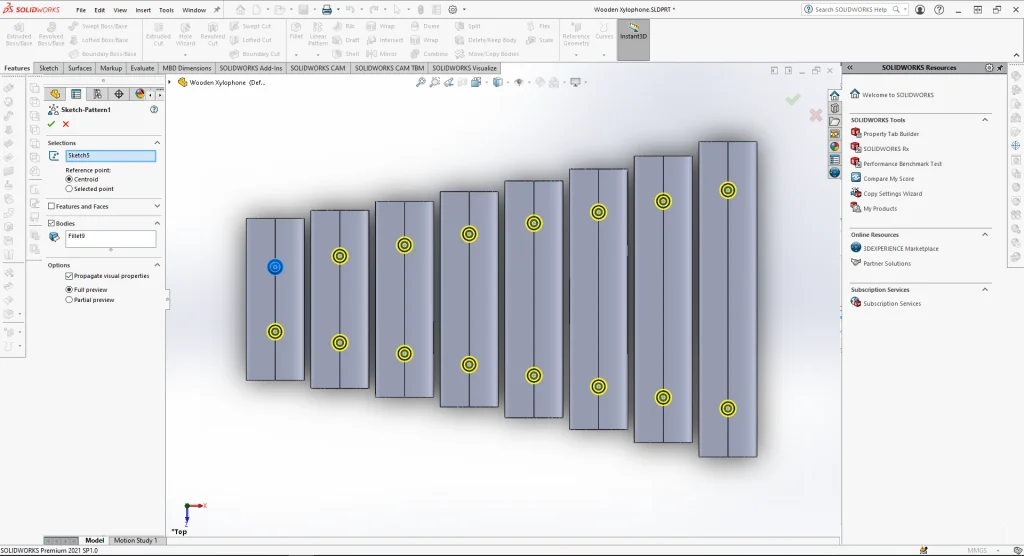
Moving onto the pegs, I created one of the pegs as a separate body within the part. I then created a sketch using the point tool and added a point inside each of the holes along the top. I realized while editing that I should have added points to all the holes at once and then applied the sketch driven pattern feature, as the peg would have patterned into all the holes at once. So, as you can see below, I went back into my model and did just that. In the video tutorial, I pattern one half, and use mirror bodies for the other side, which works too but it is much quicker to pattern them altogether.
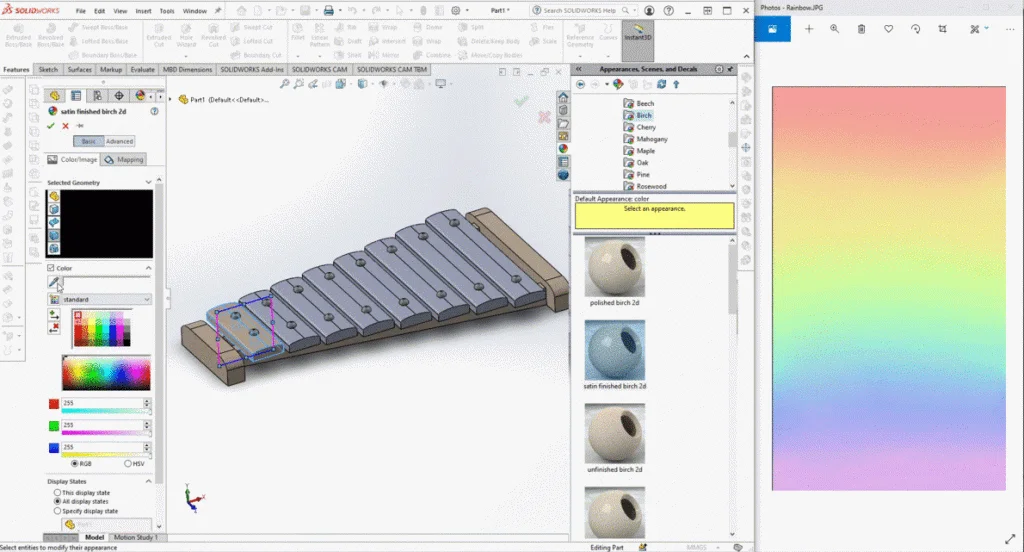
Once the xylophone was fully modelled, I wanted to add a colorful rainbow palette across the keys. I had a jpeg image of a rainbow gradient that I wanted to use as the color palette. While in appearances, I selected a wooden appearance for the key, keeping the options open, I could select the new picker tool from the 2021 SOLIDWORKS update. I opened the rainbow jpeg next to my document window seen below, and just dragged the picker tool over to the jpeg over which color I wanted and apply it directly to the key. This new tool saves me so much time, as a designer, I am constantly making models that need to follow strict colour pantones or palettes. I would normally find out the RGB value of a color and manually add it through the color swatch in SOLIDWORKS, the new tool cuts this step out.