Within SOLIDWORKS, materials can be easily applied to a model giving it a distinguished appearance, as well as the ability to perform real-world calculations. In fact, there are hundreds of materials to choose from, but sometimes the ones we want aren’t included by default. In this blog, we’ll show you how to apply custom materials inside SOLIDWORKS along with the techniques to help store and organize them for further use.
How to Apply a Standard Material
To review, a material can be applied to parts by right-clicking the material icon and selecting Edit Material. The default SOLIDWORKS Materials folder is included with every version of SOLIDWORKS and once the material is selected, choosing apply will assign the associated properties along with any appearance data directly to the part. Within the material dialog, users can also add their favorite materials to a window that is always accessible by selecting the Add to Favorites.
After the material is assigned, then the Mass Properties command will evaluate the total mass along with additional information pertaining to the real-world statistics such as the center of mass and the moment of inertia.
How to Create a Custom Material
To begin setting up a custom material, head back to the Edit Material dialog and select new library and save the material database file to its default location. Under this new library, we’ll go ahead and select new category. Right-click the category and select new material. This group will keep the materials organized in a structure similar to the default ones. For starters, each material is defined by its model type and by its associated properties. For example, if we want our new material to be evaluated for mass, we’ll need to enter the mass density. If running a simulation, other properties such as the elastic modulus, Poisson’s ratio, and yield strength are all mandatory. Additional properties are optional and can be filled out when necessary.
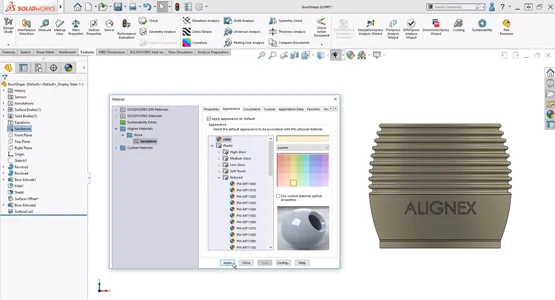
To add a custom appearance, head over to the appearance tab and select the color. Once done, hit save at the bottom and then we can choose to apply the material to our part.
To share our custom material with other users, simple copy and paste the materials database file (.sldmat) to a different system and store its location under System Options > Files Locations> Material Databases.
By following these steps, you’ll be creating a library of new materials that are easy to customize and store for further use.