
How to Create Exploded View Animations in SOLIDWORKS Visualize
An animated exploded view is a fantastic way to present your design. It can wow customers while also giving them an understanding of what goes into your product. With SOLIDWORKS Visualize Professional, animating exploded views is now easier than ever. Keep reading to learn how I made this detailed exploded view of a Parrot Bebop 2 drone.
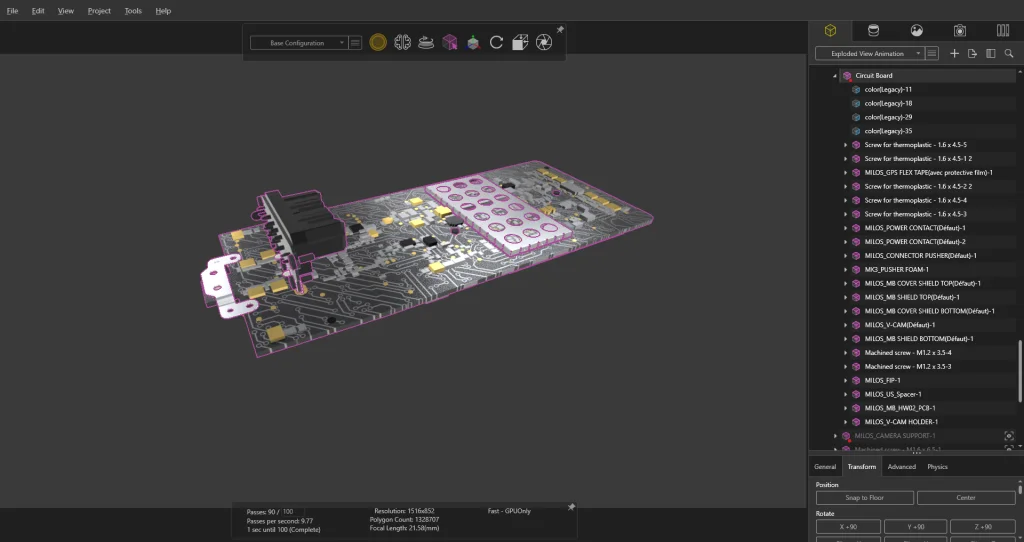
Before you even open the animation timeline you should organize your scene tree by what you want to animate. This circuit board consists of many smaller parts that I wanted to keep together. Instead of creating an animation for each part individually, I grouped them and created one animation for the whole group. This helps to keep my animation timeline clean and also makes it easier to change the animation later. To group multiple parts together, select the parts/groups in the Scene Tree and select “Add to New Group” in the palette on the right.
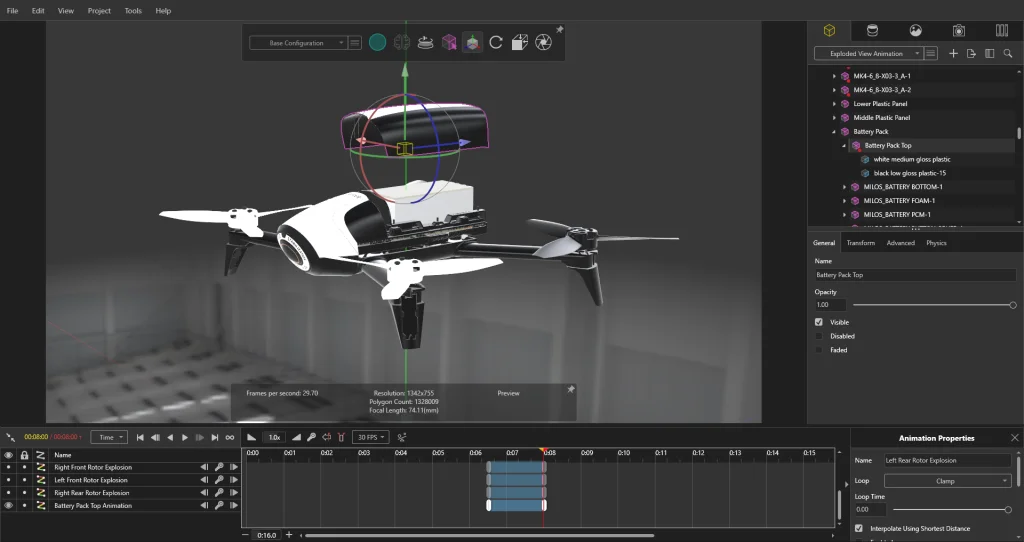
Rotation animations are very convenient for parts such as this drone’s propellers. If you want a part with a rotation and another movement, however, you’ll need to create a separate animation on the same part. This is done by creating additional groups. In my animation, each propeller is effected by three separate animations: the model animation that flies the drone into the scene, a rotation animation on the individual part, and then a keyframed animation (for the exploded portion) that is applied to a group containing only the propeller.

The most important part of an exploded view animation is, of course, exploding your product. If you’ve already grouped the parts by how you want to animate them, this step will be very easy. First, select the group that you want to animate. Then, add a keyframe by pressing “K”. Move the animation timeline pointer to when you want the animation to end and finally, move the group to where you want it. Also, you should have “auto-keyframing” turned on. Otherwise you’ll need to add a final keyframe by pressing “K” again.

During this process, if you want to change the position of an already animated part, simply use the arrows on either side of the keyframe icon to move the pointer to the keyframe you want to edit and move the group as normal. This will automatically update the keyframe, making editing your animation quick and easy.

When I reached this point, I decided that the animation still wasn’t finished; I needed to collapse the model back together. To do this, I simply duplicated the two keyframes I already had for the explosion, switched their positions, and dragged them to the end of the animation. I made sure to set the keyframes to “hold” while they were exploded so that the parts did not move during the camera flyby.

Now, you may have noticed that I didn’t talk about the camera animation at all. That’s because we have another blog post all about camera animations here.
If you’ve created an exploded view in SOLIDWORKS Visualize, make sure to share it on our forums in this thread. Now go out and make some great images!