
Laser cutters on the market can automaticity recognize colour layers from DXF files. Based on the colour in the DXF file the machine makes an engraving or cuts the geometry. With a conventional DXF export you would need edit the export in Draftsight and create colour coding afterwards. This is a process we can automate with the SOLIDWORKS map file function, removing a repetitive task in the daily work routine. In this blog I will discuss how to set up the export directly from a 3D sheet metal file and how it can automatically be generated using a PDM Task.
The map file
The first step is enabling the map file and setting up the correct map file to use. To edit the DXF Export Options, a file needs to be open. With the file open go to Tools – Options – Export – DXF. In the DXF export options we can also control the output version and the spline handling, but we are interested in the map file. Tick Enable.
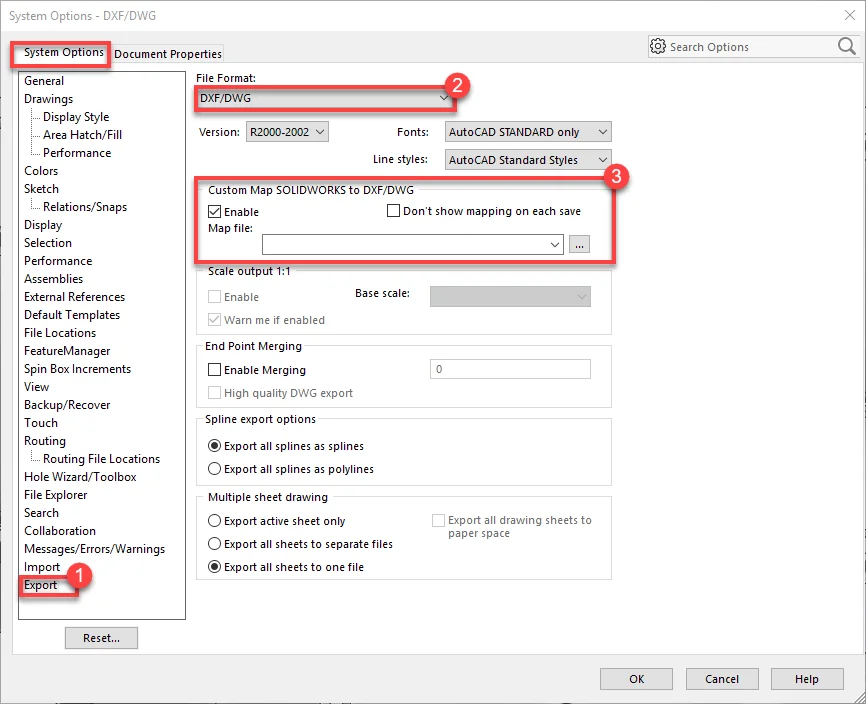
After creating the map file we save it. We then go back to these options and fill in the location. For now we don’t tick the box Don’t show mapping on each save, we will come back to check this box later. Now the options are set, so we can continue with the export.
Sheet metal export
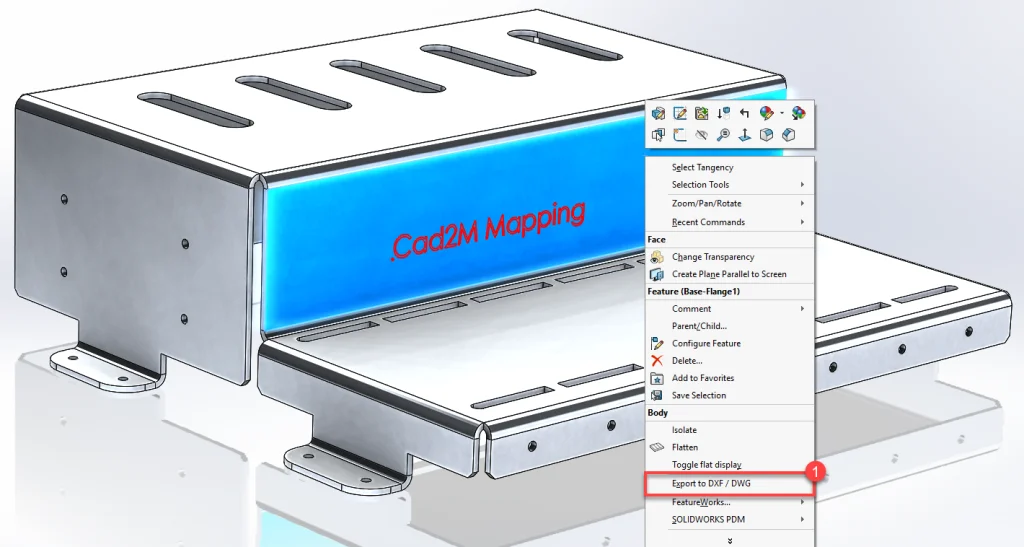
We want to engrave text and cut out holes in the sheet metal file underneath. We used a sketch in the main model to hold the text. Bonus tip: I used the Font OLF SimpleSansOC, this is a single line font and always available in SOLIDWORKS. To export this sheet metal to DXF we right click the model and select Export to DXF / DWG.

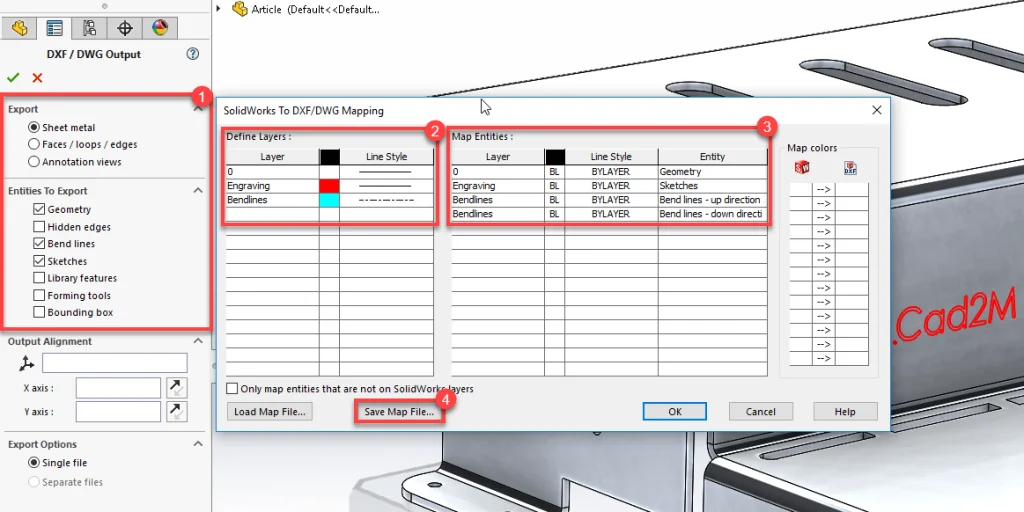
This brings up the Property Manager for the DXF output. We select the sheet metal option, and choose to export the Bend lines, Sketches and Geometry.
After confirming with the green tick, instead of showing the preview we are asked to create the map file. When using the export directly from the 3D model we use Define Layers and Map Entities. Map Colour can be used when you have a 2D drawing. The export directly from 3D has less options for mapping then the 2D. We can only map all the sketches from the model to 1 layer, this includes guidelines. When exporting a 2D, a distinction can be made between centrelines, guidelines etc.
Under Define Layers we create the layers that need to be present in the DXF file. In the example: Geometry (White), Engraving (Red) and Bendlines (Teal) Under Map Entities we assign which entity comes in which Layer. Do not forget to save the map file, we do not want to create it again.
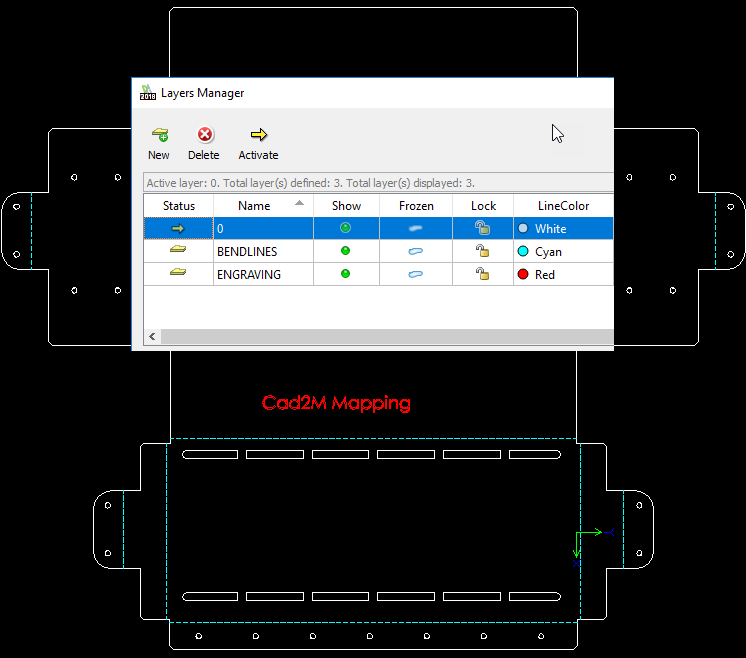
The preview is correct and we make the export. In DraftSight we verify the result and see that the layers are created with the right colour. Now that we are satisfied with the result, we go back to the DXF options and tick the box Don’t show mapping on each save.
Automation in SOLIDWORKS PDM
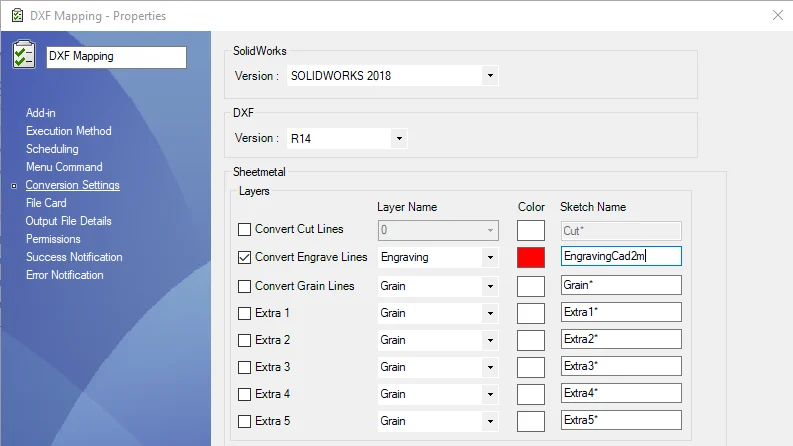
The process described in SOLIDWORKS is semi-automated. When a part is ready, we need to manually create a DXF from every file we created. In PDM Professional this can be incorporated into a task. For example, when a part is ready for production, it is approved and undergoes a transition. In this transition a DXF is created. With the use of a map, specific sketches are exported to specific layers. Finally, the DXF is placed in a specified folder. At CAD2M we created the custom task that picks up the name of the sketch and exports it to the corresponding layer.
Conclusion
With the use of a map file, a colour layered DXF is created. In this blog, we discussed how to enable to option, and how to set up the desired mapping file. Within SOLIDWORKS we created semi-automated exports. Fully automated exports can be achieved with the use of PDM Professional and custom created tasks.
Written by Pim Visscher, SOLIDWORKS Expert