When it comes to creating projects in SOLIDWORKS, the main goal is to spend as much time as possible on what is important, the design itself. Nobody wants to be stuck wasting unnecessary amounts of time on tasks like recreating file templates over and over. Come on, we are trying to increase productivity here!
In this video, I’ll walk you through the process of creating a drawing template that can be used on multiple projects.
View the video transcription below:
[Begin Transcription]
Hi everyone welcome to the Alignex blog, my name is Geoffrey and today we’re going to be going through setting up your drawing templates and your sheet formats in SOLIDWORKS. So what I’ve got open right now is a drawing template. Usually we like to start with the default templates so that’s just when you do a File > New and choose one of these sizes of drawing templates. What we’ll do from here is we’ll customize this template and will also save out the sheet format in a separate file and link the two together.
So the actual drawing template, this is when we do a File > Save As and we’ll choose type .DRWDOT. This is the actual drawing template. So what this stores is it just stores the document properties so if I go to my Options up here and then Document Properties this is what the template is storing, so like our units, our drafting standard, the types of views, fonts, thicknesses, that’s what’s being stored in our drawing template. Additionally the drawing template can also store predefined drawing views. These can be done by doing insert > drawing view > predefined.
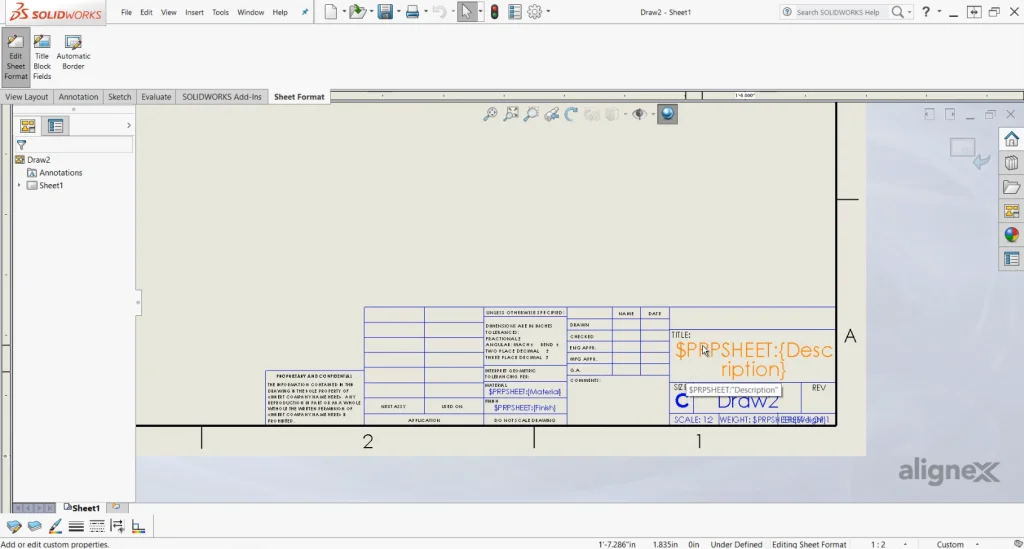
We can define the type of view so I’ll just place that like an isometric and just hit OK. So these views will be automatically populated when a drawing is created using this template. OK so that’s what the drawing template stores. Now the sheet format this is accessed by right-clicking and I’ll just choose Edit Sheet Format here. The sheet format contains the title block down here the border and finally also if I go to File > Properties the custom properties that are stored.
So the title block this can contain information such as links too properties. This is linking to the description, this is done by just if we Double Click any text field, go over here to Link to Property, we can choose to link it to any properties in our drawing or any properties in the model. Once it’s inserted we would also have those properties to link to.
OK the drawing title block can also hold images we can put those in just with Insert > Picture, and we can edit any of these lines just by using our sketch tools to draw more lines, move them, etc. This sheet format also contains the border here, if we want to change this border we can use the Automatic Border reation tool so I’ll just hit that. This delete list this would be if we want to remove anything from my title block or mask it off. I’m just going to hit Next, I don’t need to use that.
So this is how we set up the border, we have rows and columns, we have our spacing line widths and weights, we have our zone dividers if we’re using those and we also have our fonts. Finally we have the option to add a margin mask. This would hide zone dividers and zone labels in certain areas. I don’t need that so I’m just going to hit OK.
Alright, so what we also might want to also store is those custom properties. So here if I add something like “Description” this will also be stored in the sheet format file. Alright so to save out this sheet format, first I’m going to exit it here in the top right, that’s the same thing as clicking Right Click and go back to Edit Sheet versus we were in Edit Sheet Format.
Alright so the last thing we want to do is save out our sheet format. To do that we’ll just use a File > Save Sheet Format and this will save it in the type .slddrt. So let me just save that on my desktop. OK lastly we want to make sure that our drawing template is linked to the sheet format. To do that I will just Right Click and we may have to hit this drop down to get to Properties, go ahead and hit that. And you can see here this is the sheet format that it’s linked to. I’ll just browse for the one I just saved out. Here it is, Apply Changes, and then I’m just going to re-save the drawing template one more time. So .drwdotremember to change that. OK, so that’s how we would go about creating a new drawing template, saving out our sheet format and linking the two together.
[End Transcription]
If you are interested in learning more, sign up for one of the many training courses we have to offer at Alignex or check out our Alignex support documents available on our website.