Ever wondered how to skew the odds in your favor? Well, we can try to make some dice that are skewed using SOLIDWORKS so that we can win at craps.

But the funny thing is, as biased as these bones look, NumberPhile explains that they are perfectly fair given that you have both handed versions. Drat. Ah well, this looks like a fun thing to model, so let’s do it anyway!
The first thing we need to know is what this shape is. That way we can devise a plan of attack to model this strange shape easily. The name of the shape is a trigonal trapezohedron, and it has more symmetries than one might think.
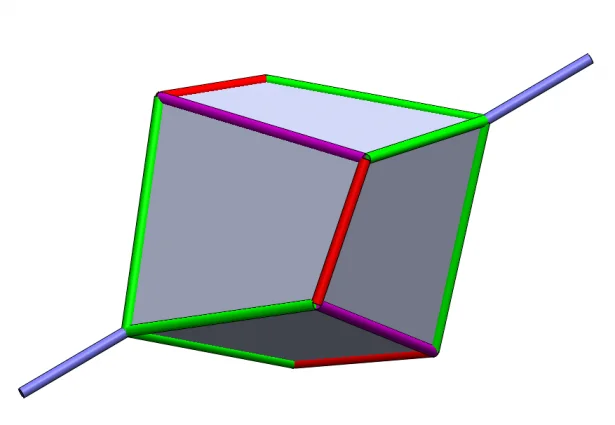
The first thing we can note about it is that it all of the faces are planar and identical in shape and area, that is, each side is a similar rhombus. With this, we can assume that mirroring and patterning is valid in the first place. It has a rotational degree of symmetry (as denoted by the blue axis). We can, therefore, use a circular pattern as part of a modeling solution. We can also see that some edges are colored differently than others. Edges of matching color means that they have the same length. Notice that all the green edges come together at a point, making a green tripod, and the same is true for the other side. Notice that the green tripods don’t line up with each other perfectly, as would be the case of a perfect mirror. We can deduce that the mirrored sides have a rotation about the blue axis to rotationally offset them. One more thing to notice about this shape is the red and purple “belt” around the solid. This will check if we got the shape right when we are finished. With those observations done, let’s get to modeling!
The plan is to use surfacing to enclose a volume and then use the Intersect tool to create a solid. The problem is how to get the surface lined up so that the enclosed volume is a trigonal trapezohedron. In this guide, I will give you my solution.
Step 1: Planar Surface
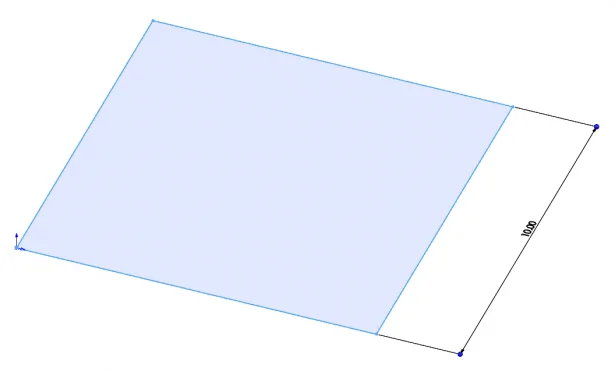
We’ve already discussed the types of patterns we plan to use, but we haven’t discussed what the seed should be. As previously mentioned, all of the sides are planar so we can use the planar surface feature. The only thing now is what boundaries should the surface have. For this, an arbitrarily large square on the Top plane will do. Keep the origin at the lower left corner and make it about 10 inches. (I am aiming to make my solid about 3 inches long, so this amount of surface should be plenty.)
Step 2: Making the Axis
Now it is time to make the axis as represented by the blue line. In order to achieve this, we will create a center line on a 2D sketch. This sketch will live on a plane that bisects this square. To make the plane, we will boot up a new Reference Plane and select the following:
- Top Plane; Perpendicular
- Vertex 1; Coincident
- Vertex 2; Coincident
You should get a plane that looks like this:
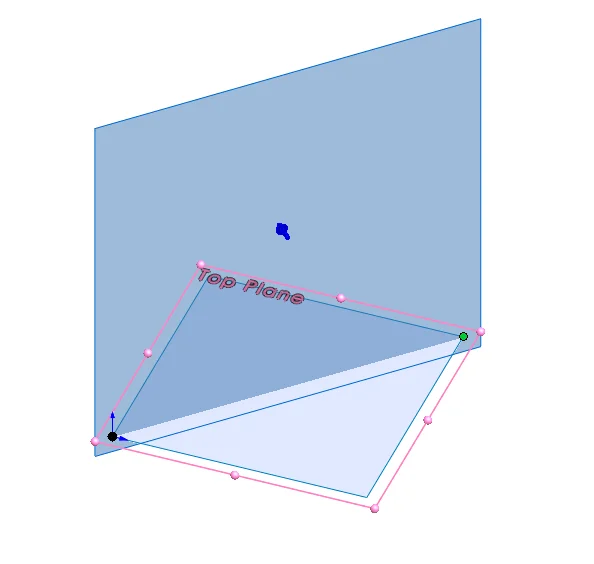
Open up a sketch on this new plane. We will draw two centerlines that are colinear to each other and equal, starting at the origin. This not only gives us our axis, but the fact that it’s in two pieces makes it convenient to refer to the midpoint, which will come in handy later. Give some arbitrary dimensions as to how far the axis sticks out and its angle. For this demonstration, I chose 30 degrees and 3 inches.
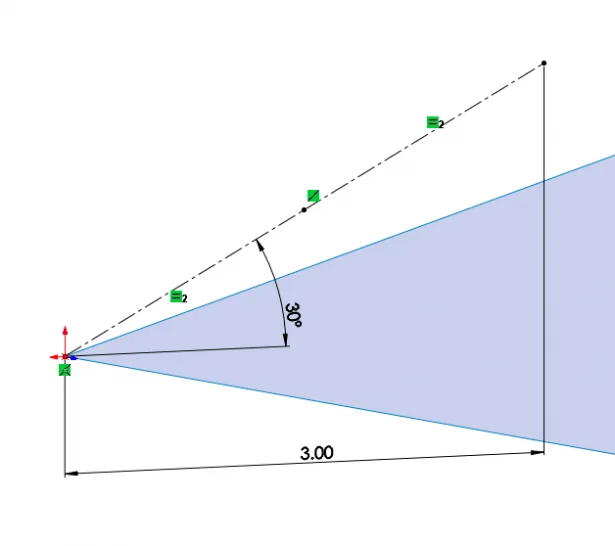
That’s it for this guy! Close the sketch.
Step 3: Circular Pattern
Now it’s time to make one corner of our solid! Boot up the circular pattern tool, select one of the sketched line segments as the axis of rotation and specify a body pattern of three instances equally spaced about 360 degrees (using the seed surface we created in the previous step as the body). The result should look like this:
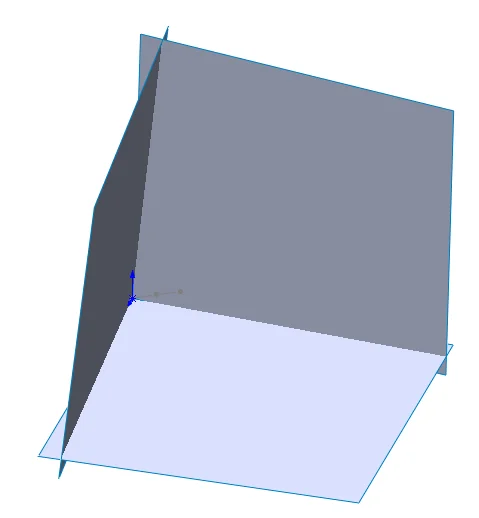
Step 4: Mirror Bodies
Now, let’s mirror these bodies to make the other corner. You may notice that we do not have a convenient plane to mirror about. This is where that double segmented line comes into play. Show the sketch that contains the axis and boot up the Reference Plane tool. For our reference geometry, we will select the center of the two lines and one of the lines themselves. This will set a plane coincident to the midpoint and perpendicular to the line. This is our mirror plane.
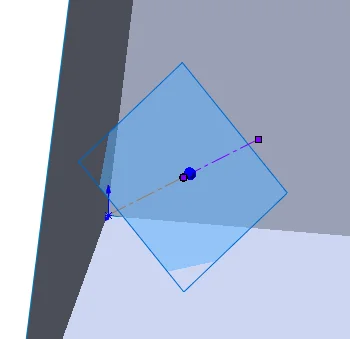
Now let’s boot up the mirror tool. We will select the plane in question as our mirror plane and the three surface bodies as bodies to mirror. This will produce a result like this:
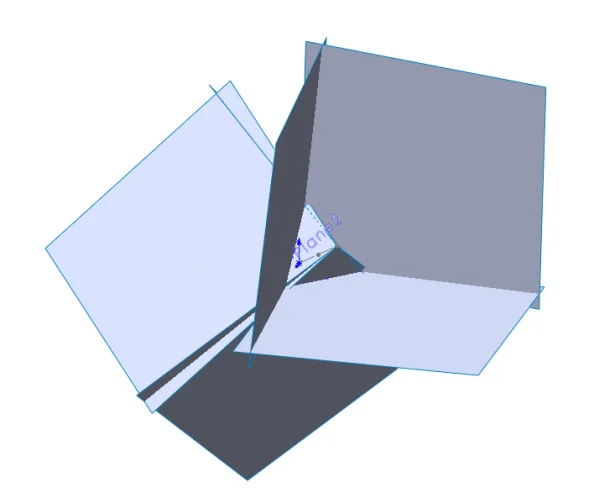
The six surface planes now enclose a volume, but it’s still not finished yet. We have to offset the new mirrored surfaces by an angle, and we will investigate the angle of this offset after we get the final solid.
Step 5: Rotational Offset
Boot up the Move/Copy Bodies Command. Switch to the “translate/rotate” mode. For bodies to move, select the three surfaces created by the Mirror feature. Expand the rotate section, and for the reference geometry, select the axis used for the rotation . Enter 30 degrees for right now (we’ll play around with this later) and hit OK (make sure copy bodies is deselected!).
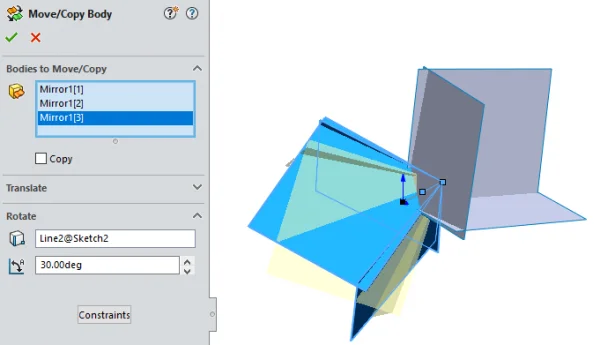
Step 6: Intersect
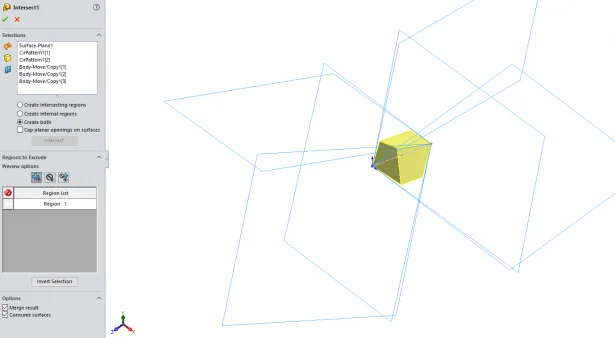
We have all of the surfaces that we need to create our solid in place. Now to just boot up the intersect command and select all six surfaces for selections. Click intersect. You should see our glorious solid in the center of all of this. No need to play around with regions to exclude, we want to keep the one solid that shows up. The only thing left is to check “Consume surfaces”. This will make the tool clean up the surfaces that we don’t need anymore.
Step 7: Verification
Our solid looks nice, but is it a trigonal trapezohedron? Well, let’s check by measuring the side lengths.
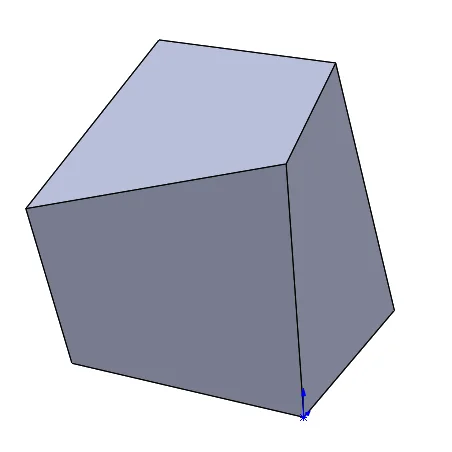
And we see that, indeed, it has the tripod of equal edge lengths at the poles of the solid. By inspection, we can also see that it has the belt of alternating long-short edges. All of the faces are planar, so yes, this is a real skew dice!
Step 7a: Effect of the Body Move Angle (Optional)
Just for fun, try suppressing the Body-Move/Copy Feature from the tree. We see geometry like this.
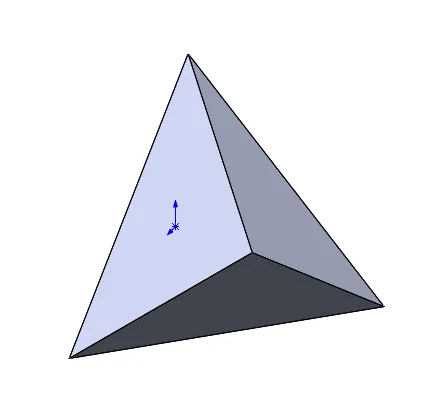
Each side only has three edges. This is what happens when the green tripods match up.
Now unsuppress the Body-Move/Copy Feature and change the angle to 60 degrees. We get something like this:
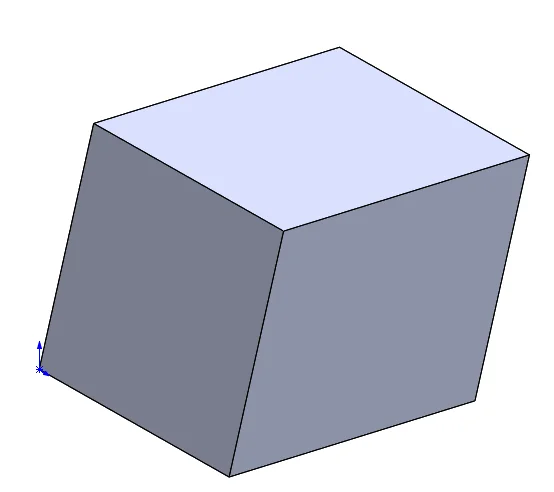
We see that it looks a lot more … regular. Sixty degrees is a special solution where the long-short belt isn’t a pattern of long short; they are all the same length. In fact, all of the edges are the same length. We can make the dice with this, but I prefer the lopsided look of an angle that is not 60. The readers can play around with more angles if they wish. The closer the angle is to zero, the more extreme the lopsidedness of the skew dice is. That is the long-short belt alternates between very long sides and very short sides. The closer the angle is to 60 the more regular the solid. You can use this to customize your dice and use the scale tool to fine tune the final dimensions of the dice.
Step 8: Details
I’ll leave it as an exercise for you to put in all the detents in the dice, as well as fillets, as you wish.
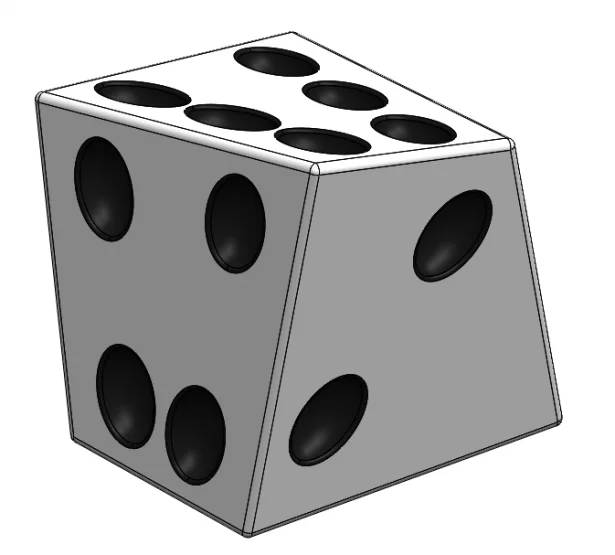
Personally, I used cut revolves to cut out the detents and applied a small cosmetic fillet along all of the edges.
Step 9: The Other Hand
The last step is to make the other hand version of the dice so that it can be truly fair. To do this, select the Right Plane (or any plane really) and go to Insert > Mirrored Part. The preselection of the plane is important for the option to be available. In the property manager, make sure that at least “Solid Bodies” is checked to get your new geometry. And there you go! Save the new part and you are done!
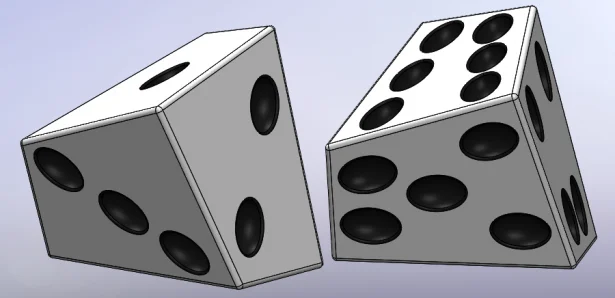
Don’t be afraid to try out your luck, and share your skewed dice with us! Thanks, as always, for following along!
Check out more blogs like this one here. You’ll find helpful articles and educational videos on a wide range of engineering and manufacturing topics to help you maximize efficiency in your job role!
And don’t forget to follow us on Facebook, Twitter and LinkedIn to stay up-to-date on our latest blogs, videos, promotions and more!
Author: Robert Maldonado, Application Engineer at DesignPoint
