
Create Realistic Textures in SOLIDWORKS Visualize
If you’ve wondered how to make your materials look more photo-realistic, the answer is very simple – use textures! With Google image searches for “textures,” “seamless metal textures” or even more targeted searches like “galvanized metal textures,” you can easily find a lot of images and even websites offering you tons of textures to download. Textures.com has a lot of decent quality textures, but my favorite site to use is poliigon.com – offering high quality seamless textures, with all the included maps you’d ever need. But what if you want to add that final layer of surface imperfections (dust, scratches, fingerprints, smudges etc) to push your project from a ‘render’ to ‘holy cow, that’s not a photograph?!?’ This short article shows you step-by-step the easiest way to take your Visualize images to the next level and beyond!
Start with a new appearance
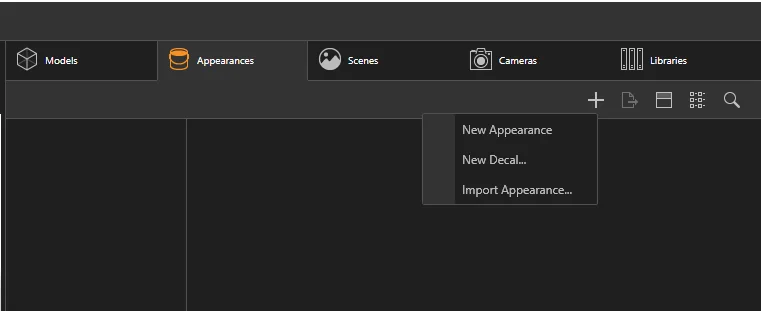
As you probably know in SOLIDWORKS Visualize we can apply 4 different types of texture maps – Color, Specular, Alpha, and Bump. These maps help you recreate any material/texture in the real world. For this example I’ll keep it simple and use the “Plastic” appearance type, which allows me to use all 4 of the available texture maps.
Download and import the textures
First, find the material or texture you’re looking for on Poliigon.com. You can search interactively in the search bar at the top – using keywords like brushed, marble, seamless, surface imperfections, free or any combination.
After downloading and unzipping the archive from Poliigon, you have to import the textures into Visualize. Poliigon offers you many types of texture maps for each material, but in SOLIDWORKS Visualize only up to four of them are needed. Since Poliigon is using different names for each map type, here is how the Visualize map types correspond to the Poliigon map types:
Poliigon SOLIDWORKS Visualize
Color Diffuse
Reflection/gloss Specular
Alpha Masked Alpha
Normals Bump
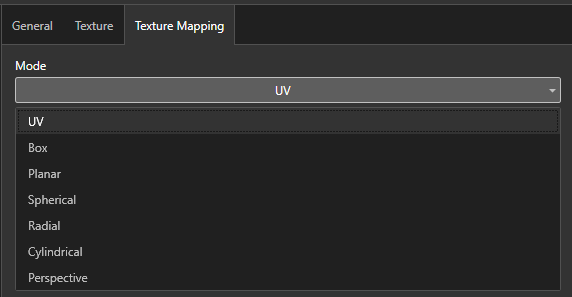
Adjust the settings
For each type of map you can adjust a few settings, which helps to make the appearance look more realistic.
First of all, you may need to change the mapping type of the texture. UV mapping type is good for the geometry only from non-parametric software like Rhino, Blender, 3DS Max etc. Don’t use UV mapping with 3D models from SOLIDWORKS.
The second important step is to set the scale of the texture. If you add the appearance only to one part in your scene, you can easily play with the “Tile” parameter until the scale is right.

If you have more than one texture map applied on a single appearance and need to sync the textures together, make sure to check the ‘Sync Textures’ box at the top of the Textures sub-tab. For example, any size adjustment made on the Color map will also be changed on the matching Bump map.
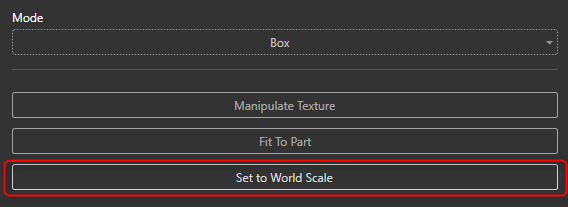
Let’s now take a look how to set the same scale of the texture if the appearance is added to more than one part of the model. As you should notice, the scale of the texture depends on the size of the part.
With the button “Set to World Scale” from the Texture Mapping sub-tab, you can set the same scale of texture, even if parts are different sizes. You can see the difference in the image below:
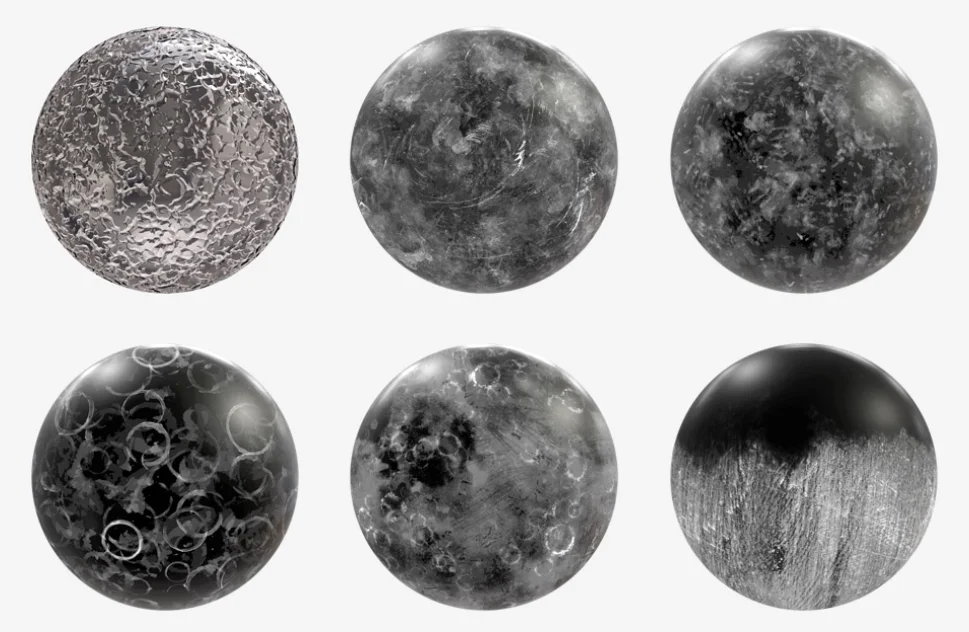
Add Surface Imperfections
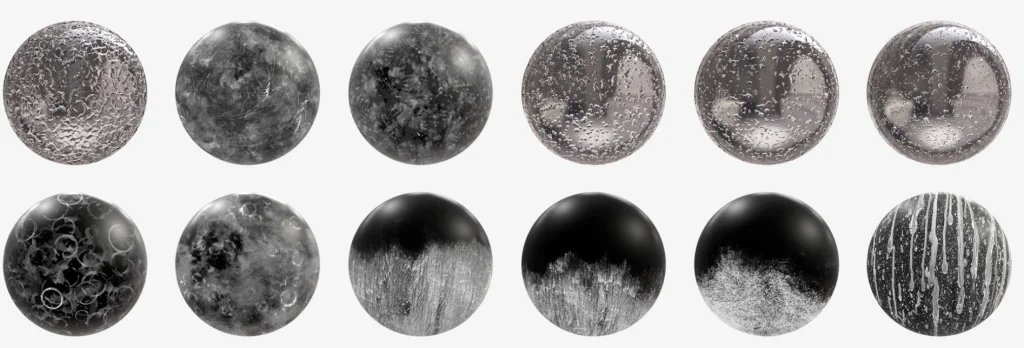
Adding surface imperfections is the best way to take your appearance to the next level. Poliigon offers you a lot of textures with surface imperfections like dust, smudges, fingerprints, water drops etc. There are two ways of using those overlay textures in Visualize.
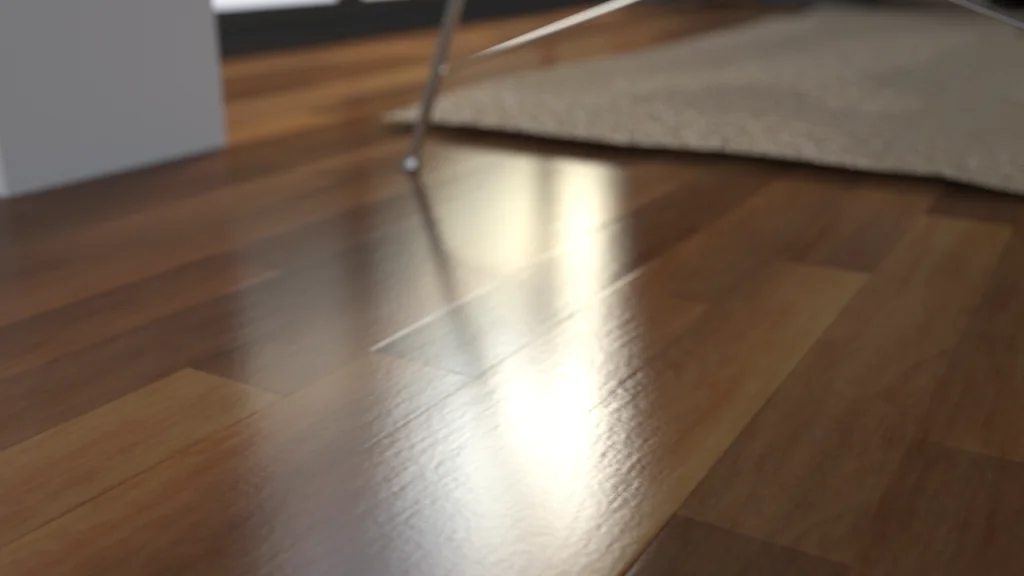
The first way is to use this surface imperfection as the specular map, changing the reflection of the appearance. Use this workflow for dark glossy material like polished wood or glass.
Without specular map:

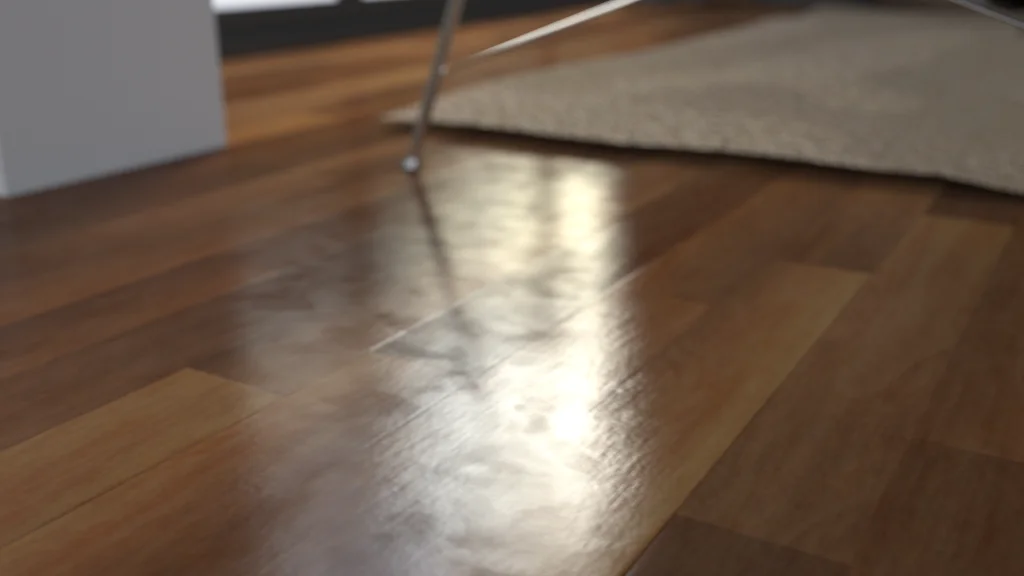
With specular map:
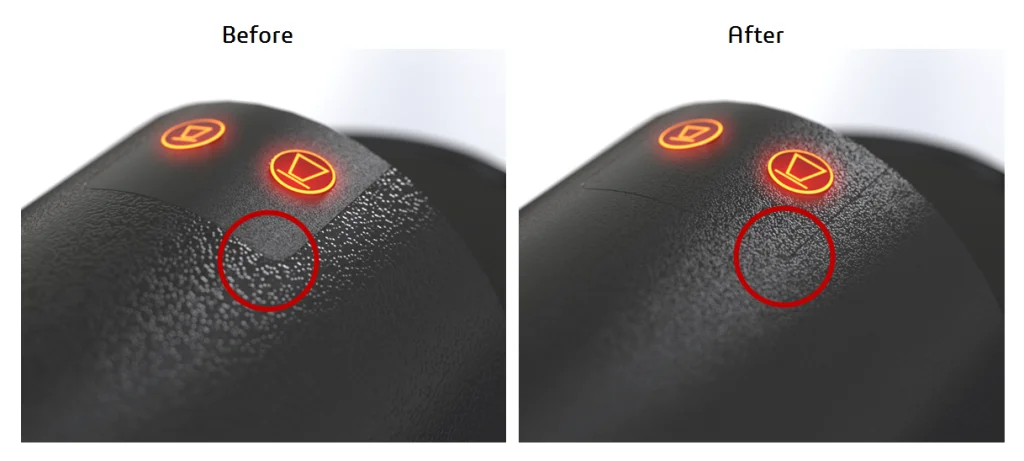
The second way to add surface imperfections is to use a Multi-Layer material. The Multi-Layer Appearance Type consists of up to four other appearances stacked on top of each other to create sophisticated appearances. This workflow allows you to add a new transparent material, recommended Glass, as a layer on top of the base material.
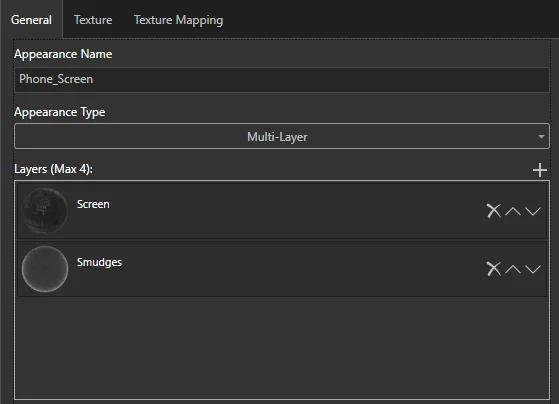
Creating a Multi-Layer material is a very simple process. First, you need to create the two appearances which you want to stack together in a Multi-Layer appearance. Simply just create two new appearances from the appearance tab. In this example I used two appearance types – Plastic for the screen and Glass to show the surface imperfections. To get smudges on the screen, I downloaded the ‘fingerprints’ texture from Poliigon and added it as a Specular map to the Glass appearance.
From the image above, you can see I have already stacked my two appearances together in the single Multi-Layer appearance. Clicking the little + icon will allow you to continue adding appearances – up to four of them. It’s counter-intuitive, but your base material (‘screen’ in this case) should be at the top of the list, and then your surface imperfections (‘glass’ in this case) should be below it. This will layer the smudges on top of the screen.
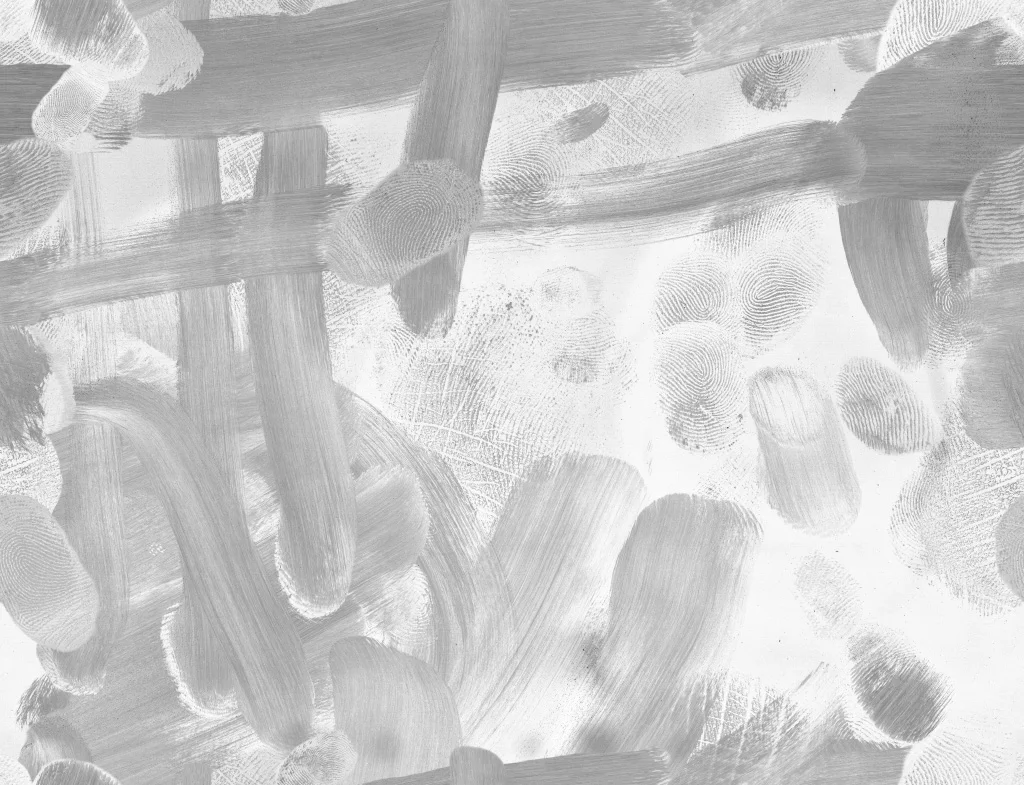
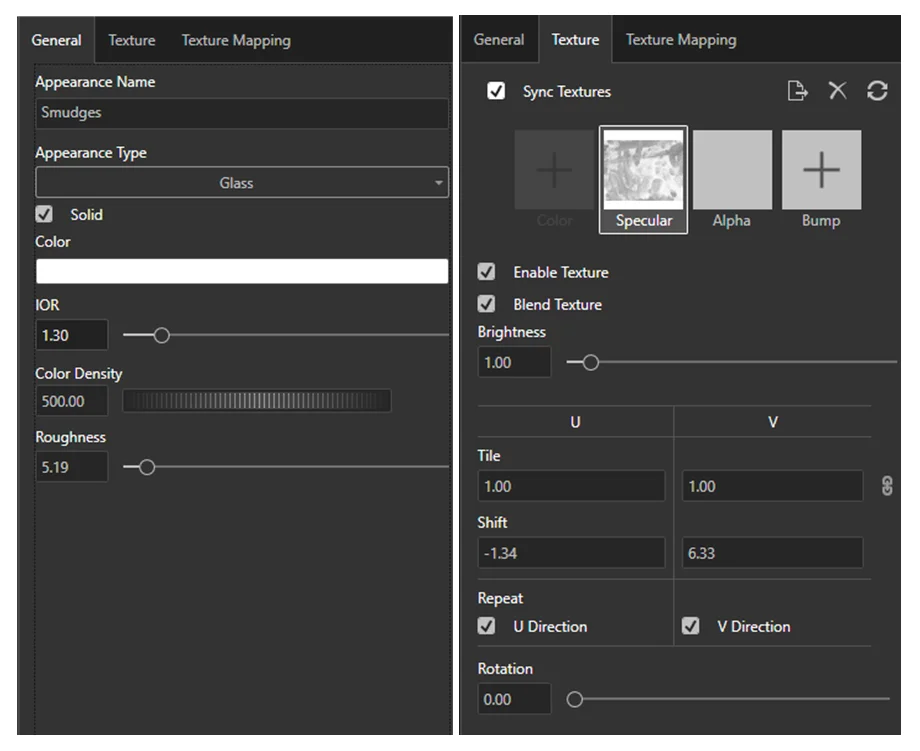
Here is the fingerprints image I downloaded from Poliigon, and then used as the Specular map in the glass appearance. Below that is a screenshot of my settings for this glass appearance to create the surface imperfections, with my final images.
Only the base screen appearance:

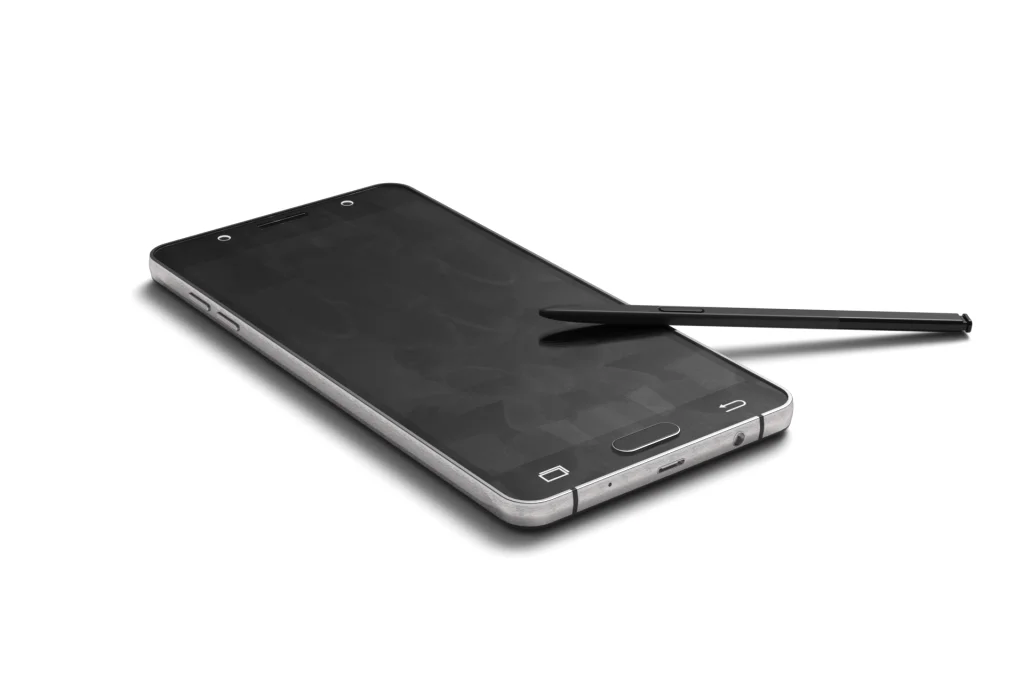
Multi-Layer appearance with surface imperfections – really pushes the photorealism!
For a general overview of using textures in SOLIDWORKS Visualize, watch this tutorial.