Splines in SOLIDWORKS are crucial to creating organic and free-form geometry with sweeps, lofts, and boundary features. There are a couple of hidden System Options that pertain to how splines display in SOLIDWORKS, and this tip will be useful as perhaps a refresher to those who have seen them as well as a nice reveal for those that haven’t.
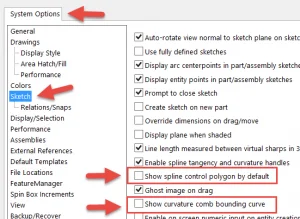
Both options are off by default in SOLIDWORKS. They are found on the Sketch page of the Systems Options tab and are highlighted below.

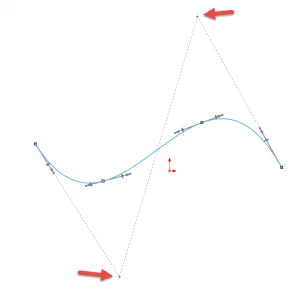
This first option is “Show spline control polygon by default.” If you like to use the control polygon to manipulate your splines, you can have it automatically showing whenever you select a spline in a sketch. This saves you the step of having to right-click on a spline and show it manually each time. As a reminder, the control polygon lets us manipulate a spline in a more subtle manner than directly dragging the spline points. Dragging the vertices of the control polygon gives us a different feel for making adjustments to our spline curves. See the example below that highlights the drag points of control polygon.

The second option is “Show curvature comb bounding curve.” Curvature combs are one of the best ways to evaluate a spline for smoothness; having SOLIDWORKS generate a curve based on the ends of the combs makes a quick visual assessment that much easier.
As a reminder, the longer the comb, the greater the curvature at that point on the spline. We are looking for a consistent change in curvature along the spline when evaluating how smooth it is. See the illustration below for an example that shows the curvature combs with the bounding curve showing a smooth spline.

If you work with splines, hopefully you find these two options useful!
By: John Setzer, Training Coordinator
For more tips and tricks, visit gxsc.com/SolidNotes

