You’re in ready to wrap up your day and your boss needs a huge favor: make sweet images of the company’s products for a last-minute presentation. Luckily SOLIDWORKS Visualize just showed up on your computer. NOTE: Visualize doesn’t have to be installed on the same machine as SOLIDWORKS or your CAD package. Its standalone so it can be used by anyone.
This situation may seem intimidating….which is why we are here to HELP!
Trust us…you’re not alone (remember designers and engineers were once in the same shoes). But guess what? You have nothing to be afraid of. Not only have those poor souls found all the bugs so there are none left for you (we wish), but we are going to break down your first endeavor and have some fun with it too. Visualize is a software version of a photo studio…so put your creative hat on and keep your technical inhibition at bay. Now that dragons are back at the top of pop culture consciousness, we’ll stick to the theme.
OK – now back to the urgent request. While you are seriously bummed at this point, you suddenly realize you can emerge from this unfortunate situation as the hero. Let’s get you there…you deserve it! DISCLAIMER: as ridiculous as this scenario sounds, it happens ALL THE TIME. In fact, this actual project was delivered in the same fashion.
So you reluctantly raise your hand and accept the challenge. Jim from engineering points you to a file (the format doesn’t really matter since SOLIDWORKS Visualize supports 25 popular CAD formats). This medieval scene ended up in my lap and happened to be a SOLIDWORKS file. Just launch Visualize and drag and drop the file into the welcome window. Accept the default settings in the import dialog. Visualize automatically determines the best device(s) and settings to use in order to give you the best performance and loads the file at the same time. This process can sometime take a minute depending on the size of the file. If it does take a bit, this is a good time to quickly get inspired. If not, take this time to get inspired anyway…it will help later on. I Googled “dragon vs knight” and just soaked in some images that popped up. Pay attention to some key items while in inspiration mode: Aspect ratio, mood, camera angles, tone, composition, lighting and object placement.
The file loads and looks like this:
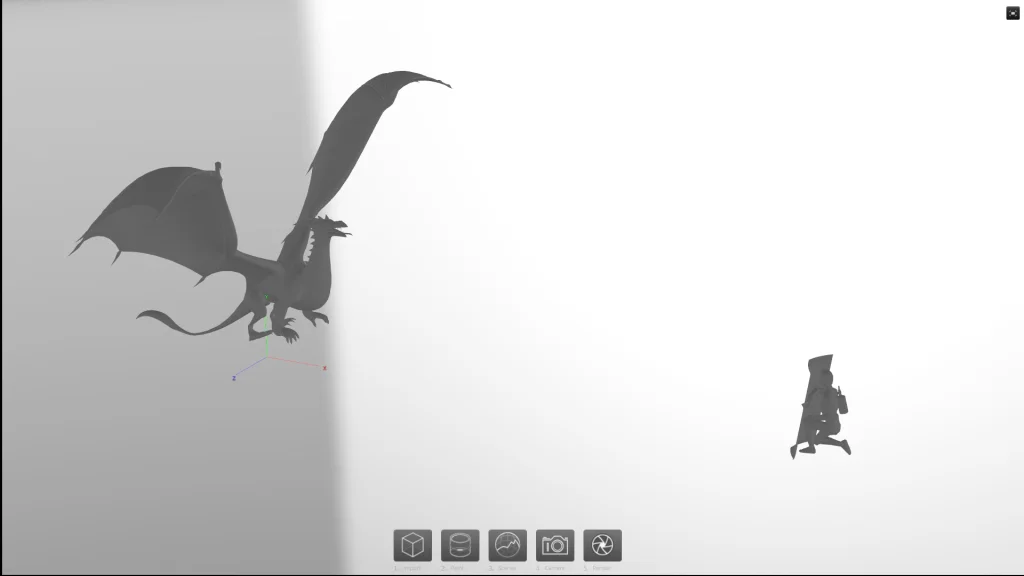
Before you get overzealous, get comfortable manipulating the camera, which is essentially your viewport. You can do this by activating the Camera Manipulator by hovering over the Tool Bar at the top of the viewport. You’ll get comfortable in no time…just don’t panic.
- LMB moves the camera around
- RMB zooms in and out
- MMB pans up down or side to side
- Scrolling changes perspective
- Ctrl + Alt and Right Clicking on a part of the model will make that point the focal point of manipulation.
The file should come in centered in the scene and ready to go. If not, you can easily move it but let’s not digress…Jim should be giving you files that aren’t curve balls. This particular file didn’t have appearances or textures assigned in CAD. If it did, they would come over. If your role is simply to render the image, you shouldn’t have to make adjustments to the model size/location or invent what appearances are on your products. Just make adjustments to turn the CAD file into a photo.
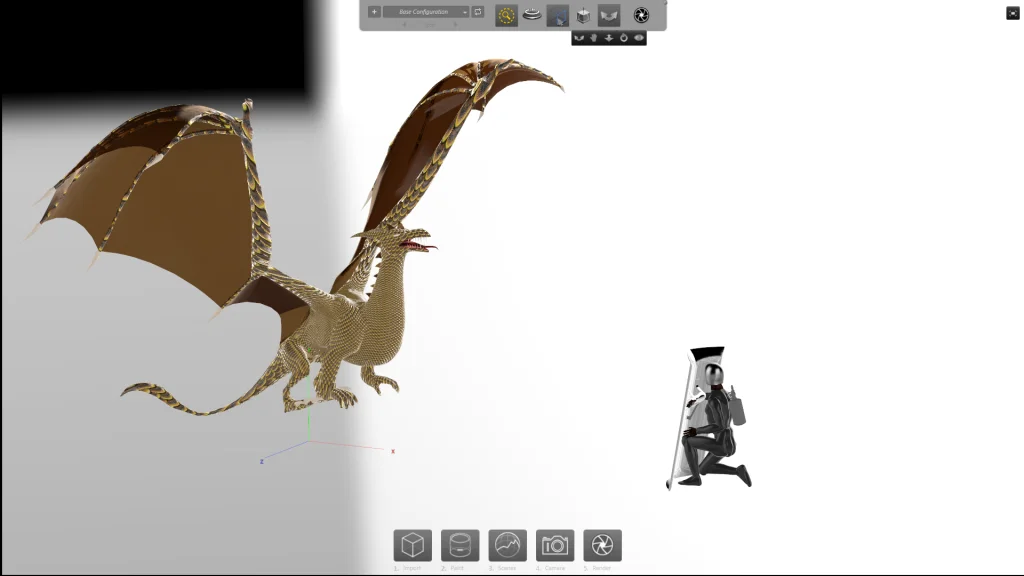
In my scenario I quickly added basic appearances onto the parts. To adjust appearances, right click on the surface of the model which appearance you’d like to adjust and choose “Appearance Properties.” Without changing the material dramatically, this will give you the option to make some fine adjustments.
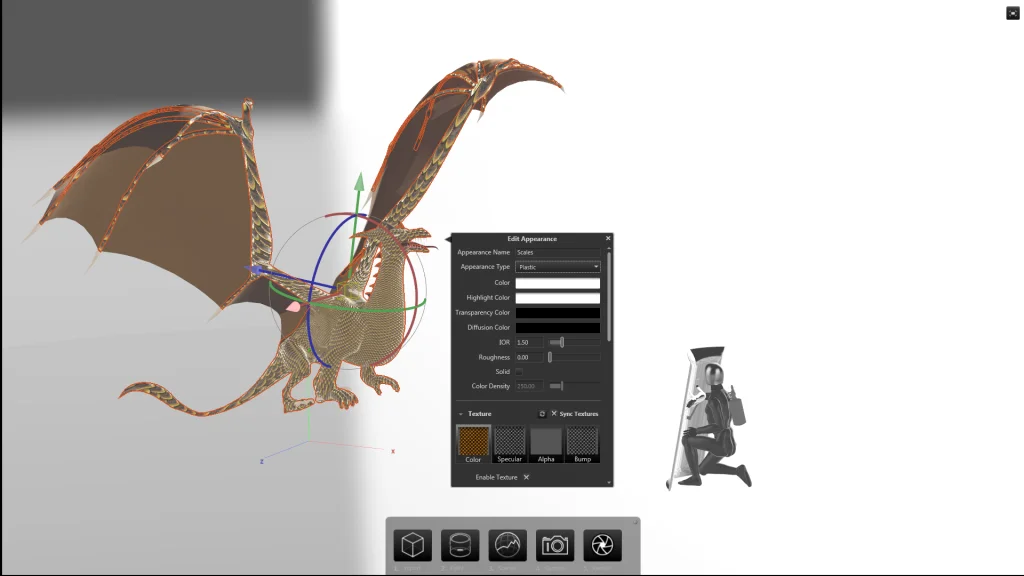
Some common adjustments are Roughness tweaks, Bump Map strength (to make a texture look more or less texturized) and maybe Color (if your lighting environment deems that necessary). Again, the appearances that come over with the file, especially from SOLIDWORKS, shouldn’t require much of your attention if everyone upstream is doing their job. Explore the various materials on your model if you want to get a sense of what you’re dealing with.
This is a good time to activate ray-tracing to validate its final appearance. Do so by hovering the mouse over the top of the viewport and Render Selection section and selecting “Fast.”
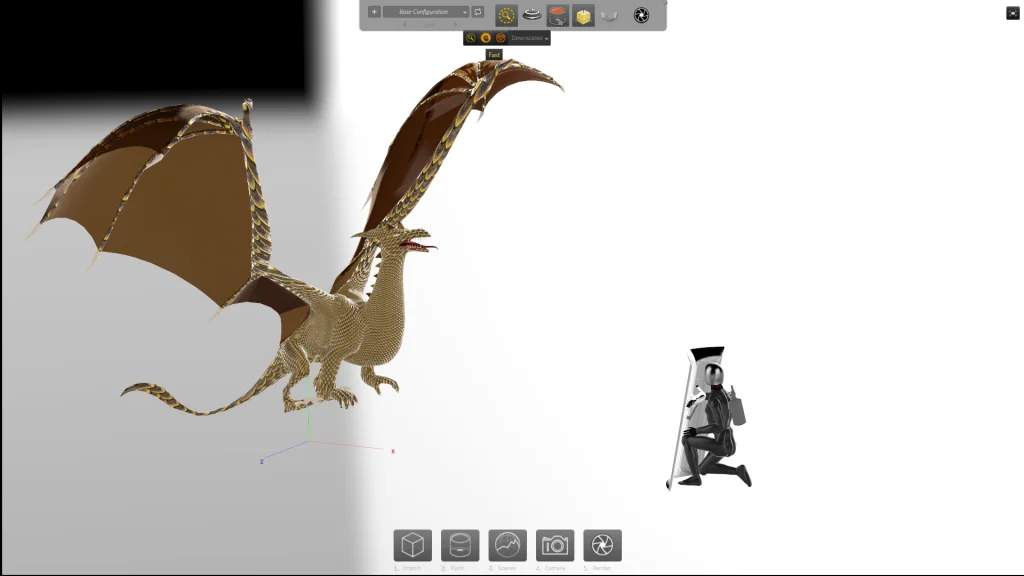
The scene may take a second to initialize, depending on your viewport resolution and model size. From now on, you can stay in Fast mode or if you wish you can toggle between Preview and Fast if you seek more interactivity.
Now….the creative and fun part: embellishing the scene to emulate your inspiration image that’s fresh in your mind.
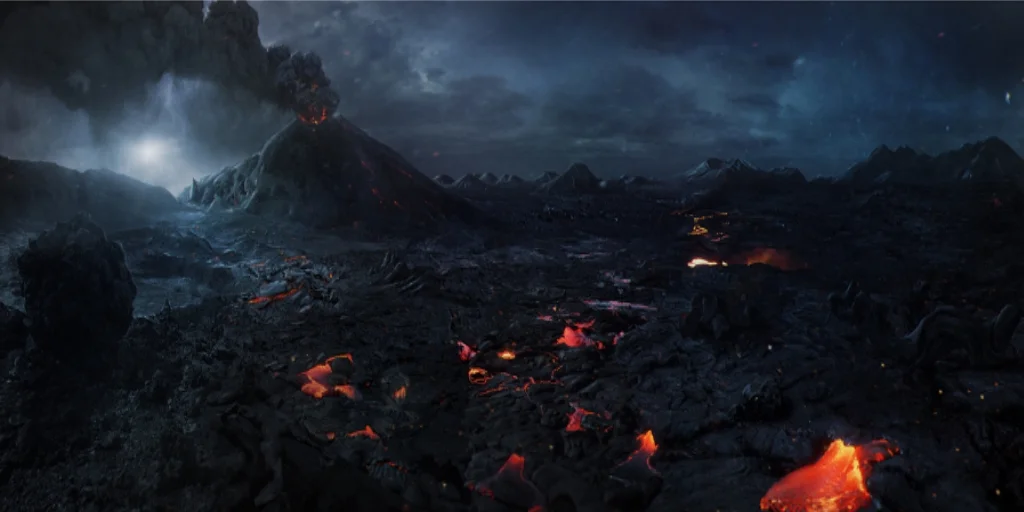
The Scene makes a big impact to your final result as the Scene depicts the location, lighting and context of your product. Visualize comes with a variety from which to choose. Simply select the third button on the bottom of the viewport called “Scenes” and feel free to explore. Try and seek environments that match the mood, tone and lighting of your inspiration image by looking for things like similar colors, gradients and contrast. Studio-style environments are always a good place to start for product shots. In my case, I needed to think outside the box. Dragon fight scenes should take place in a volcanic wasteland, right? Because Visualize doesn’t cater to dragon pre-viz experts, I’ll defer to Google again. A quick search for Volcano Environment and two minutes of digging resulted in this image.
NOTE: proper environments should be .hdr or .exr format images (like the ones in our library), but it’s OK to bend the rules sometimes and use a .jpg as the environment….just be aware that the lighting, shadows and reflections won’t be as dynamic.
I just saved the environment I found to my desktop, and then right clicked on the environment in the viewport in Visualize…choosing “Environment Properties” and clicking on the environment thumbnail to replace it with the one I saved. (Because I broke the rules and used a .jpg, i needed to change the file type to “All files”…in case you’re being brave and following my lead).
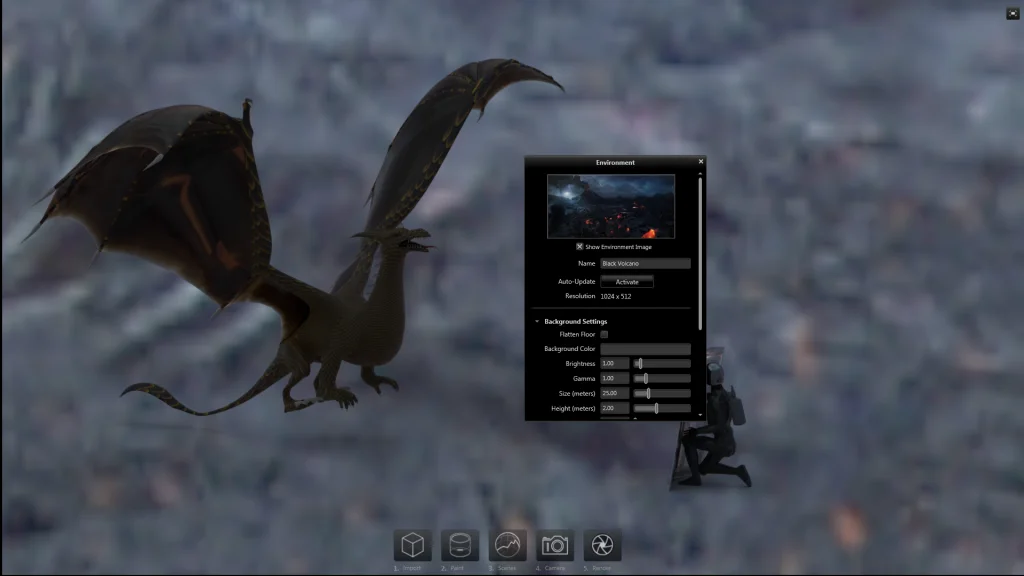
What a difference right? Just by changing the scene I’ve just come a lot closer to my inspirational image.
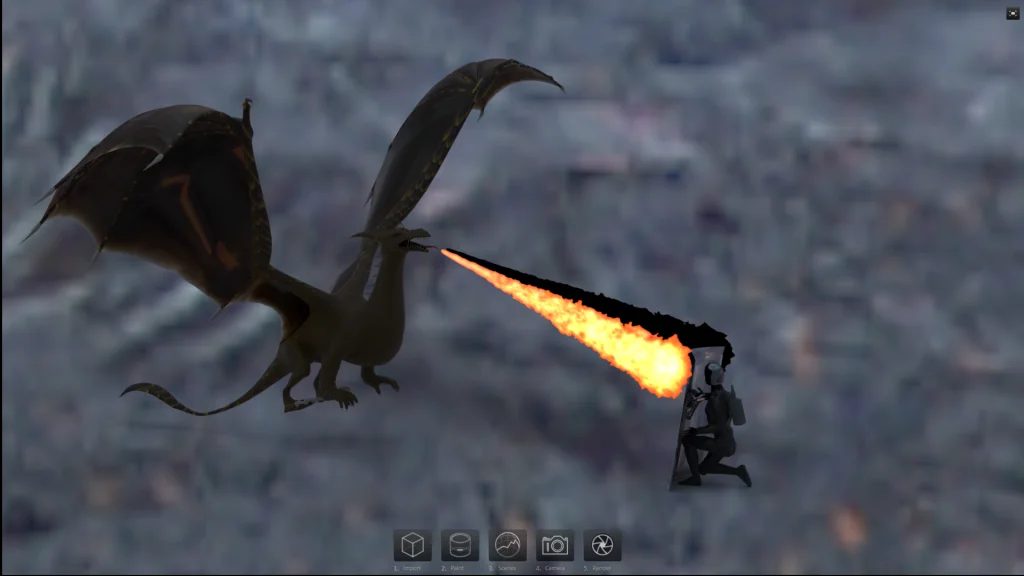
Now, while still on the topic of the Scene, I used the opportunity to exercise some creative freedom. You probably don’t need to account for this step during your first rodeo so I’ll go quickly. I wanted to add some more heat to the situation so I chose to add a flame ball projecting dangerously towards the brave knight from the Dragon’s mouth. In Visualize you can create shapes, manipulate and texture them without having to go into a CAD package. Cool huh? I created a cone, which closely resembled the shape of a fireball, then built an appearance using a Google-sourced image of a fireball and some techniques you’ll learn in no time by watching the excellent Visualize tutorials on MySolidWorks.
Here is the result:
Just three more steps to hero status…hang in there!
You can do a lot with the Camera in Visualize, just like you can with a real camera used to take professional photos. Given all the options however, it’s always good to Keep It Simple Stanley. You can accomplish a lot with just a few techniques.
1. Pick a sweet angle that’s going to show off your product (or project in this case) really well. This will put your camera manipulation skills to the test, but again, for starters, keep it simple. This is another great time to refer back to your inspirational image. Borrow the angle, amount of perspective, aspect ratio and composition. I chose a dramatic angle to put the viewer in the armor of the brave Knight. Square aspect so it’s Instagram-friendly, low angle to make the dragon look imposing, close to the flame for some shock value and some twist to add imbalance. HINT: you can reveal more camera parameters (like aspect ratio) by clicking the forth button at the bottom of the viewport labeled “Camera” and subsequently the “more options” button at the top of the window that pops up.
2. Add some filters to perfect the mood. If you didn’t above, click on the “Camera” button at the bottom of the viewport to open the Camera panel. You can start by playing with the pre-made filters, but if your creativity is just exploding, beg your company to upgrade to Visualize Professional, which allows you to customize filters (among many other killer features).
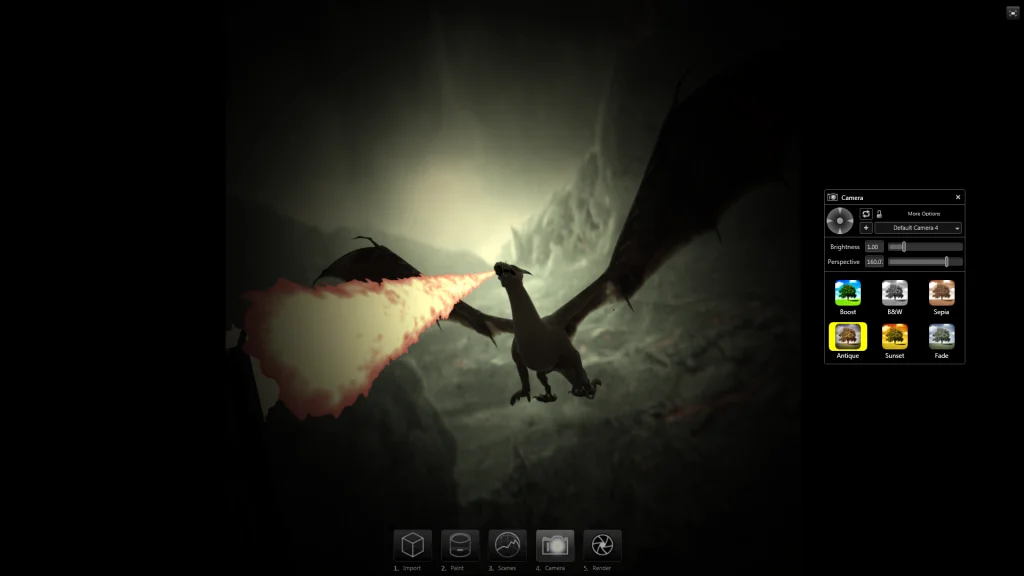
I took the liberty to dial in the mood by customizing the filter, although the Antique setting out of the box isn’t too far off.
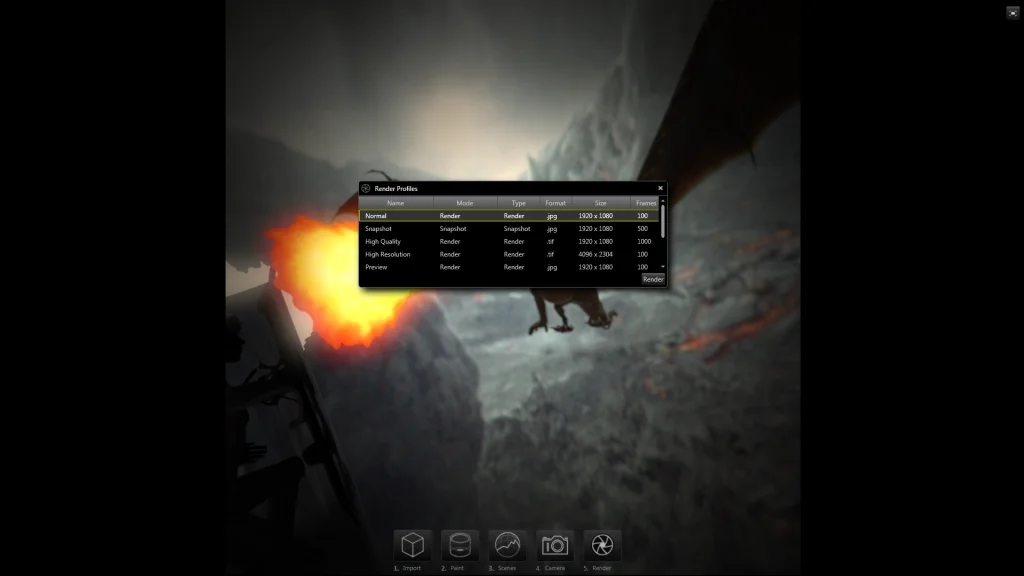
3. The grand finale! Save out your image or kick off a render to generate a higher-resolution image. I just saved screenshots as this project didn’t require high resolutions. To save a screenshot, simply click on the final fifth button below the viewport called “Render.” The out-of-the-box behavior will save a screenshot to your Visualize Content folder (in My Documents by default). If you prefer a higher-resolution image, right click on the fifth Render button and choose a Profile. Standard should be just fine to please your manager and click the “Render” button in the lower right.
For brownie points, go to back to step one above, and play around with some other angles. The hard part is done…now you’re just taking pictures.
I hope you’ve enjoyed this journey into SOLIDWORKS Visualize and that you do, in fact, reach hero status. You just escaped the fire!
Don’t forget to share your amazing work when possible either by sending it to us or beautifying the social world one post at a time with the hash tags #gettinvizzy and #swvisualize.