From Crash and Burn to Soaring – Creating a Drone with 3D Creator


Hello, my name is Kyle Richardson. I’m 21 years old and am currently studying mechanical engineering at the University of Massachusetts Lowell. This past summer marked my second consecutive internship as a SOLIDWORKS Product Management Intern at Dassault Systèmes. After my incredible learning experience last summer, I knew I wanted to join the team again and continue advancing my career in 3D design and engineering. My journey with using SOLIDWORKS desktop started four years ago as a freshman in my first “Intro to Mechanical Engineering” course. I was immediately hooked on the software, and once I discovered 3D printing, I fell in love with bringing my models to life.
As an intern for the SOLIDWORKS product management team, my main responsibilities were using and testing the full suite of SOLIDWORKS browser-based design roles, such as 3D Creator and 3D Sculptor, which include the xDesign and xShape apps. I’ve always been fascinated by drones and have wanted to design and build my own, so it made sense for me to pick that project for my internship.

The goal was simple: Design a drone from scratch, 3D print the entire frame, and see it soar in the real world. The catch? To design it entirely with the SOLIDWORKS browser-based roles, which were new to me as I previously had only used SOLIDWORKS CAD on the desktop. Lucky for me, the transition from SOLIDWORKS desktop to 3D Creator was very straightforward, and the more I used the xDesign application, the more it grew on me, and I absolutely love it. The simplified user experience, flexible design workflows and device independence to work from the office, at home, on my computer, or iPad, made my learning experience better than I could have ever expected.
Since the frame would be 3D-printed, I had an excellent opportunity to design it with intricate lattice geometries using the CATIA Lattice Designer role. The integration between 3D Creator and Lattice Designer made for a great design experience, allowing me to optimize the frame for strength and weight. I was excited about this project and eager to start because the clock was ticking! The project needed to be done by the end of my internship, so I had a little over two months to make this happen.
Before diving headfirst into the drone’s design, I had a ton of homework to do. I didn’t realize how much research was involved, but there was a lot before I could even think about designing the frame. I spent an immense amount of time learning about drones and what it would take to design and build one myself. There was so much information, but documenting and organizing everything was super simple since everything was stored on the 3DEXPERIENCE platform. Utilizing 3DSwym, I could quickly manage all my research in one central location and provide visibility to all my team members.
Down the Rabbit Hole
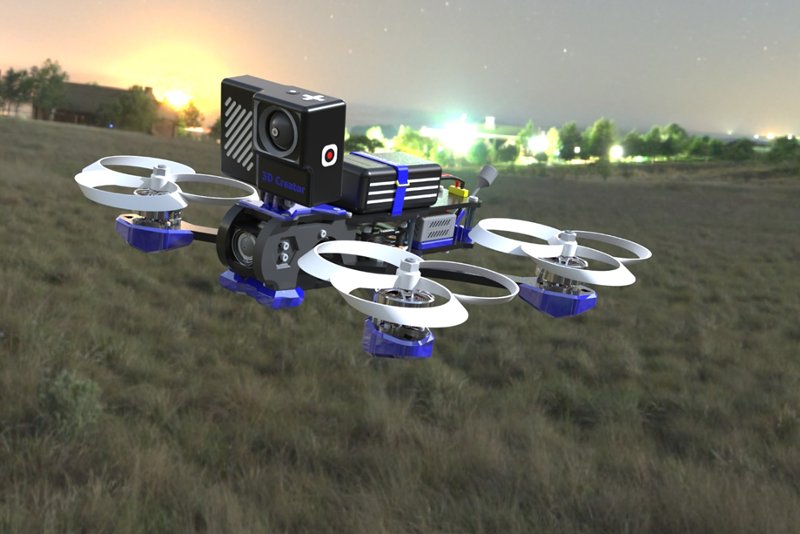
After a deep dive into drone research, I decided to design a first-person view (FPV) drone, and I’m so glad I did because FPV drones are awesome! An FPV drone is different from a standard drone because the camera image is viewed through the operator’s video goggles or virtual reality (VR) headset instead of on a phone screen.
A never-ending rabbit hole of information was required to understand this complex hobby of FPV drones. After relearning many physics topics, I never thought I would need to know in the real world, I had finalized the electrical components required for the build. I then spent the better part of two weeks doing my homework on the frame, and I felt ready to begin the frame design process.

Lessons Learned
Let’s just say it wasn’t a “get it right the first time” deal. Four design iterations later, I thought I had the perfect frame design, but a quick 3D print test showed I was way off. Lesson learned, always test your design in the real world! 3D printing was a lifesaver. After a few more quick prints it was back to the drawing board.
Modeling this drone in xDesign had a significant impact on the success of this project. Designing in a single modeling environment with flexible part and assembly structures was way more efficient than anything I had experienced. Designing a complex assembly in a top-down modeling style was crucial in my drone design. The flexibility of this single modeling environment allowed me to iterate on the design much more efficiently than traditional assembly modeling techniques.

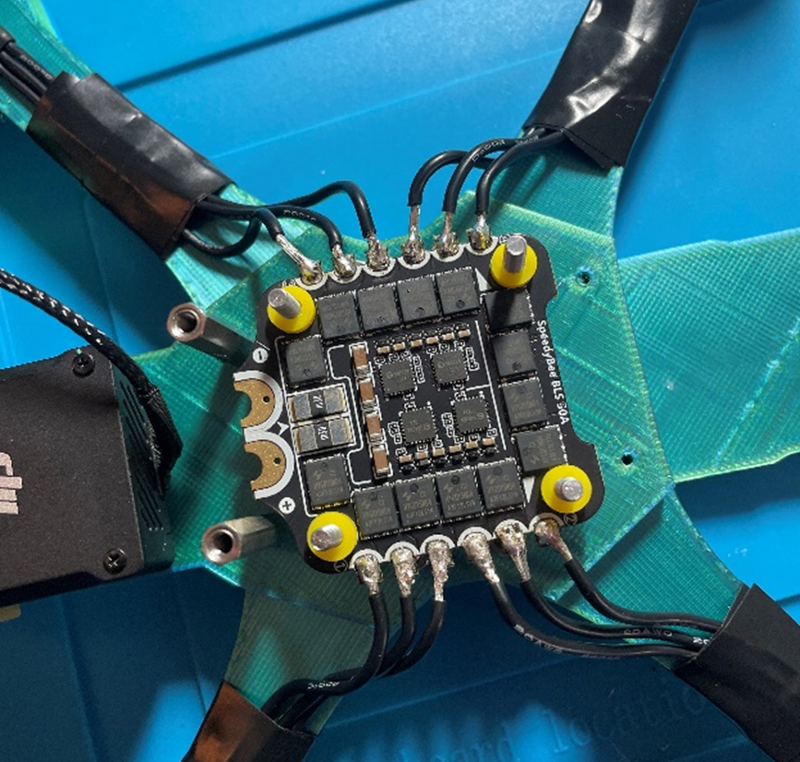
Once I felt confident in my frame design, I modeled the various electrical components needed for the build. After everything was modeled, it was time to assemble the drone. For the assembly, I quickly generated assembly drawings using Manufacturing Definition Creator so I could reference my design from my workspace. Along with the drawing, I generated a bill of materials (BOMs), allowing me to budget and purchase all of the commercial off-the-shelf items. When all the components arrived, it was time to assemble everything, which required soldering all the electrical components together. This was another learning experience because I had never soldered anything before, but surprisingly, everything went smoothly.
With the drone assembly complete and a successful first power-up, it was time to get this thing in the sky. This is when I discovered another crucial lesson about FPV drones: don’t skip the simulator!
Time to Take this Baby for a Test Drive
Flying a manual FPV drone is no easy task, and training in a virtual flight simulator is essential for successful flights. I thought I had a good grasp of the simulation and was eager to get flying.
The drone performed amazingly on the initial flight test and was much more powerful than I had expected. It flew beautifully for about 20 seconds— until I crashed it into a tree. Oops.
I wasn’t trained well enough on the simulator, and my flying skills were horrible, but that didn’t stop me from trying to fly it. Let’s just say I took a bit more of an explorative approach of learning to fly it— as in, I just went for it— but I don’t think the drone appreciated that, as it constantly crashed and broke.
Luckily, I could easily 3D print the broken parts, make repairs, and get it up in the air again.
Overall, this project was one heck of a rollercoaster. From thinking it’d be a breeze to realizing there were a million things I hadn’t accounted for. It was a wild ride, but every hiccup and challenge taught me something new. This experience has given me many incredible stories and valuable lessons for my future in engineering.
The biggest takeaway? Designs never perfectly translate from CAD to the real world the first time or even the third. Designing a complex assembly of the FPV drone and making it work in the real-world took a lot of time and consideration. I’m so glad the product management team gave me this opportunity to work through such a major passionate project, and I couldn’t be happier with the final result.
If I had to do the project all over again, I would have tried to plan my design out a little better and think more about the ease of assembly and designing for more uniform hardware. These are some of the real-world engineering lessons that can only be learned through trial and error. However, I’m happy to say the latest iteration of my drone is still flying and I’ve managed to get a better handle on flying it.
I want to give a huge shoutout to the SOLIDWORKS product management team for allowing me to work on this project and to the 3DEXPERIENCE platform for streamlining and simplifying such a large multifaceted project.
Without xDesign’s flexibility, this project would have been even more challenging and time-consuming. Being able to design in a single modeling environment is extremely powerful. After experiencing the power of these browser-based solutions, I don’t think I will be going back to traditional assembly modeling techniques in the future.
I look forward to using these solutions for years to come as I move beyond college and begin my professional career. As I mentioned, I’m super passionate about 3D printing and want to be at the forefront of this rapidly evolving technology. I am eager to design real-world 3D printed projects and show the practical use cases of additive manufacturing with the skills I’ve learned during my internship.
Here is a video of the design process that I created with the Product Communicator Role.
Thanks for checking out this blog post, and I hope you enjoyed hearing about my journey of designing and flying my first FPV drone. I hope this story inspires you to pursue what you enjoy and tackle the projects you are passionate about.
NOTE: This blog was written by Kyle Richardson, a mechanical engineering student at the University of Massachusetts Lowell. He recently completed an internship at SOLIDWORKS where he designed a drone with 3D Creator and 3D printed it to fly it in the real-world.
