
Let’s face it… weddings are expensive, luckily for me 3DEXPERIENCE SOLIDWORKS for Makers isn’t! For just a $15 per month or $48 per year (at the time of writing) you get access to SOLIDWORKS software allowing anyone to have a go at making with the use of professional CAD.
After we finally agreed now was the time to take our next leap into adult life and settling on a suitable date to do so. The first thing we needed to do was tell our chosen guests to keep the date free. A quick google led me to something I hadn’t seen before in the form of a save the date magnet. For me this is a great idea, I’m not a fan of cards or paper stationary and often remark that these are a waste of paper and that no one really looks at them in this digital age. A magnet seems like a great way to keep the date not only in the front of people’s minds but also their kitchen fridge. Now, I could have simply ordered these but always looking to save a few dollars and having the equipment to do so I thought I’d give it a go myself.
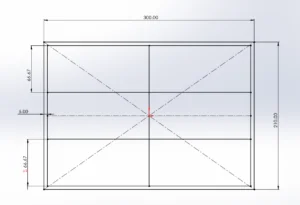
Step one for me was to work out the size of magnet I wanted to produce, I didn’t want it to be too big and frankly cost a fortune to post out to people but then it also couldn’t be too small where no one would be able to read the text. I also wanted to be able to cut multiple at time from one sheet of material, so ideally the measurements would nest nicely into this size to reduce waste.
To work this out I set out to create a new sketch in SOLIDWORKS that matched the size of the sheet. I drew a rectangle 300mm by 210mm, I then offset this rectangle by 5mm to allow for any warping in the material or in case I didn’t quite center this within the bed of the laser cutter. From here it was easy to work out a size per magnet. Adding some symmetry lines first I then created an additional smaller rectangle which I could move around and adjust away from the main sheet until the correct size was found. It turned out I’d be able to get 6 per sheet meaning for the 40 I needed I’d need 7 sheets of material. The engineer in me always needs to know my wastage, this is made easy by the fact SOLIDWORKS can measure area allowing for some simple math to calculate an overall utilization figure of 88%.
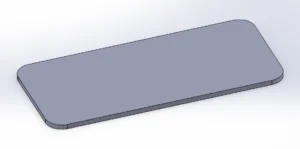
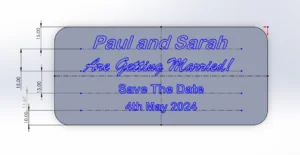
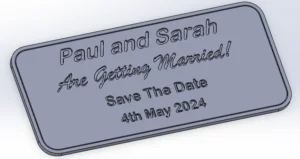
Now knowing the magnet would be 145mm wide by 66mm high in size I started a new part file and began by making a new sketch in the desired size before extruding 3mm to match the material thickness. The square corners weren’t to my liking and didn’t really match the aesthetic I was going for. I added a simple yet effective 10mm fillet to each corner and that was it for the basic shape of the magnet.
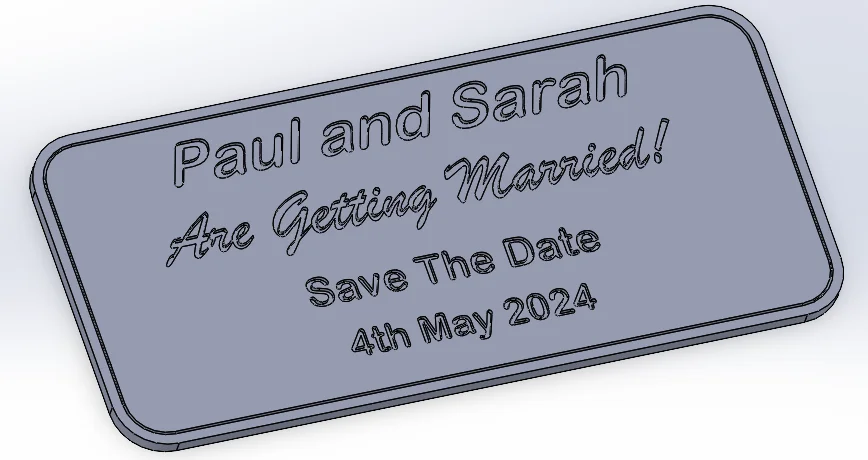
The next segment of the design would be the text which I would engrave onto the upper surface of the magnet. Simple enough to achieve thanks to SOLIDWORKS’ text tool within the sketch options. I created a new sketch on the upper surface and began adding some basic framework as construction lines for the text to run along. Line 1 would be out name, line 2 some filler text, line 3 what the event is, and line 4 would be the all-important date. I decided to add a border which would be an engraved line just to frame the text and make it standout more.
The design for this one probably took a maximum of 5 minutes, hence my thoughts of “I’ll just make them myself”. Once the design was done it was time to save the top surface as a DXF. Again, SOLIDWORKS has a built-in option for this within the save menu so there’s no need to find some sort of online converter to do so.
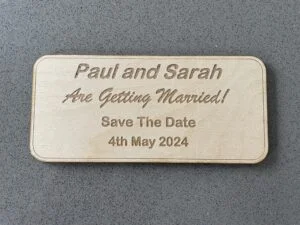
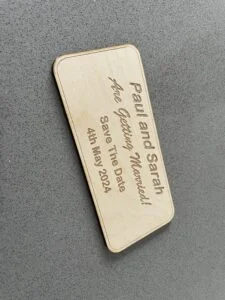
With my DXF saved I headed to the laser cutting software where it was a quick task of setting the cut and engrave positions. Most laser cutters will read a red line as a cut (fully through the material) and a blue line as an engrave (on the surface of the material). There is also a cool setting which reads black lines as an infilled engraving known as rastering; this is essentially like drawing an outline and then coloring it in. I opted to cut through the outline and raster engrave the test to get a filled in look. With the program file populated I headed to my garage and began cutting out the magnets.

After a short while in the garage, I had a stack of cut and engraved wooden pieces. The final piece in the build would be to attach some magnets to each one to allow these to stick to a magnetic surface. I’d ordered some small 15mm by 15mm square magnets sold as a sheet which came with a self-adhesive backing. I simply had to peel each magnet of the backing sheet, line up on the back of the wooden blank and press down firmly.
This was pretty much the end of this quick project, the only thing left to do was label up some bubble mailers and write the addresses on. I hope you’ve enjoyed reading my latest blog and that it inspires you to give making a go using 3DEXPERIENCE SOLIDWORKS for Makers!