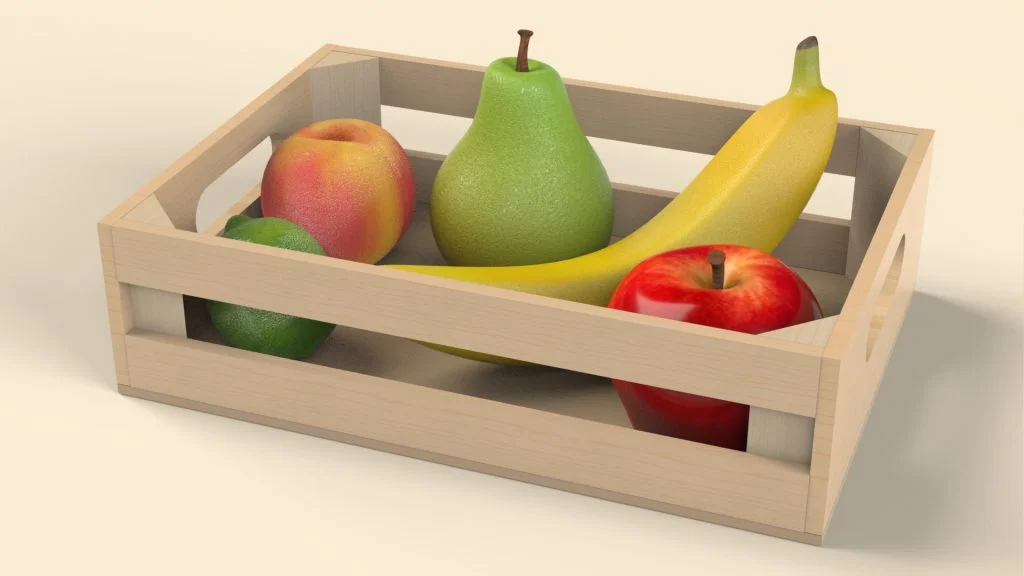

For this 3D Sculptor and SOLIDWORKS tutorial. I used xShape from the 3D Sculptor role on the 3D Experience Platform to create some realistic pieces of fruit. For the purpose of the tutorial I only demonstrate modelling the apple and banana. The tutorial is fast pace so feel free to pause as you go along. The modelling type in xShape is very freeform so your models will be slightly different, especially as there are no reference images used for the modelling. The finished xShape models are exported as STEP files for SOLIDWORKS, where I could add appearances and decals. The finished fruit is added to a premade assembly which is available to download here along with the decals needed for the apple and banana model.
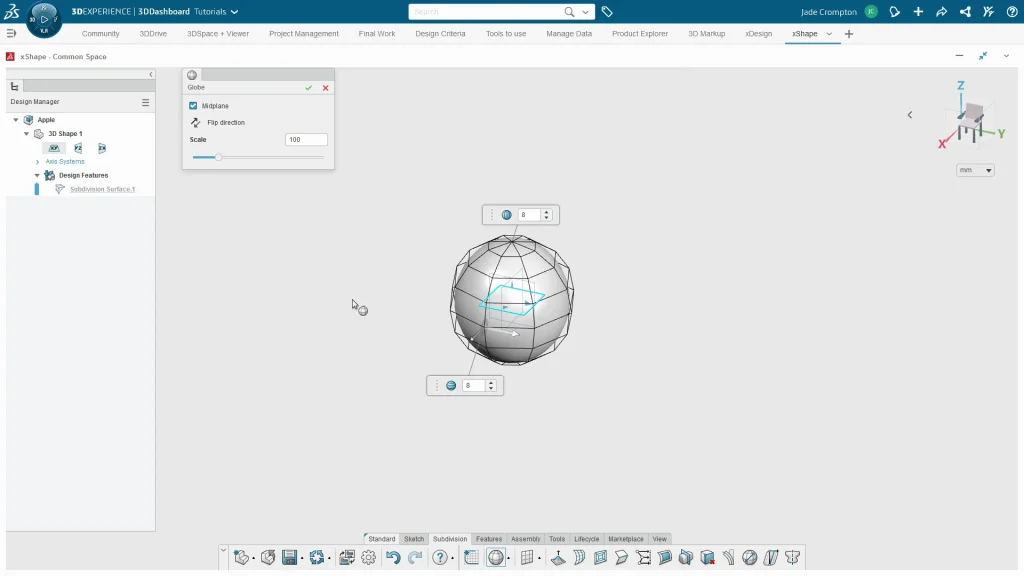
Starting with the apple, to begin modelling you need to choose a subdivision surface shape, this decision when modelling can make a model easier to create as these shapes acts as a base for all your modelling. So, for the apple, I used the globe. You have the option once the shape is dropped to add more control loops to the shape but it is best to keep your shape simple to begin with and add more control loops as you go along. You can copy how I model my apple in the tutorial or use reference pictures or an actual apple yourself to model from. The great thing about 3D Sculptor is the ability to create irregular organic shapes quickly which was ideal creating these fruit shapes. During the tutorial I demonstrate a range of modelling features such as, symmetry, insert loops, subdivide faces, fill edges and delete faces/loops.
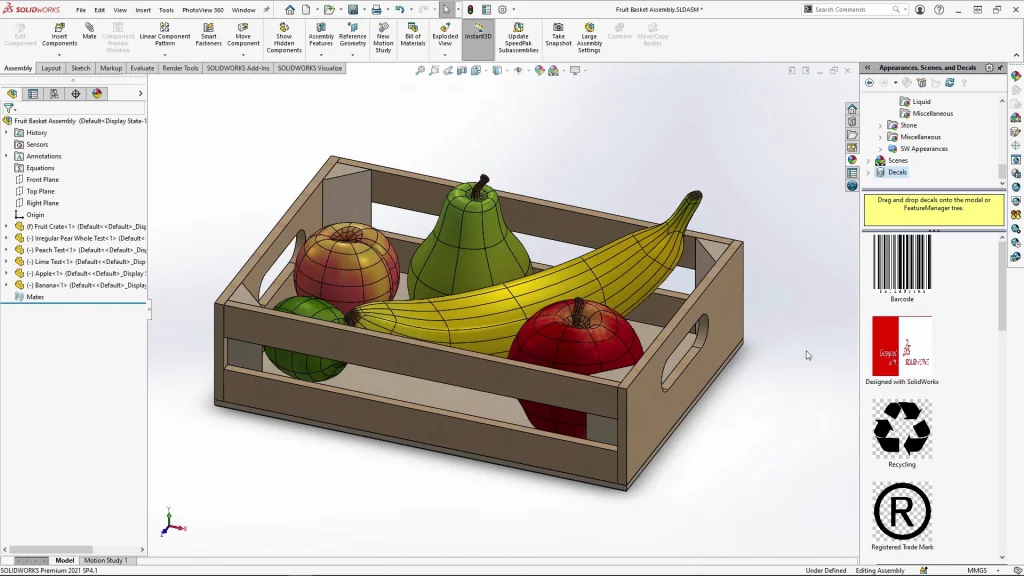
Once I have both fruit pieces modelled and exported from xShape, I could open up SOLIDWORKS and open the apple step file. Because the model in xShape is a knit surface, it imports into SOLIDWORKS as a Solid Body. To make the part easier to work with, I had to rotate it with move/copy bodies to be upright then save the part as a part file. When you open up the fruit crate assembly from the Fruit Crate Files, you will see the other 3 pieces of fruit already in place which were also created and exported with 3D Sculptor. Those fruit pieces needed to be scaled for the crate and had decals and appearances added to them within SOLIDWORKS. When you insert your apple component, you may find the scale is all wrong. If that is the case, drag the apple to where it will be placed so that when you do rescale it you get a better idea of how big it needs to be. You may try different scale options until you’re happy with the look. We don’t need to be too precise for this as its just fruit.
I also used SOLIDWORKS to add the apple decal to the part. Selecting the apple decal I used projection mapping from the top view of the apple. Resize it to 60mm here and ensure it covers the whole apple. You may need to drag the decal window like this to cover the apple completely, you may even need the decal to be larger depending on your apple size. The unfinished mahogany wood appearance was applied to the apple stem to give a realistic finish. The finished assembly was rendered with SOLIDWORKS Visualize.