

Warning: DO NOT TAKE UNTESTED GEAR INTO THE WOODS. Especially if said gear would be essential to survival in a worst-case scenario. With that preface, here we go…
Living in Greenville, SC, Pisgah National Forest is an outdoors enthusiast’s playground just an hour and a half outside of my door. While my default in these woods is mountain biking, lately I’ve enjoyed getting into hiking and backpacking. Since it doesn’t require the same technical skill as mountain biking, it has been a great way to hang out with friends and family. Not to mention get to places I wouldn’t take a mountain bike.
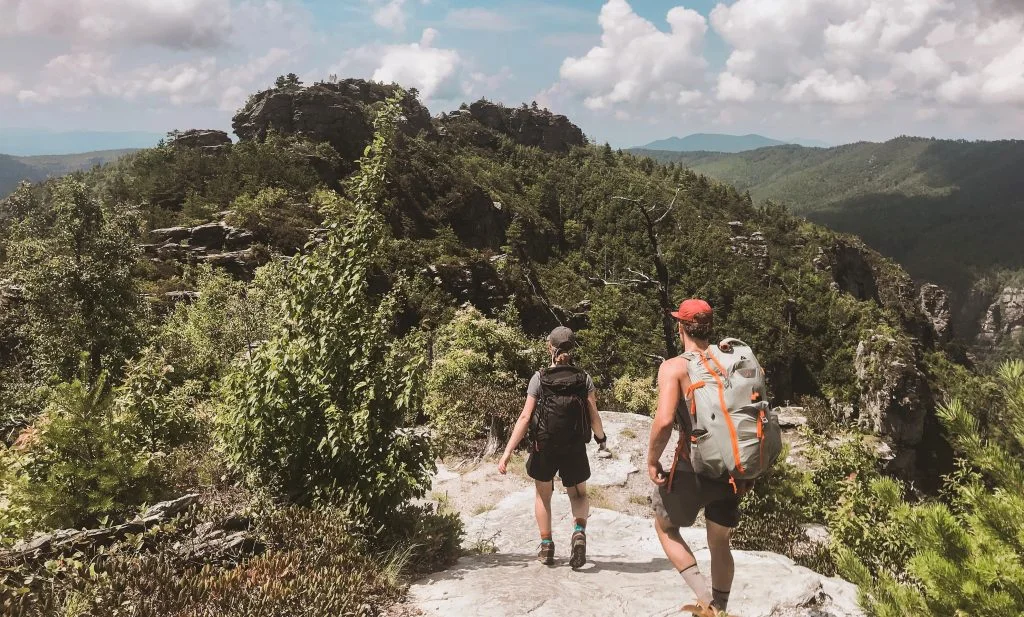
On the Trail
As I have gotten into this new method of exploration, I’ve also developed an obsession for gear. Ever the minimalist, I routinely find myself drooling over multi-functional, fold-to-the-size-of-a-soda-can equipment. A stove that fits in your hand? Yes, please. A thermos with an integrated french press? I’ll take one of those. A tent that weighs less than your sheets at home? Yeah, one of those too. That’ll be $500. On second thought….
Due to ultralight gears’ ubiquitously expensive price tags and a drive to create things myself, I have been playing around with some of my own gear ideas. Shelter was my first priority, because it’s an essential piece of gear, takes a substantial amount of room in a pack, and light, compact set-ups cost a fortune.
So here is the question:Can I use SOLIDWORKS to design and build a lightweight, low cost sleeping set-up?
Preliminary Research
My dabblings into backpacking have led me to spend nights in a variety of, let’s call them, sleeping situations… Hammocks, tents, bivys (bivouac shelters). Add to that the car camper (where I spend the majority of my nights in the woods) and rooftop. Lessons learned:
1-A Hammock without a canopy is a horrible idea.
2-A Hammock with a canopy isn’t that much lighter than a tent. And a lot colder.
3-Bivys are basically glorified trash bags. Light, compact, and usually waterproof. But you have to ‘shimmy’ in and can’t sit up. I wasn’t a huge fan.
4-Flat roofs tend to pool water. Water is heavy and cold. And wet, although heavy and cold is bad enough. Avoid flat surfaces.
The solution between the tension of size and comfort seemed to be a single-wall, one-person tent. Most tents are ‘double-wall’ in that you have a tent body with an upper portion that is mostly a mesh material with a separate, detachable rainfly. A ‘single-wall tent’ is all one piece, with no mesh — simpler, lighter, and more compact. The tradeoffs are reduced breathability and a reduction in stargazing capabilities. Those seem to be much better concessions than not being able to sit-up, or worse yet, being soaked all night.
Design Goals
They were pretty straightforward:
1-Waterproof. ‘Nuf said.
2-Pack down under 35cm in length. Combine backpacking and bikes and you get bikepacking. The handlebars are a great place to mount a tent, but that means the packed tent has to be narrower than your handlebars.
3-Weigh less than 900 grams (2lbs). I have found pack size is more impressive in person and more applicable than weight, but weight is a fun metric
Time Crunch-By the time I had this idea on paper, I only had two weeks until a 2-day, 2-night backpacking trip on the Art Loeb, a 48km trail through Pisgah. And I was determined to make this tent a reality for our expedition. So two weeks to finish out the design, figure out materials, and build this thing. Did I mention I’m pretty lousy with a sewing machine…?
Design Process
I started this project with the same motto I start most: KEEP IT SIMPLE. At least with the actual design. Tents aren’t complex; don’t make this one so.
To design a tent in SOLIDWORKS, there are two applications that aren’t often used: soft goods and bent structural members. Could I use SOLIDWORKS for these applications? I was about to find out.
General Design-
After playing with some bivys (see 3 and 4 from “Preliminary Research”), I knew I wanted a single ridge down the middle, which meant a single pole. While considered ‘freestanding,’ I would rely on stakes to tension out areas instead of using additional pole structure. I also wanted the door to be in the front with secondary poles around said door.
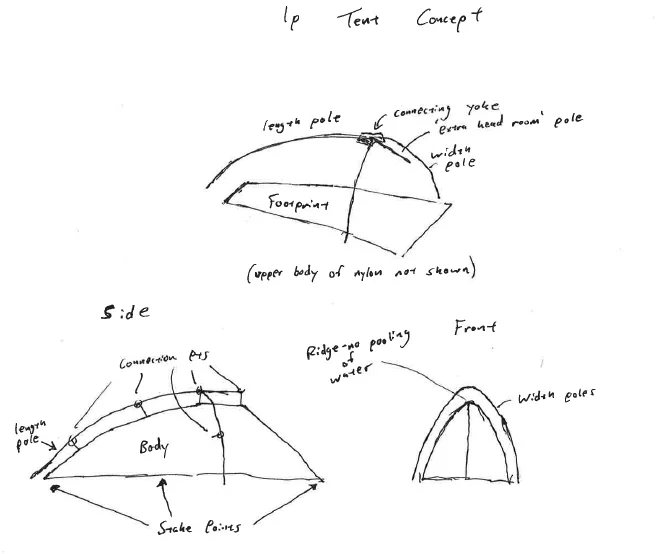
The general shape that I was after.
A tent is obviously more than one part. But all the parts fit smoothly together, at least in a functional tent. Which raised some questions on my overall structure. Multi-body part? Assembly? How do I get all the curves of the poles to match? And the tent body to follow the poles?
Enter top-down assembly modeling. I started everything at the assembly level with some general profiles.

The general profiles with dimensions. What you don’t see is all the bending calculations and trigonometry to get the 16.5 degree angle between the length and width poles right while keeping the structure balanced.
In the screenshot, you may notice a list of global variables. Some of these are controlling the layout sketch, others are controlling aspects of the individual parts. Yes, that means I have started a file referencing web. Welcome to the danger zone.
Poles-
While I could have modeled these with Weldments, I wanted to be able to change the outer and inner diameters from the assembly level (via global variables), so I opted with a sweep instead to model the poles in the bent state.
Initially, I made the path that the poles follow a spline, but then I realized that the individual poles would all have the same radius — an arc path, NOT a spline. With that in place, global variables at the top level assembly drove the profile, path radius, and length, resulting in something like this:
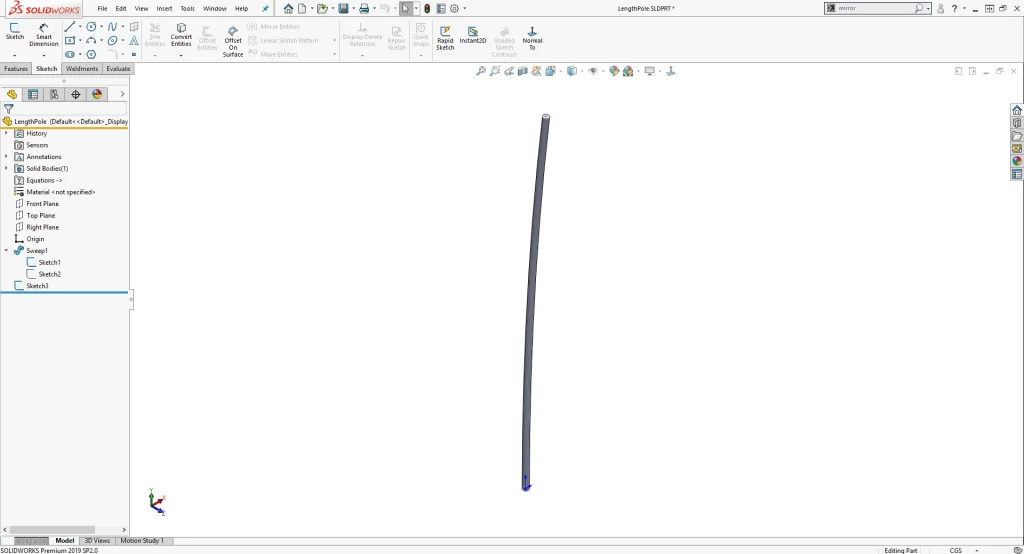

Simple, but critical to the overall design.
Body-
Thin material screams surfacing, and boy do I love some surfacing. Problem was, I had already dove into a top-down approach. “Hang on everyone,” I warned, “ I’m about to try top-down surface modeling”
Was the SOLIDWORKS universe about to blow up?
Before we answer that question, for the sake of both common sense and simplicity, the actual surfaces didn’t get too crazy. Common sense said that the fabric was only going to hold the shape defined by the poles. Any cool shapes would just flop over, which is why the design had to be top-down. Simplicity said complex shapes were going to be hard to actually make.
I started out with the floor profile.
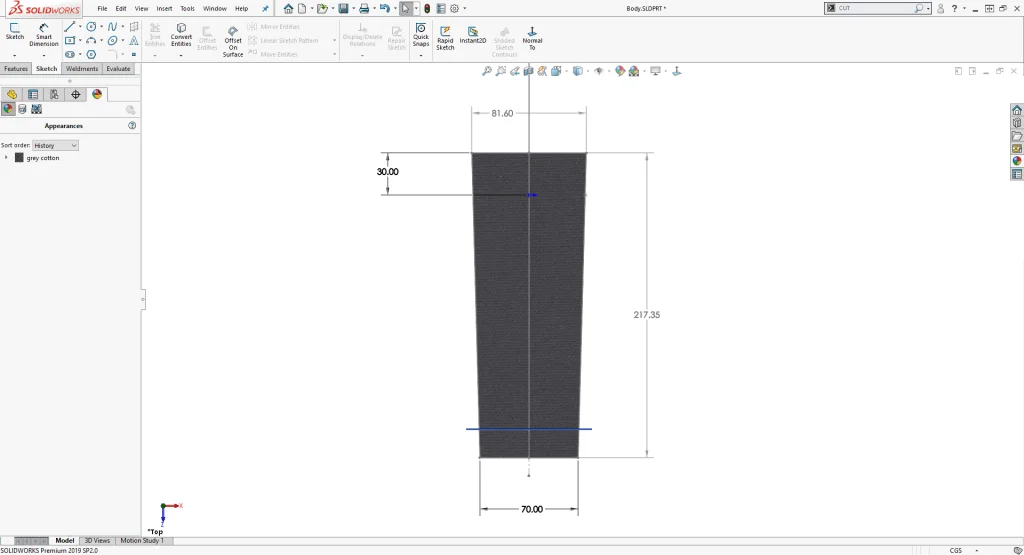
Those light grey reference dimensions are driven by the assembly level sketches.
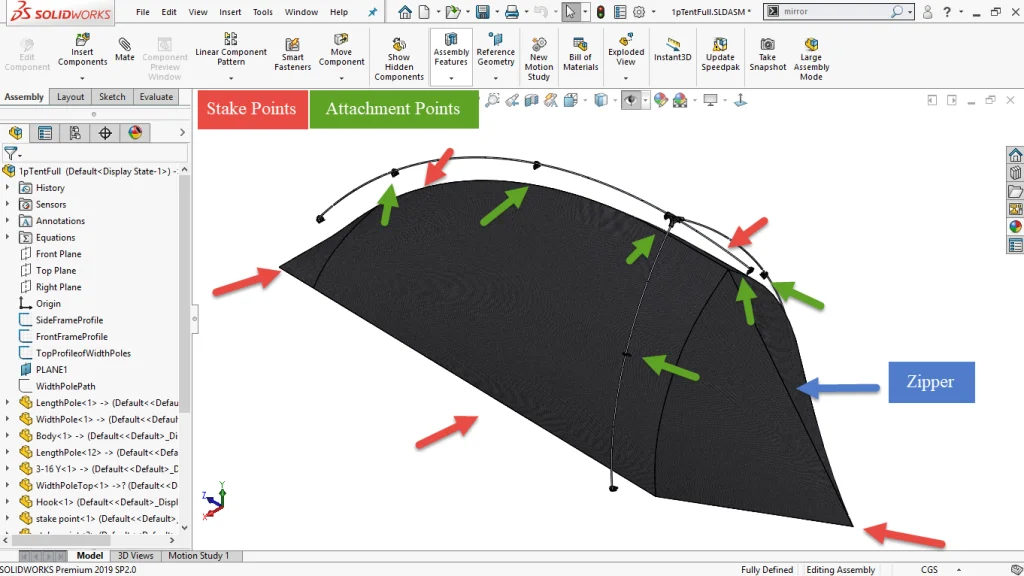
From there, I went to the tent sides. I wanted to limit seams, so I made each side as one continuous surface consisting of three lofts.
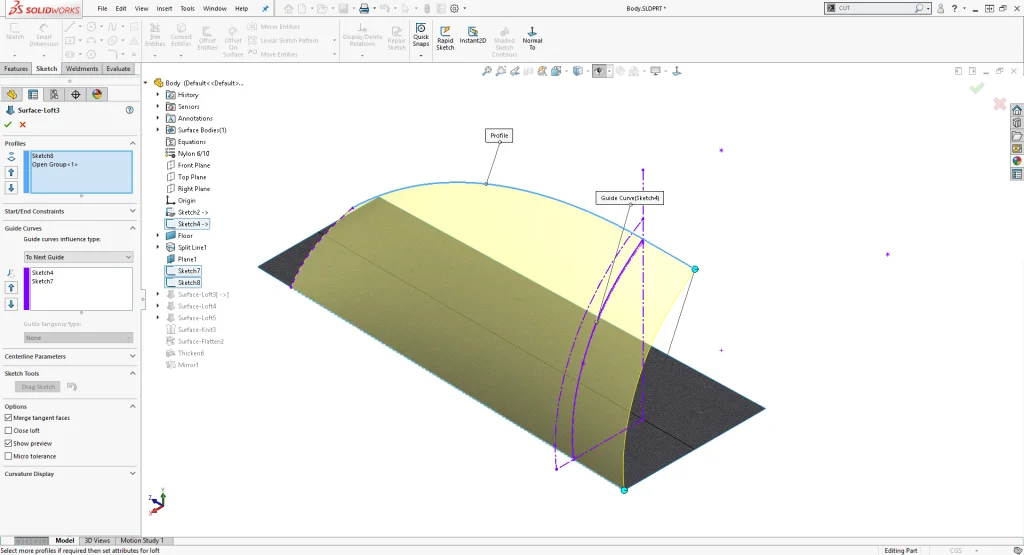

The progression of the lofts. Not the cleanest of the surfaces, but it was simple and ended up being easy to create.
Now that I had the body designed, how the heck was I going to translate that surface to a flat piece of fabric? Enter Surface Flatten.
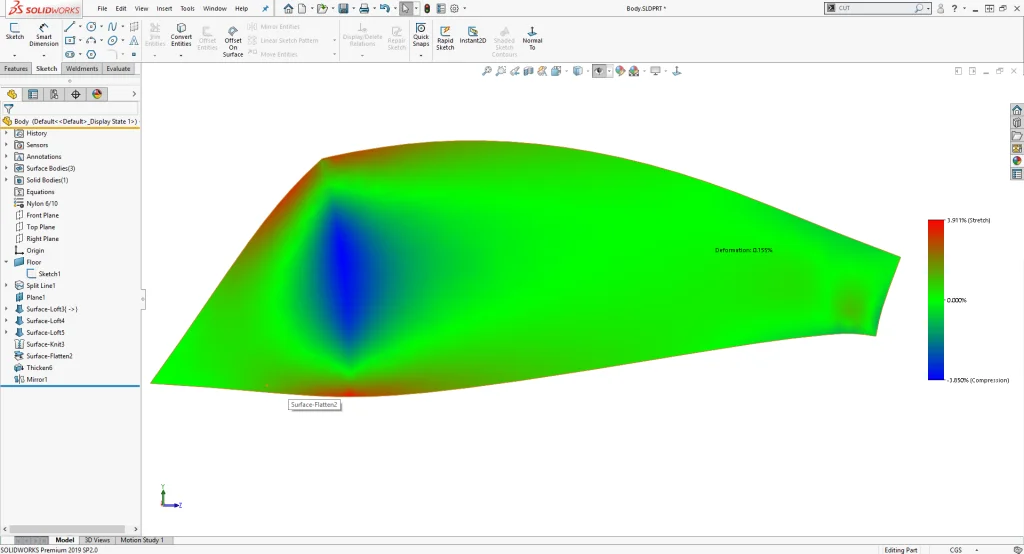
This is what I needed to cut out of the fabric later on. Shown here with the deformation plot.
I didn’t know what the deformation plot would correspond to or what the limits of it were. All I knew was that I had my pattern. Now for actually transferring it to the fabric…
Small Parts-
There were three small parts; the yoke at the intersection of the poles, ground connection points, and clips to hold the body to the poles.
As futuristic as the yoke looked, it was actually incredibly simple and almost completely driven by previously defined information.
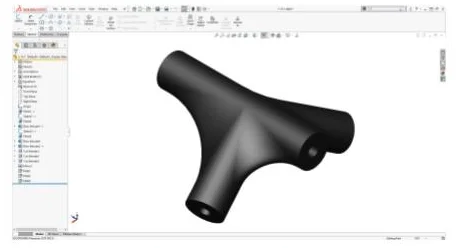
A simple yoke to connect all the poles.
The ground connection points and clips were a very similar geometry. Both allowed for tension adjust-ability when nylon webbing was routed through.
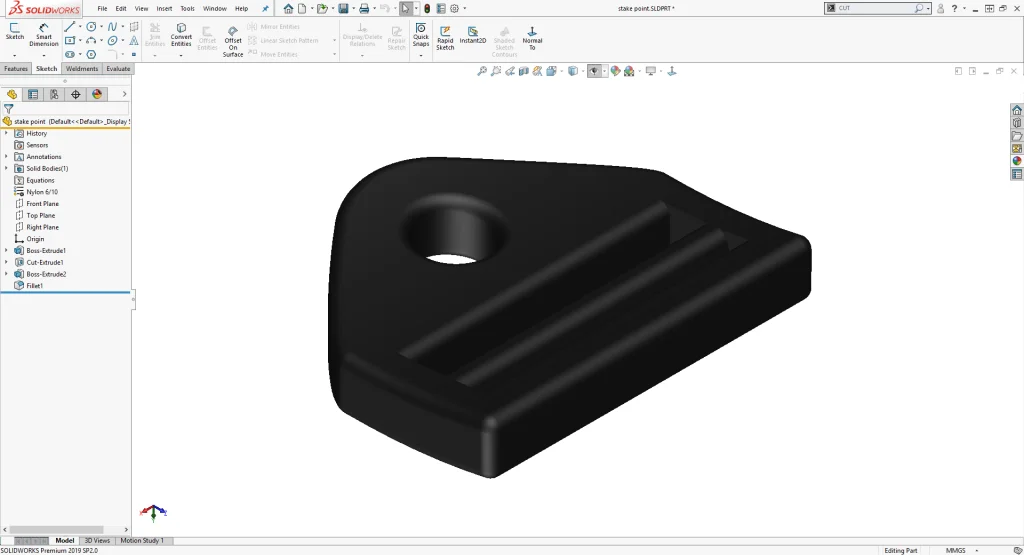
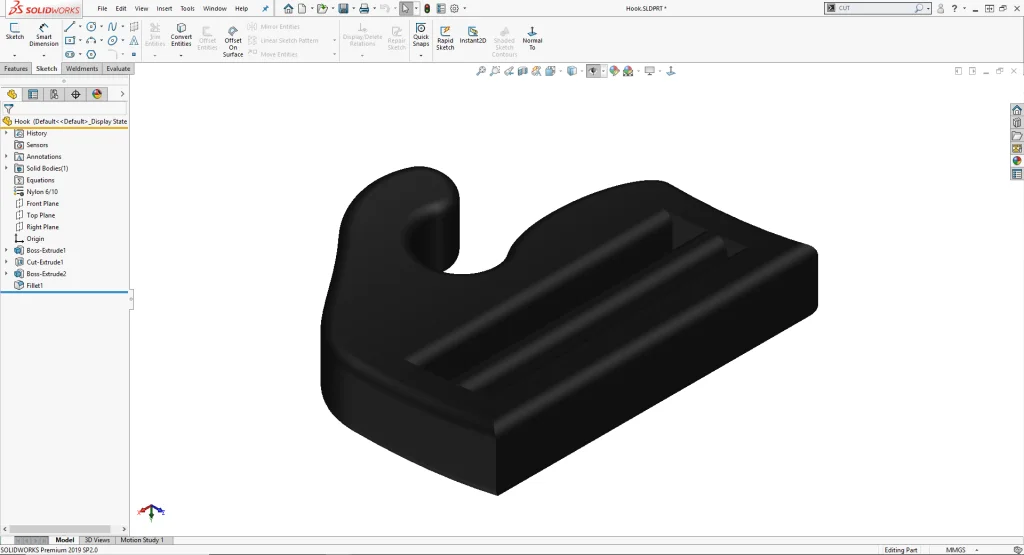
The ground connection point and clip to round things out.
I decided to forgo modeling stakes, straps and a zipper, but with the small parts modeled out, the assembly came together nicely. Calculated weight was 577 grams, giving me 323 grams to play with for the finishing touches.
Putting it all together
Now that I had the CAD model, how the heck was I going to put this together in a week and a half before our Art Loeb adventure? Did I mention I’m pretty bad with a sewing machine, and zippers might just be my arch-nemesis?
Materials-
For the body of the tent, most manufacturers use some variation of nylon fabric. I ran across some 30 Denier (measurement of thread thickness; 30 is on the thin,light side) ripstop nylon with a waterproof coating. On eBay, because that’s where you find all good things. Perfect.
The poles were easy to find on McMaster-Carr. I actually went through a number of sizes, settling with rods to save space compared to a larger diameter (and much more commonly used) pole. The structure was not as steady as it would have been with standard poles, but I typically don’t camp on bald knob faces where high winds are an issue.
Building the Tent-
The first and most challenging step in building the tent was how to transfer the flattened surface in SOLIDWORKS to the actual nylon fabric. In a rare stroke of genius, I fired up the projector and spent a half hour adjusting the zoom just right to get the proper scale.
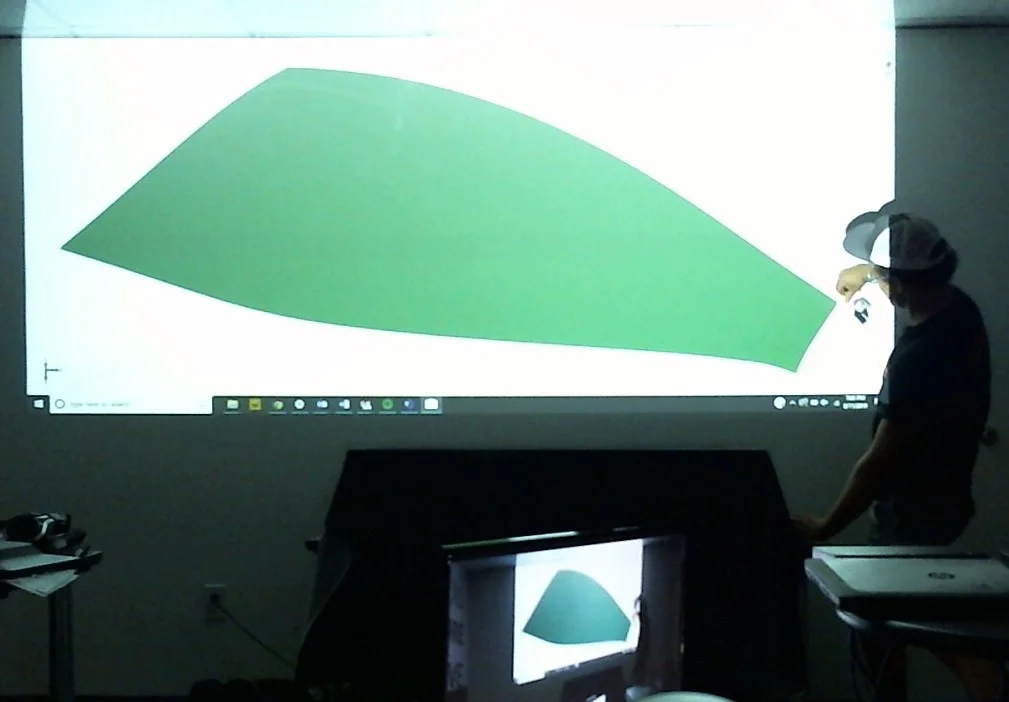
“Hey Luke, whatcha doing?” Me:“Don’t worry about it.”
Taping the nylon fabric to the wall and tracing was actually pretty easy. The sharpie didn’t even bleed through to the wall.
A week and a half quickly dwindled to a week. In that time, I confirmed my sewing machine was as good as broken. Not that I was going to make great strides with it anyway. With a quick internet search, I found EZ-Steam II, basically double sided tape that is heat and pressure sensitive. It makes it possible to ‘tape’ your pieces of fabric together and go over it with an iron, sealing the pieces together.
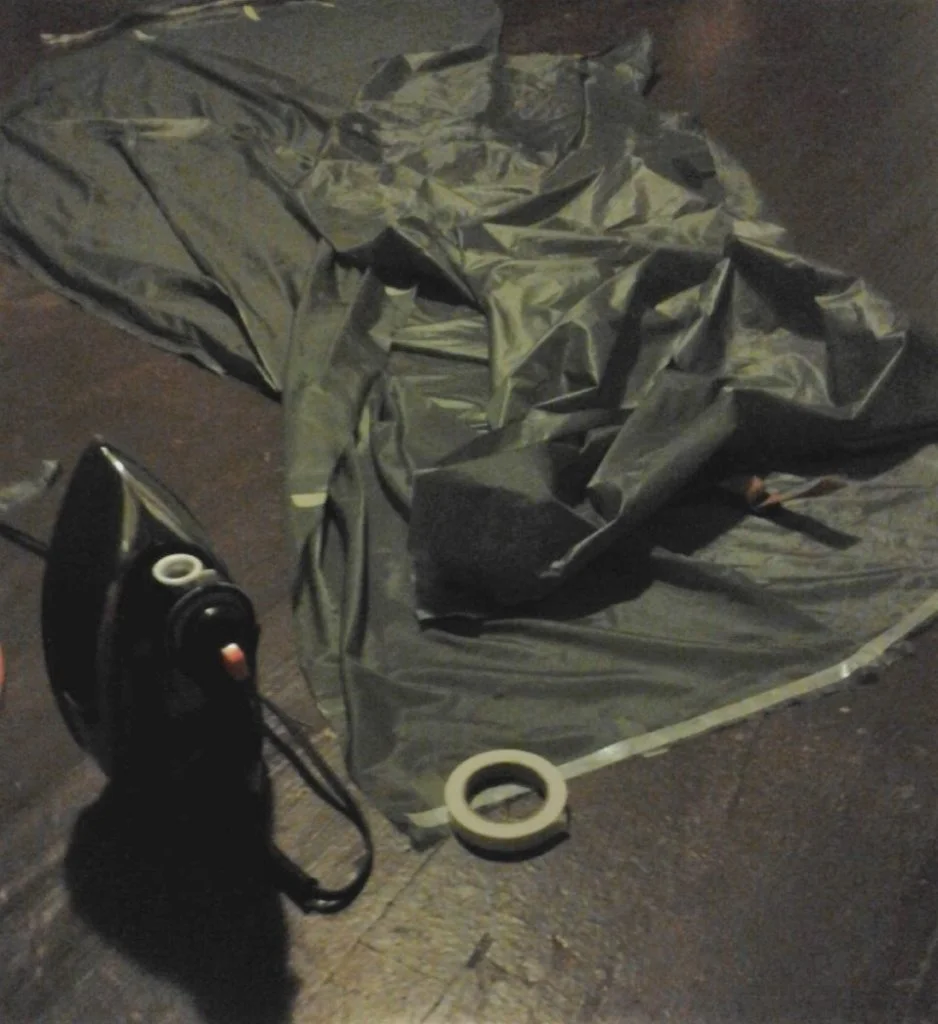
My new seam method.
The day before setting off, I had one seam done and the basic structure set out. I had all but given up on getting this together before the Friday rendezvous. Due to several injuries in the group the previous two weeks, we decided to back off from a the weekend expedition to just a Saturday overnighter on Sam’s Knob. This gave me one more night and morning, as well as fresh determination.
So on Friday night, instead of heading directly to the woods, I did what every 25 year old guy does on a Friday night — went home to Jack the dog, grabbed a few beers and…my iron. The next morning, I chopped and ground aluminum rods and did a last round of 3D printing. I sandwiched Nylon webbing between carpet tape and gorilla tape, another quick improvise to stitching and sealing, and traded a buckle for a proper zipper. By the time I cut the rods and attached the webbing, I was running an hour behind on the 24-hour delayed meet-up. This left no time for a proper test fit, much less any waterproof testing. I knew this was a bad idea. As in If it rains, I could be flirting with hypothermia bad idea.
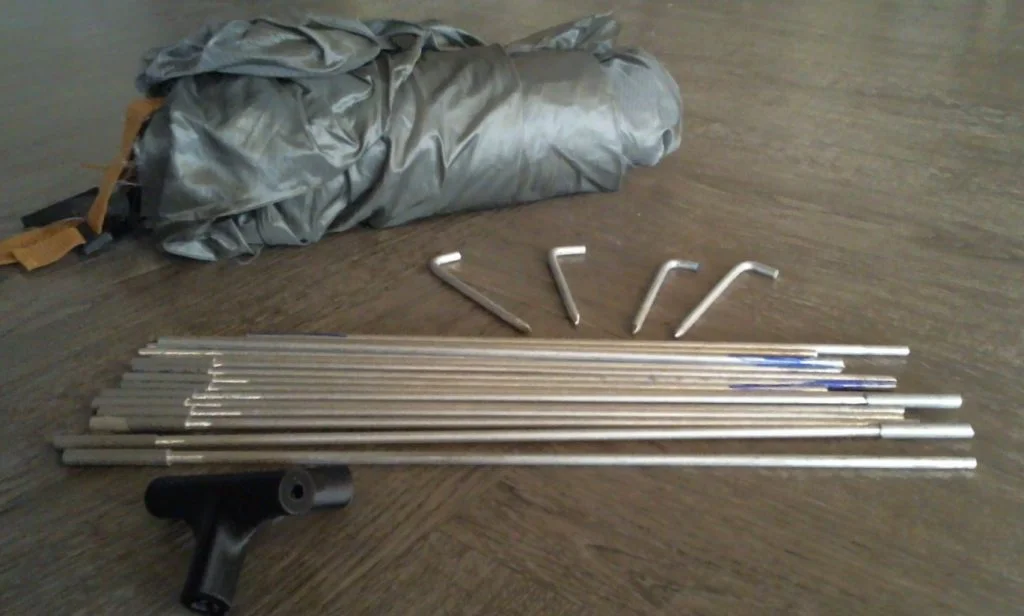
Running late and no time to test, but I had a tent! Testing would be have to be live.
By the time Jack and I finally rendezvoused with the group, the other three were waiting, but gracious toward our tardy arrival. When they learned I had made my own tent, there was slight concern over my sanity, and where Jack was going to sleep. For whatever reason, this concern did not extend to my safety. With dinner in our bellies and the sun almost set, we headed up the mountain.
On the trail again.
Even though the poles weren’t connected, setting up in the dark was much easier than anticipated. In the daylight, it would have looked something like this:

Set-up and tear down wasn’t nearly as difficult as I thought without the poles being attached.
Staked out, it was time to crawl in and call it a night. Jack did not share my enthusiasm and stayed outside for the majority of the night. As the dew started covering everything in the early hours of the night, he did end up crawling his way in before the sunrise wake-up.
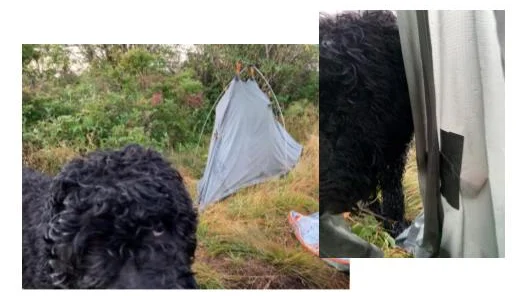
Why good morning Jack! His eyes say it all.
Jack, myself, and the tent all made it through the night. Fortunately, there was no rain, but there was the most dew I have ever seen coating everything in the morning.
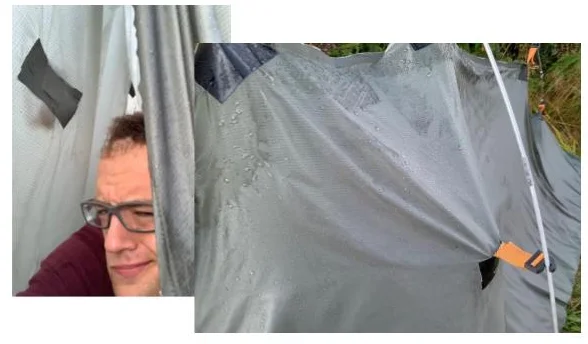
So much dew. Everywhere.
With a (thankfully) rainless night, this definitely was not a waterproof test. In fact, there were a few spots where the seams separated, deeming the current iteration NOT waterproof. Interestingly enough, the separation spot was where the highest stretch value (~3%) in the deformation plot inside of SOLIDWORKS was. Takeaway-3% is too much, and the deformation plot is very useful.
There will be future tests and improved iterations, but all in all, the ultralight tent project worked out. We woke up fortunate to be warm and dry, enjoying coffee and a pastel-painted morning sky.
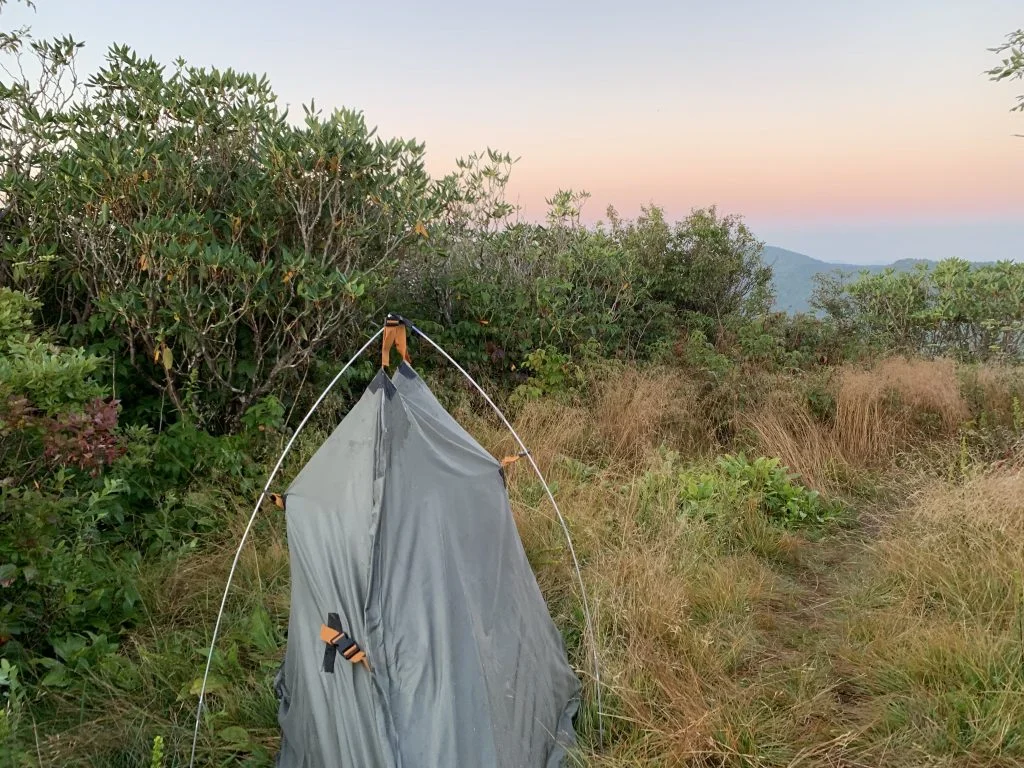
Mountain sunrises never get old.
Takeaways
I had three goals in terms of the finished tent:
1-Waterproof. Nope. But playing with seam technique could remedy this in prototype 2.
2-Pack down under 35cm in length. YES! Poles, the limiting factor here, came in under 35 cm. Holding everything in one fist for the first time was really cool.
3-Be under 900 grams (2lbs). YES! 670 grams. That’s getting into bivy territory, but with a structure and ability to sit up.
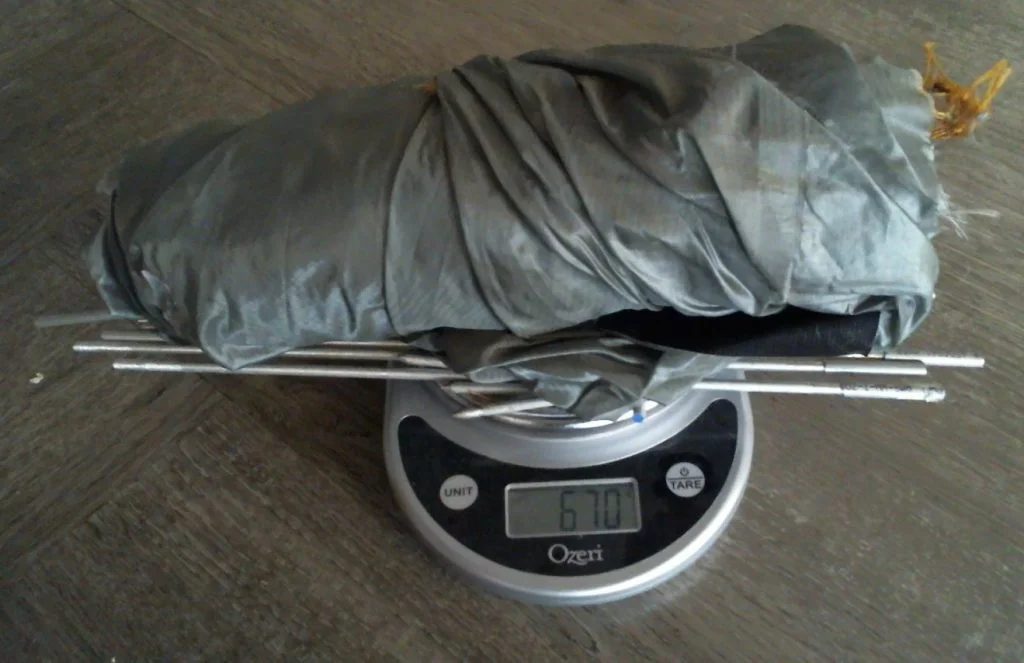
Just tipping the scale with over 200 grams to spare. Maybe I’ll use that allowance for waterproofness for prototype 2.
Questions posed in regards to SOLIDWORKS:
1) Can SOLIDWORKS be used for bent structural member design? YES!
2) Can SOLIDWORKS be used for soft good design? YES!
Surface modeling is great for this, and ‘Surface Flatten’ is an incredibly valuable tool to bring the design to life.
3) Is top-down Surfacing a viable technique? YES!
I wouldn’t recommend it in most applications, but in this case where the surfaces were fairly simple, it worked out great. It allowed me to test different dimensions quickly, and I did not get a single rebuild error.
4) Can SOLIDWORKS be used to design and build a lightweight, low cost sleeping set-up? YES!
670 grams and a final cost of about $80 (not counting unused materials), I’d give this a yes. This may have been stretching what most would call a typical application. But not only can it be done, there were specific tools (Top-down, Surfacing, Surface Flatten) inside SOLIDWORKS that significantly helped the design and build process.
Until the next adventure.
Luke Woodard • Technical Solutions Consultant • TPM