Dirty decals
Dirty decals in SOLIDWORKS
Decals in SOLIDWORKS Visualize are often for applying logos, labels and signage onto products. This blog explores how decals can be used to give realistic defects, dirt and damage onto appearances that would otherwise look too clean and perfect.
When exporting a render in Visualize, you have the option to save the file in .png (portable network grahpic) format. This file type supports alpha channels which means that portions of the image can be set transparent and therefore easy to superimpose onto any background. The same goes for when you import decals. A scratch with a transparent surround can be set as a decal so that only the scratch would be visible on your object. All you need to do is find some .png decals.
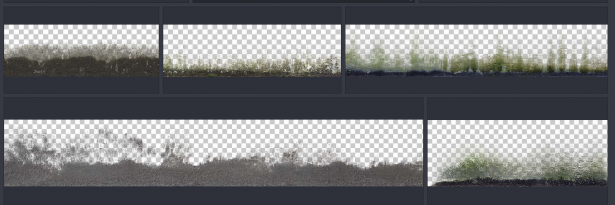
There are plenty to be found from online sources. One great example is Textures.com which includes a whole category dedicated to decals. Below is just a small snippet of the grimy wall stains available – just download any that take your fancy!
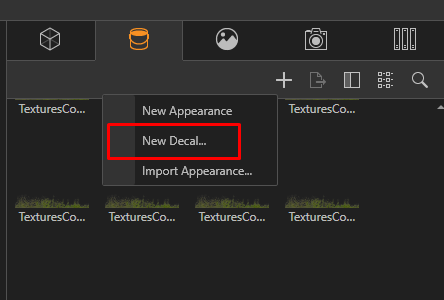
The process to add the decal is the same as any other. Hit the plus symbol on the appearances tab (for Visualize 2018) and choose to add a new decal then browse for your .png. You will also find this option by right clicking in the appearances pane.
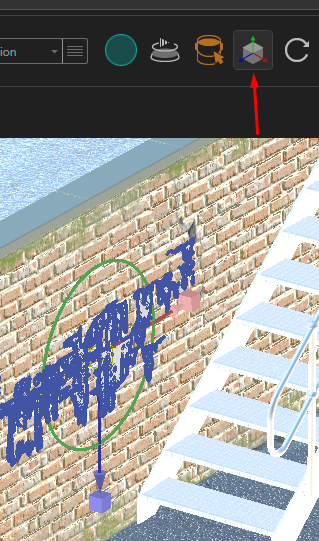
Drag the decal onto the intended face then position, rotate and scale it using the object manipulation tool.
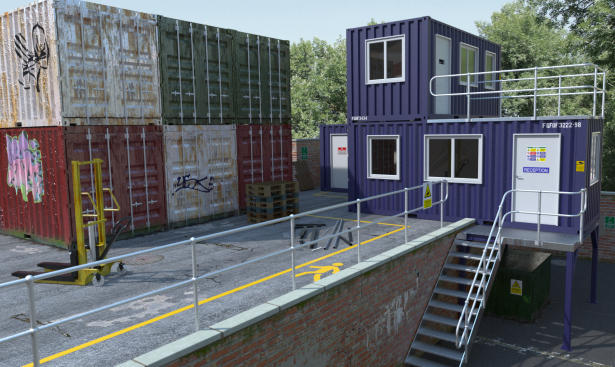
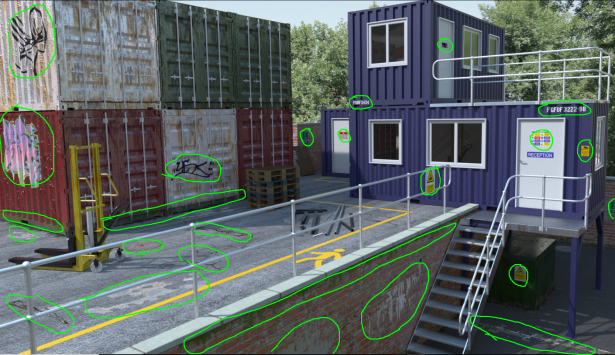
This render example below illustrates a new container conversion for offices in a fabrication yard. The highlighted decals help to give realistic examples of:
- Graffiti
- Cracks (wall and road surfaces)
- Excess cement on walls
- Damage to tarmac
- Dampness mould
- Health and safety signage
Warning! Don’t rough up your render too much!


