
A common pain point we hear from you, our customers, is that you all need unified access to data. We hear you loud and clear and are always working to ensure that you can design faster and collaborate smoothly with your team and stakeholders.
One of the new collaboration features we refer to as multi-level approval for drawing stamping is going to help you do just that – speed up the drawing release process. The latest functional delivery (FD) update for 3DEXPERIENCE SOLIDWORKS and SOLIDWORKS with Cloud Services, R2024x FD03 gives you the ability to set multi-level approvals during the drawing release process. Using the Route Management app, you can create a task/notification for a colleague, such as the engineering or manufacturing manager to let them know a drawing is ready for their review/approval.
What’s especially great about this new feature is that as tasks are approved, the time stamp will automatically show the approval status on the drawing, so there is no need for manual work.
Let me walk you through it so you can start using this feature asap. I am also including a video at the end so you can see how simple it is.
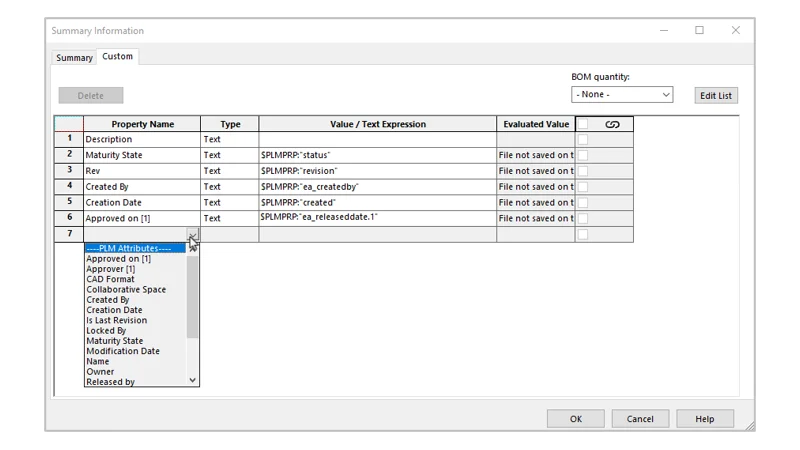
Before you begin, set up your SOLIDWORKS drawing template to include the necessary PLM attributes for the approval process. You can add these attributes, like “Approver” and “Approved on,” to a note in the title block of the drawing. These attributes automatically appear in SOLIDWORKS properties when it is connected to the 3DEXPERIENCE platform, so no extra setup or mapping is needed.
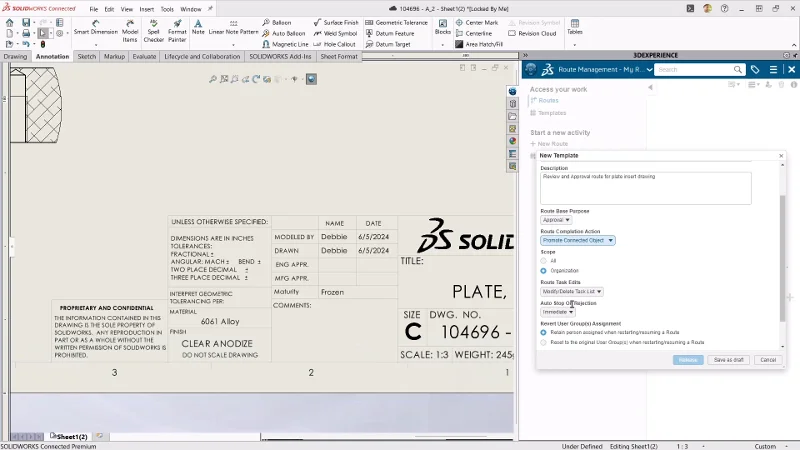
Now once you are done with the initial setup, you can get the approval process rolling. The first thing you have to do is freeze the drawing. Next open up the Route Management app in the MySession panel, start a New Template and click on Properties and enter your title, for example, “plate insert approval.” Then click on Tasks and add the recipient that this task needs to go to and hit apply. Hit the + arrow next to the task window for the task you just created and add the next person who is in line to review, such as the manufacturing manager. You can also add specific instructions, for example, “manufacturing approval required for further processing.” Once you hit apply you can then hit the Release button.
Open the Change Execution app from MySession, then click the Change Action icon on the left side of the screen. Enter the title, in the example in the video I used “plate insert”, select Members, and add the task route template that was previously created. This will appear in the Approver drop-down menu. Click Add to confirm.
Note: The route template will act as the approver since it includes the sequential approval tasks for engineering and manufacturing.

Next, simply grab the Plate insert drawing from the FeatureManager Design Tree and drag and drop it into the Proposed Changes tab of the change action.
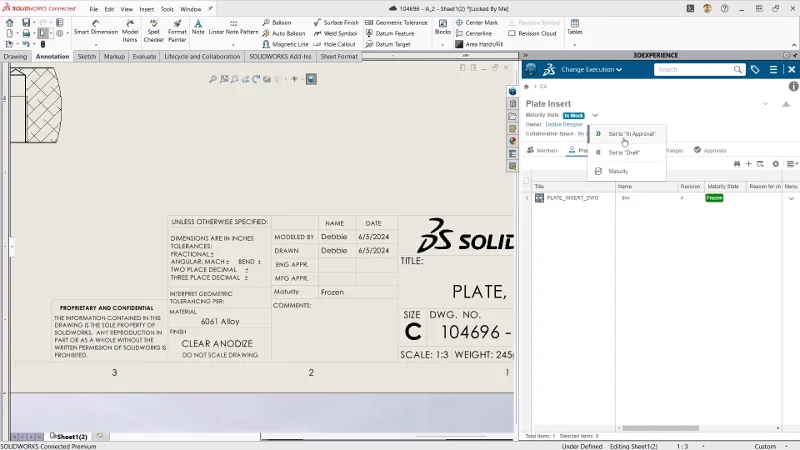
Change the Maturity state to “in Approval” and that kicks in the drawing approval process.
Once the engineering manager gets to the task, they can open it and review the drawing in 3DPlay from any device, and then approve or suggest further changes.
Right after the engineering manager approves the drawing, it will go to the manufacturing manager to do to the final approval and release the drawing to production.
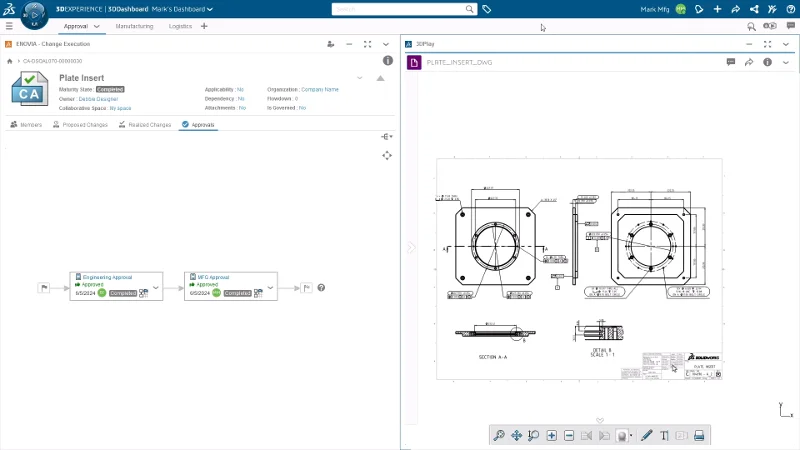
Finally, the designer gets notified when the drawing is approved and released, and they can simply go back to the Change Execution app and click on the change action then click Approvals, Realized Changes.
While this may seem like a lot of steps it takes very little time to get through this process, and you can see how simple it is in the video below.
I think you will find that this workflow really delivers on the promise of providing a simple and unified workflow on the 3DEXPERIENCE platform, enabling anyone who is part of the approval process to easily log in from a web browser, review the drawing, and approve it – anywhere and at any time.
This is just one of the many great new enhancements available to you now in 3DEXPERIENCE SOLIDWORKS and SOLIDWORKS with Cloud Services that enable you to connect your data to the 3DEXPERIENCE platform and take advantage of a slew of time-saving collaboration and data management capabilities.
See my last blog on how 3DEXPERIENCE SOLIDWORKS users can now save data locally with SOLIDWORKS PDM, and stay tuned for more enhancements coming soon in SOLIDWORKS 2025!