Sheet metal has always been a popular option for design and manufacturing teams in the automotive, industrial equipment and construction sectors and for good reasons. Sheet metal is strong, durable, moldable, lightweight and cost-effective.
For example, with sheet metal you can create lightweight yet structurally rigid parts, unlike bulky casting or machined parts. It’s also more cost effective for mass production compared to costly investment casting, forging or 3D printing manufacturing techniques. And last, you can get a unique combination of rigid and flexible designs that can easily withstand shocks and vibrations.
In this blog I want to discuss tips for designing stronger sheet metal parts using the tools in 3D SheetMetal Creator role. 3D SheetMetal Creator is a fully browser-based solution that includes the xSheetMetal app with purpose-built tools for sheet metal design, in addition to other apps and features for storing, managing and collaborating on your designs since it runs on the 3DEXPERIENCE platform.
Bending, holes and slots, and stretching are just a few of the key characteristics of a well-designed, strong sheet metal part that 3D SheetMetal Creator can help you easily achieve. Let’s get into more details below.
- Bends – don’t let your parts get bent out of shape- add bends!
When it comes to bends, I say “Bend it Like Beckham,” or in other words, as the movie title suggests bend it like a pro. When it comes to sheet metal parts, you want to avoid a flat sheet metal part and adding bends is usually the go-to method for sheet metal designers as they begin their design. A lot of the time damage is sustained on the outer edges of a sheet metal part so having bends or folds on the outer edges adds more rigidity to the part, so it doesn’t buckle or get bent out of shape, literally speaking.
Keep in mind when adding bends, you have to take the bend radius into account as different materials and thicknesses require different bend radiuses. If your radius is too much, you risk the chance of the part springing back, and if it’s too small, the part could crack. A good rule of thumb is that the bend radius should be at least twice the thickness of the sheet metal.
With 3D SheetMetal Creator bends can be achieved using the Wall on Edge, Bend from Flat, Jog, or the Flange commands in the xSheetMetal app.
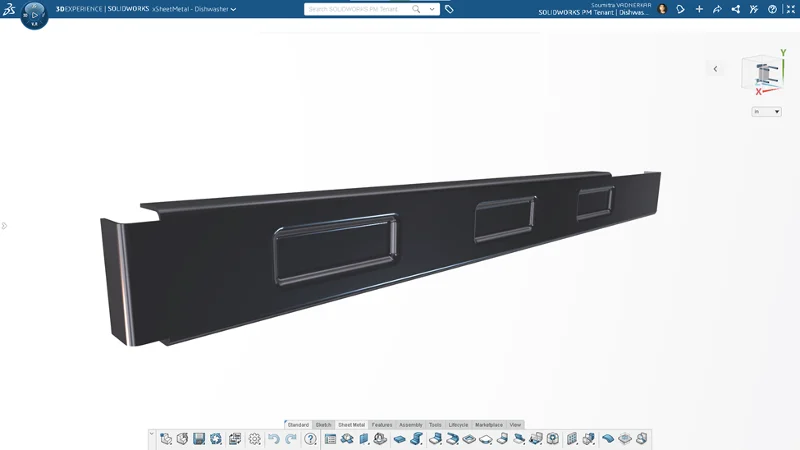
- Stretching with Embosses – pretty, yet sturdy parts.
After you have your bend radius, you want to focus on stretching your profile, which can be achieved by adding an emboss to stretch the part. Stretching is the process of extending the metal sheet in a certain direction. This process strengthens the sheet metal by orienting the metal’s grain in a certain direction. It also adds an aesthetic aspect to your sheet metal design.
Stretching can be easily achieved by adding embosses, such as a formed punch or beaded emboss. In 3D SheetMetal Creator you can use the User Stamp command to easily get your desired shape for the emboss. This feature eliminates the need for complex modeling techniques to create the stamped geometry and allows users to use their favorite suppliers’ tool geometry to form the sheet metal model. If you have a library of stamps and formed tool geometry that you use regularly, you can save them on the 3DEXPERIENCE platform and use them as needed. As long as it is a solid body, it can be used regardless of the application it was designed in.
- Holes and Slots – the more cutouts the merrier.
Often times you’ll see lightweight parts that have excessive cutouts in the design. Why? Because cutouts not only make parts lighter but add even more strength to sheet metal parts during the manufacturing process.
It may sound surprising, but what happens is when the cutout is created during the sheet metal manufacturing operation, the material becomes slightly stretched due to the punch motion into the die cavity and re-orients the metal’s grains, making the sheet metal part stronger.
The cutouts also help in reducing the stress concentration and help the load distribution when the part is loading (in service).
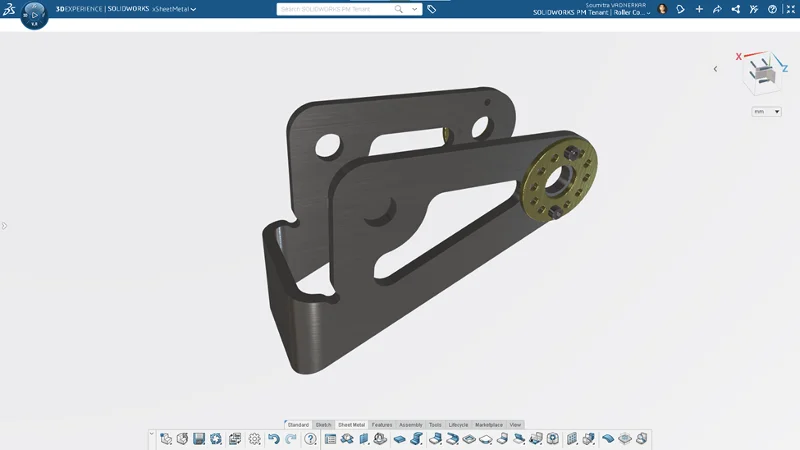
With 3D SheetMeal Creator you can use the Cutout command to create multiple cutouts quickly. You can also use the Hole Cutouts with Pattern feature to create a perforated design characteristic in your sheet metal part.
Not only does adding sheet metal design features, such as bends, stretching and cutouts yield stronger parts, it drives the manufacturing process, helping the manufacturers make the part the way you intended it.
That should give you a feel for what you can do with 3D SheetMetal Creator, but I’d like to continue this conversation in another blog in which I will discuss how you can get even stronger parts with the addition of edging, ribbing and more! Stay tuned!
Also don’t miss my presentation at 3DEXPERIENCE World next month in Dallas called “Productivity Boosters in xSheetmetal and xFrame” taking place Tuesday, February 12th from 10:30 a.m. – 12:00 p.m. You can also catch me and my colleagues in these presentations to learn more about additional cloud-connected and browser-based roles available in the 3DEXPERIENCE Works portfolio and the SOLIDWORKS Cloud Offer.