
Have you ever had to assemble something, say a desk or a patio set, and it’s a total nightmare? There’s way too many parts and it takes hours. I know. I can relate.
That really makes me rethink design. When it comes to design, there are many factors to consider aside from designing the best product possible, as fast as possible; while also taking into consideration functionality, aesthetics, the environment and, of course, the cost.
As you know here at SOLIDWORKS we are all about the “experience,” so we want you to have a good experience with our products and enable you to create a memorable experience for your customers with the products you design.
This requires a suite of purpose-built solutions that are easy-to-use, flexible, and scalable. That’s why I like working with the SOLIDWORKS browser-based design roles, like 3D Structure Creator and 3D SheetMetal Creator that run on the 3DEXPERIENCE platform and enable you to design, manage, and collaborate on your data from anywhere on any internet-connected device.
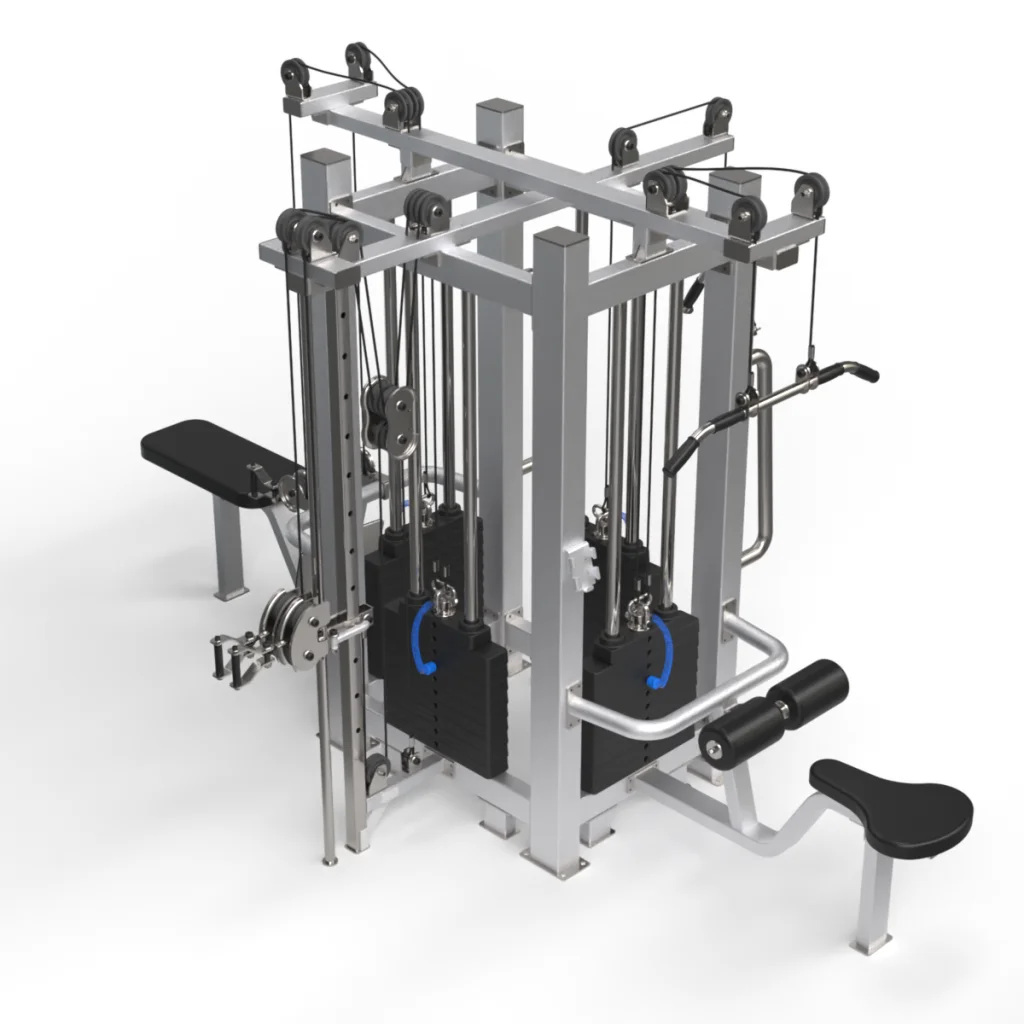
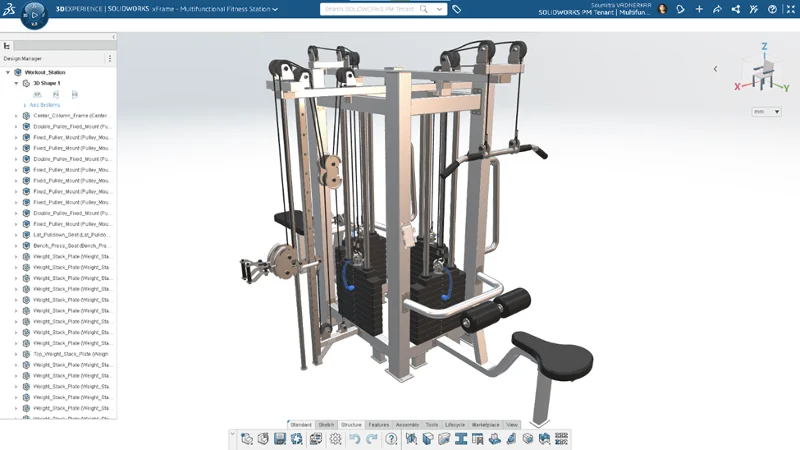
Today I want to show you how you can use the 3D Structure Creator role to create a product that’s easy to manufacture, ship, and assemble. In this example, I modeled a frame for a workout station using the xFrame app in 3D Structure Creator to produce a product with less components, less waste, and less headaches for everyone from design to use. Think less is more.
Since I wanted the product to be easy to assemble and transport, I limited the amount of structure member sizes so they would stack better and require less padding to reduce waste. I also only used two screw sizes so it would be more straightforward for the consumer.
Here are some of the features I used.
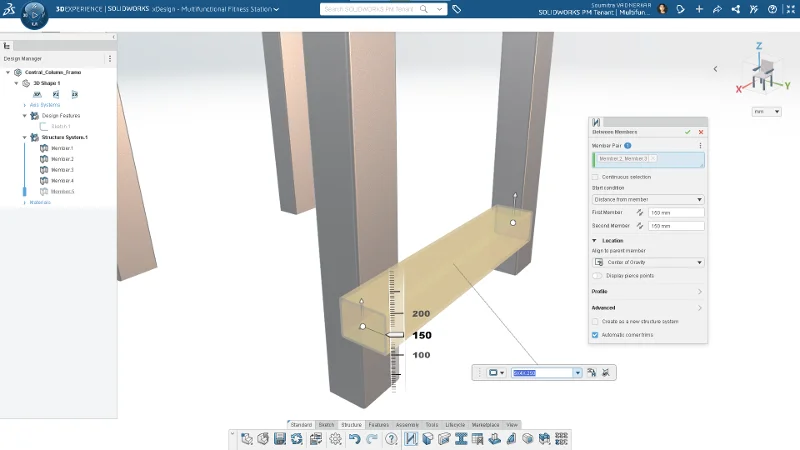
- Point-Based Member Command
As you know working with structure members involves a lot of line sketches. Often, we’ll use a skeleton of the entire design with line sketches, which can be quite messy to deal with.
What’s great about the Point-based Member command is that you can use points to create members the length you want them by simply dragging the robot handle on the ruler, instead of dealing with lines.

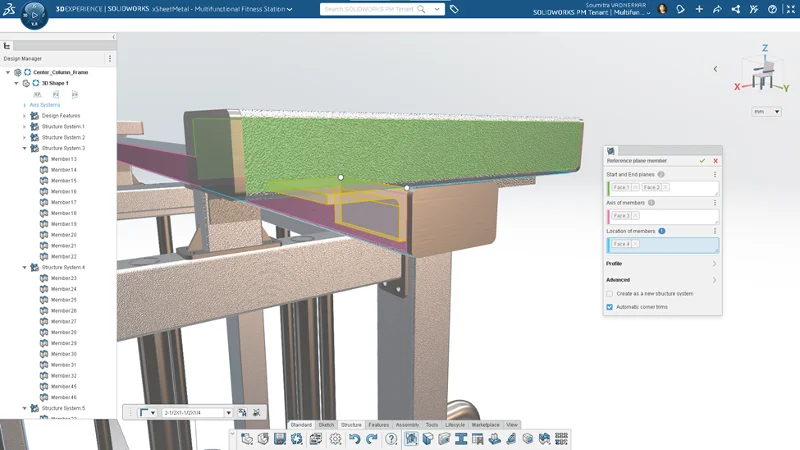
- Reference Plane Member
For even more support I added a bracket in between the structure members. In this case I used an L-shaped bracket that I created with the Reference Plane Member feature. This saved me time from having to manually make the bracket in another solution, such as the 3D Creator role or 3D SheetMetal Creator role, which work seamlessly with 3D Structure Creator, by the way. But this option is quicker as I can do it right from 3D Structure Creator, saving me time from having to switch between multiple roles (which is quite fast when you do need to do so using the Switch app option).
- Between Members Command
Though I am cutting down on structure member sizes and screw sizes, doesn’t mean I am cutting down on quality, as I want to build a sturdy, well-made structure that will support a lot of load variations. To make the equipment even more supportive I added another member in between two horizontal members with the Between Member command in just a few clicks.
I selected two of the members and hit the Between Member command to add a brace-framed member between the two members I selected.
- End Cap Command and the Design Assistant
With the End Cap command, I easily created the end caps for the structure members. Pretty much automatically as 3D Structure Creator features the Design Assistant for Selection, which uses artificial intelligence to propagate end caps to similar sized members. Just select an end cap turn on the End Cap command then click on the Design Assistant for Selection to generate the remaining end caps automatically.
- Gusset command
To make my design even better, and more study I added gussets, which mount across the structural components normal to each other. So, in this case I added them to some of the members of the equipment to reinforce the structure in certain areas.
You can pick from various types of gussets, such as triangular, polygonal, chamfered polygonal, etc. For this design I used the triangular gussets.
Using the Gusset command is no sweat. All you have to do is pick one side and hit the Gusset command and then select the other side and hit the command again.
Voilà, you’ve got your gussets.
After designing the main frame and my cutouts in 3D Structure Creator I used 3D SheetMetal Creator to add some brackets, in addition to using some other design roles to add more accessories, which I will cover in another blog so stay tuned!
Check out these the blogs below to learn more about the browser-based design roles available in the 3DEXPERIENCE Works portfolio andthe SOLIDWORKS Cloud Offer:
5 Reasons I’m a Fan of Browser-based Design Apps
Being a Smarty Pants Can Be a Good Thing