Now that Christmas is over, I guess I can stop playing Michael Bublé’s Christmas album as it’s the final count down into 2023. Cue Europe’s “The Final Countdown” song. Before we rock into the new year, I want to take the time to reflect on my top five favorite enhancements in 3D Sculptor from 2022.
For those who aren’t familiar, 3D Sculptor is a fun and easy-to-use tool for subdivision (Sub-D) modeling, and since it runs in a browser on the 3DEXPERIENCE® platform it also includes collaboration and data management capabilities.
If you are using it, I hope you are taking advantage of all it has to offer, including the following enhancements.
Let the count-down begin!
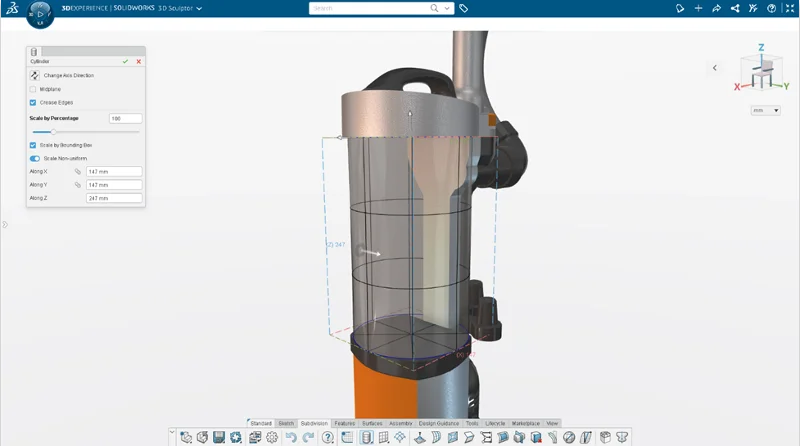
- Scale a Primitive with Bounding Box – eliminate size ambiguity by scaling by specific dimensions.
You can use the Scale by Bounding Box option to easily scale a Sub-D primitive for more precise dimensions when inserting the primitive into a design.
This is helpful when you are designing a component to fit in a specific space in your design. It’s also helpful when you’re inserting a primitive to start a design in an empty design environment. You can set the bounding box dimensions for your primitive to get your model scale correct right from the start.
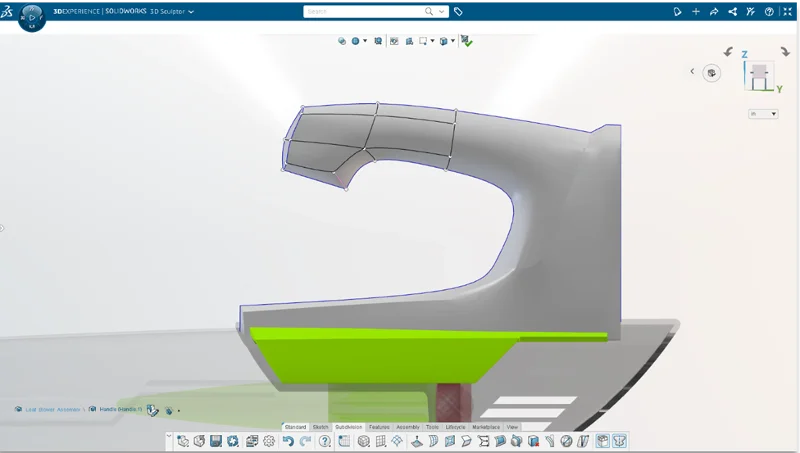
- Working Zone – declutter your workspace and reduce the risk of errors.
The Working Zone for subdivision modeling helps you stay “in the zone,” so to speak. With the Working Zone you can select a specific part of a component that you’d like to edit by selecting it on the Sub-D mesh.
This not only declutters your workspace but helps reduce errors, so you don’t accidentally edit another node, loop or face outside that area. The Working Zone enables you to see the whole assembly while staying focused on one area with less chance of errors.
- Selection Accelerators – speed up your geometry selection.
In 2022 we introduced several new selection accelerators that you can easily access on the Context toolbar or by using shift select.
For instance, if you need to select a group of tangent edges or faces you can use the Select Tangency accelerator. If you need to select edges around the face of a box or quad ball, there’s a Corner Loop accelerator that lets you shift select two edges on either side of a corner to select the entire loop. And for creased edges you can use the Select Crease accelerator so you can select connected creased edges. Also, shift select will now follow along creased edges.
Not only are the selection accelerators one of my favorite enhancements but it’s been one of the highest-ranking productivity tools per 3D Sculptor users.
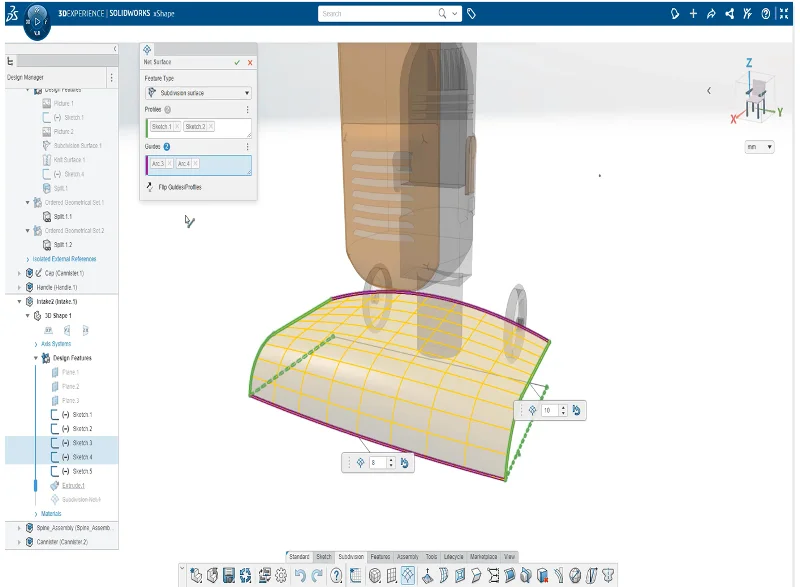
- Net Surface Primitive – create your shape for the end product faster.
The Net Surface command is also a great productivity tool. You can now create your own primitives using a loft, a boundary surface, or a sweep. Start by defining a surface using familiar parametric commands. Then use freeform Sub-D modeling to modify the shape of your customized primitive. Also, you can toggle between the customized parametric surface or subdivision surface. To increase design efficiency, choose pre-defined primitives or create your own with the Net Surface command.
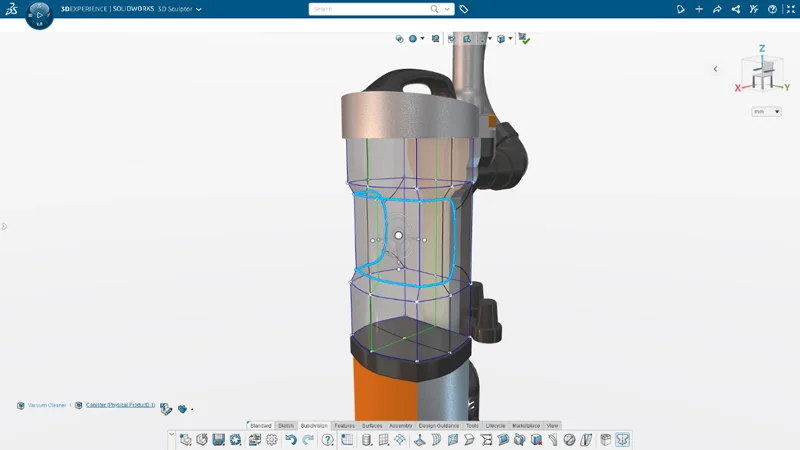
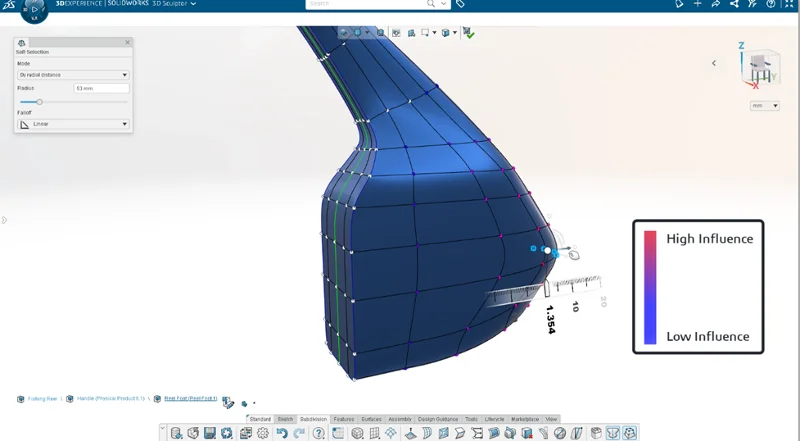
- Soft Selection Command – easily control the influence of subdivision meshes.
The new Soft Selection command allows you to use a slider to set the radius of influence. This lets you control the influence of a push-pull operation when editing a Sub-D mesh. You can turn up the influence to move large portions of the mesh with evenly distributed displacement. Or turn down the influence to make localized changes to some entities while keeping the rest of the mesh unchanged.
The Soft Selection command gives you greater control of how the subdivision surface deforms when dragging a point on the mesh.
It was a tough choice between the Net Surface command and the Soft Selection command, but this one took the top spot, simply because it unlocks more control for the user. It’s going to give you the ability to visualize and fine tune the impact of a push-pull operation on any Sub-D model.
That’s a wrap! What is your favorite feature? Drop a line about it in the Comment section. And let us know what you’d like to see in future releases of 3D Sculptor by submitting your ideas to the Top Ten List of requests, now open for submissions.
I hope to see you at the annual user event, 3DEXPERIENCE World, taking place in Nashville, Tenn., February 12-15, 2023. Check out the list of sessions and register here.
Until then, Happy New Year!