
Have you ever wondered what you would do to save yourself from the zombie apocalypse? I know I have. Do you get in a car and drive to the country, stay in your house or jump on a sail boat to wander the seas like the Flying Dutchman?? Actually I can rule the last one out as I can’t sail, so it’s either drive or stay. But what happens if the undead hoard are stumbling over the horizon on the day my car doesn’t start? I need a back-up plan; I need to be safe in my house, I need to know how much wood I need to board up my doors and windows. So let’s fire up SOLIDWORKS.
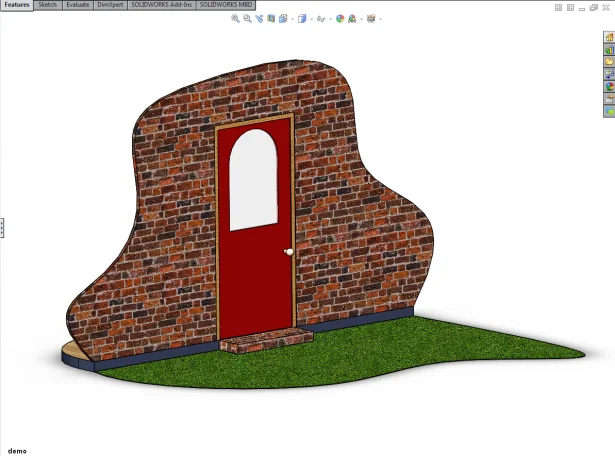
According to most of the zombie movies out there, no matter if we’re talking traditional Romero or the modern fast moving variety, the biggest problem the home owner faces is the doors being broken down, so let’s start with a typical exterior door with a glass panel.
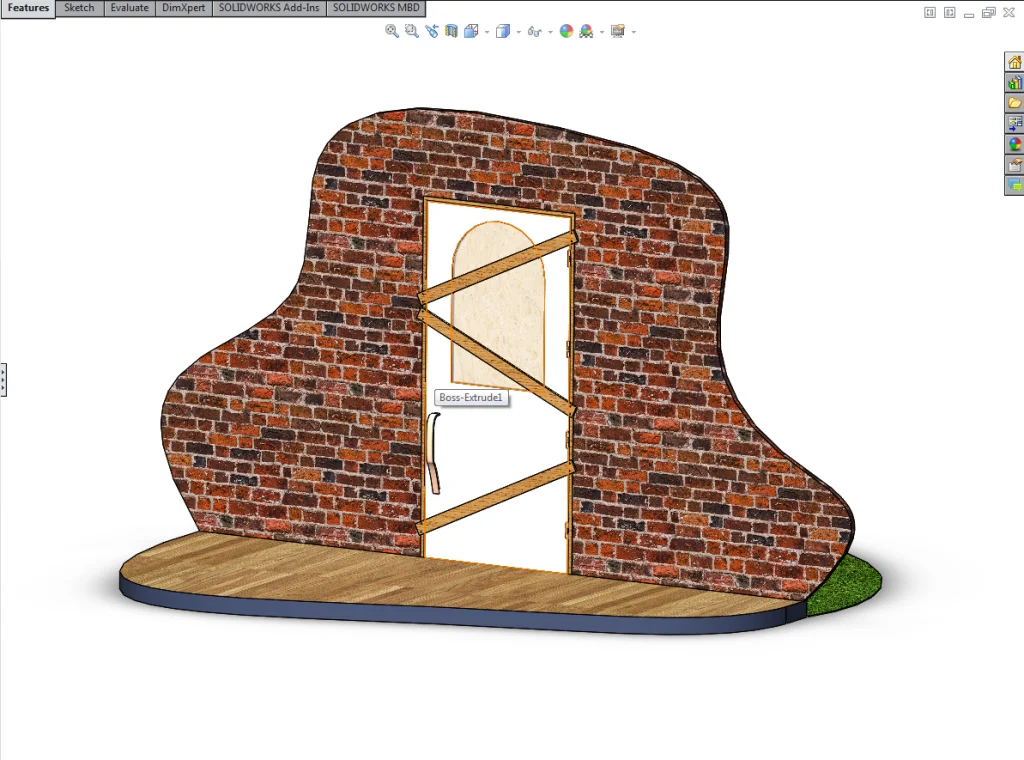
A few judicious additions of bits of wood and my first attempt as zombie proofing is done.


Now I don’t have nails inside of SOLIDWORKS Simulation so I will have to use bolts and set a failure load equivalent of the nail pull out force. Lastly I will need to apply the load on this door due to the mass of zombies pushing against the door. Now theoretically there should be a limit to this load because at some point the mass of zombies would crush the zombies at the front rather than increase the load. After quick scan of the internet I found information on crowd safety barriers and, assuming a healthy safety factor, I now have my zombie crush pressure. As all we are interested is the door we are going to ignore the wall, and assume the door frame is perfectly attached to the house walls. After adding contact between all the components we are ready to run the test.
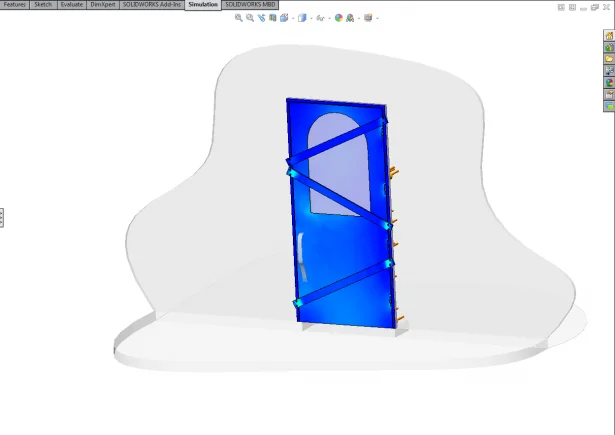
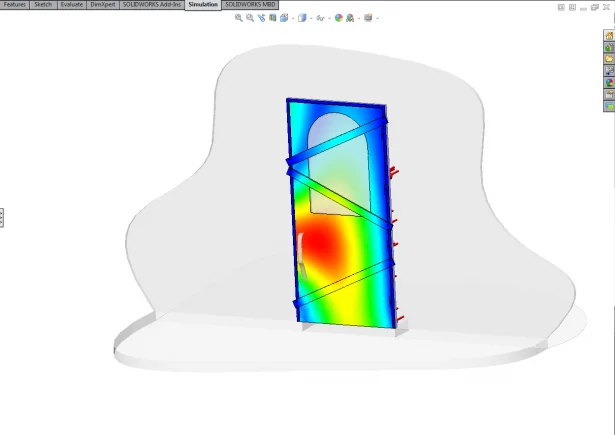
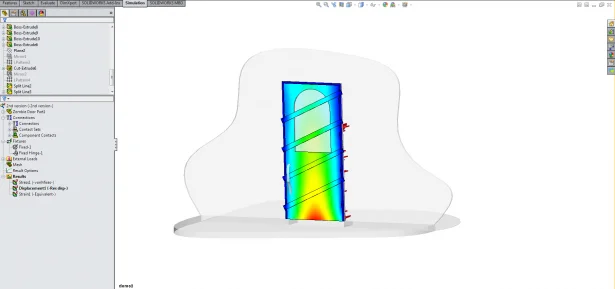
My initial calculations are looking promising with low stress (left hand image) but the door looks a bit flexible (right hand image)where the door lock would be. It’s time to increase the number of planks of wood, don’t you just love patterning!
With my new bracing I have reduced the door flex at the door latch, so it looks like four planks of wood is enough, but how many nails do we need? At the moment we have 4 per plank, but is that enough? It would be a shame to use enough planks of wood only to die for the want of a nail, (For want of a nail the shoe plank was lost.) As we set the nail pull out load as the bolt connector failure load we can use the bolt failure check plot to see if I have used enough nails. The pin bolt check plot is a very straight forward plot, red is bad, green is good, if the bolt is red then in the real world the nail would pull out. We cannot have any red!
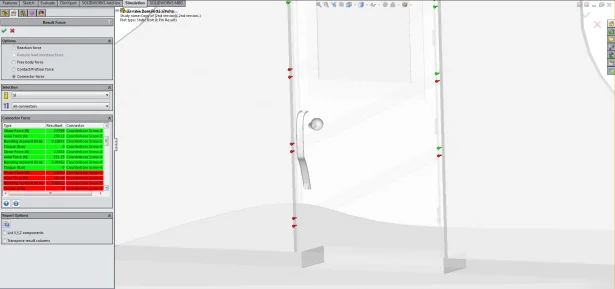
But unfortunately we have some red, which likely equals undead. Now we can’t say if the nail will pull all the way out, as it bends it might grip again but to be honest when faced by a horde of the undead who want to eat my brains I am not taking any chances. So it’s time for more and bigger nails. And after a quick update…
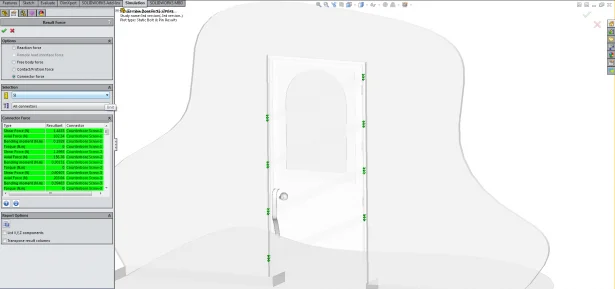
Success, the new analysis shows that I am now safe from the impeding zombie horde breaking down my door. So to my zombie home survival kit now reads
- Cider (beer for guest)
- Nachos & dip
- Hot wings
- Popcorn
- Chocolate
- Cricket bat (for close quarter self-defense) substitute with baseball bat in the USA and hockey stick in Canada, I’m sorry but if you’re French, you’ll have to make do a stale baguette!
- Box of strawberry Cornetto ice creams
- 4 planks of wood and 24 large nails per external door.
Next on the list is to zombie proof my windows and sliding doors!
So the next time you are facing an apocalypse (or even a design decision) use SOLIDWORKS Simulation to save the day, you know it makes sense.