

Every year, I try to highlight a holiday aspect of the SOLIDWORKS design platform (in 2019, I discussed 10 key modeling tips in SOLIDWORKS 2020). This year, I wanted to take advantage of the 3D Sculptor role on the 3DEXPERIENCE platform, and make a model of my most beloved childhood holiday character: the Rankin-Bass claymation version of Rudolph The Red-Nosed Reindeer.

A quick Google search gave me plenty of pictures to work from.
As with most things I create, I took a little artistic license in some of the details. A conscious decision was to make his head a little bigger, as well as his eyes – I thought it made him look cuter, and younger, which is what I was going for in this quick sculpt. This is what (images below) I came up with in the xShape app that’s part of the 3D Sculptor role. I took a couple of screenshots along the way so I could show a bit about how I put Rudolph together.
I started with a primitive Ball and re-shaped it into his head. A second Ball was simply scaled and translated into place for the nose. The rest of the pieces all started out as primitive Cylinders that were rotated, scaled, and then portions push-pulled into the shapes that I wanted.
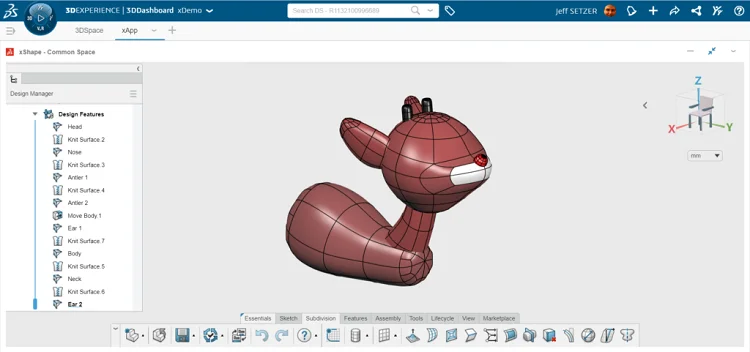
In xShape, you color the facets of a body. That made it easy to make Rudolph a proper white-tailed deer.
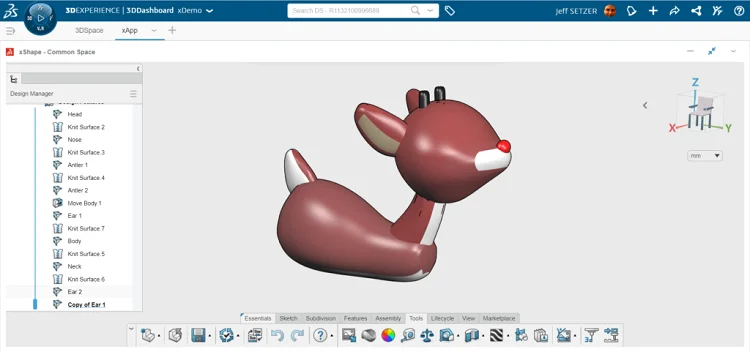
Then it came time for the legs. I made the back leg first, then copied it and re-sculpted it to make a front leg. When working with sub-divisional (Sub-D) modeling, you don’t really work with a modeling strategy like you do with traditional solid modeling; at least, I don’t. I think of a model piece, pick the closest primitive shape, and then just start pushing and pulling on it until I get the shape I feel I want. It’s much more artistic, and reminds me of working clay in art classes from so many years ago.

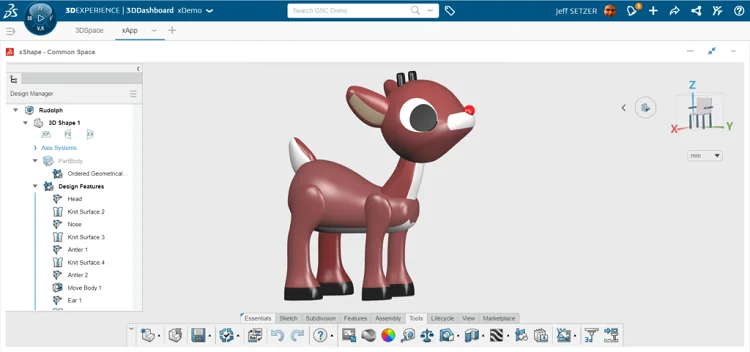
For the eyes, I started with a pair of disks, and then pulled them a bit to make them oblong. At this point, I thought I was pretty much done.
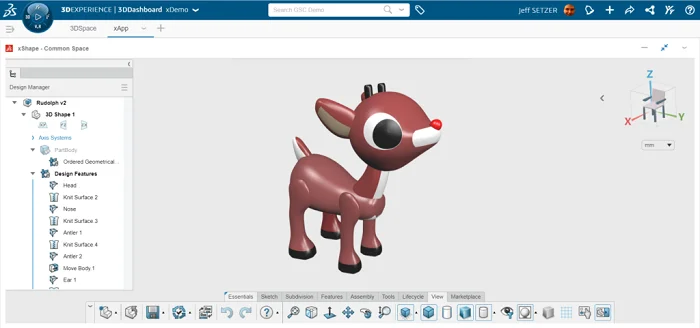
After a while, though, I thought to myself that the flat eyes could be better, so I came back to the model and pulled out their centers to give them some curvature. A little bit of tweaking their positions and angles let me get pretty close to the shape of the head, and I was satisfied with the look. It’s so easy to make tweaks to a Sub-D body that has no parametric or relational attachments – just like clay – you could come back to it over and over, but at some point you’ve got to call it done and walk away!
This was a really fun model to make in xShape, and it was a very different experience than my past holiday SOLIDWORKS models. If I were to recreate my SOLIDWORKS model of Santa’s sleigh on the 3DEXPERIENCE platform, xShape wouldn’t be the tool – but xDesign in the 3D Creator role would certainly be able to handle it. And that’s the point of the 3DEXPERIENCE platform: different tools for different needs. Perhaps you’ll see me use a mix of tools in next year’s blog – there’s a lot of cool things to model in the Rankin-Bass universe. And since the tools on the 3DEXPERIENCE platform are enhanced 4 times a year, who knows what cool new things we’ll be able to do a year from now?
I’ve naturally been sharing this with other people at GSC, but I also wanted to share the model with all of our customers, partners, and friends. So I saved out a 3DXML file and have shared it on my 3DDrive (another app that comes with the role). You can spin it around on any device; if you don’t already have a 3DS Passport, you will be able to create one for free so you can see Rudolph in all his three-dimensional glory.
What’s more, if you want to bring this into SOLIDWORKS, I have a SLDXML file for download. If you do bring this into SOLIDWORKS, you’ll want to select all of the bodies and rotate the whole thing 270 degrees around the x-axis to get him standing upright (the z-axis is up in the 3DEXPERIENCE platform apps).
Finally, if you or your kids want to play with Sub-D modeling on a “toyland” level, we have our free browser based SOLIDWORKS Apps For Kids. It’s a lot of fun.

This blog is authored by our Technology Evangelist, Jeff. Jeff loves showing customers new ways to use software and complementary tools to make their jobs easier. Jeff has been working with SOLIDWORKS since its first release in 1995 and he has been with GSC from the beginning! He is a Certified SOLIDWORKS Professional, a Certified SOLIDWORKS Support Technician, a Certified SOLIDWORKS Instructor, a Certified Simulation Support Technician, and a Microsoft Certified Professional.