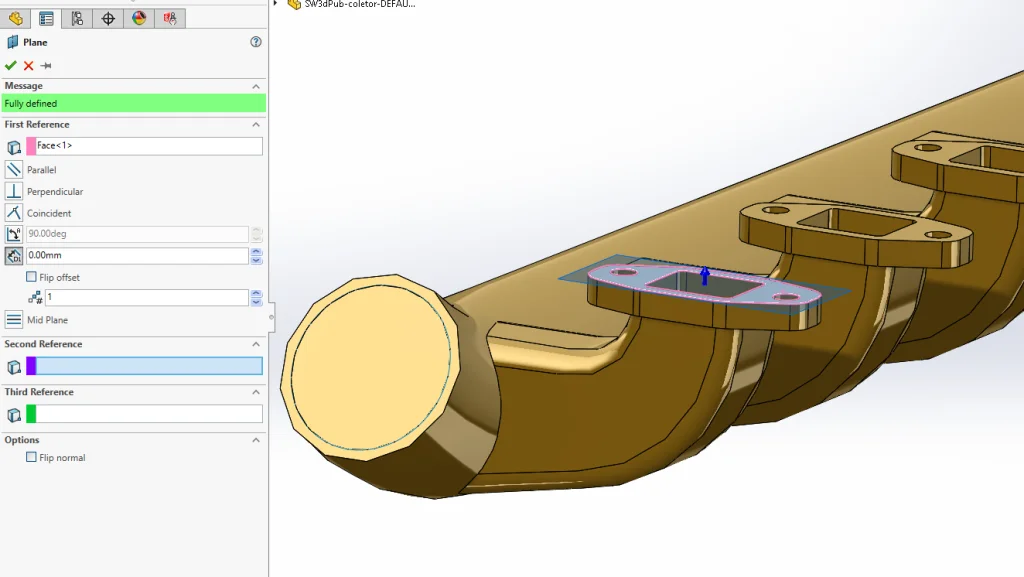
One of the key functionalities of the ‘Intersect’ command is to create geometry using an enclosed volume. This is a simple method for finding the internal volume of complex parts, the first step is to cap all inlets and outlets that lead to the internal volume:
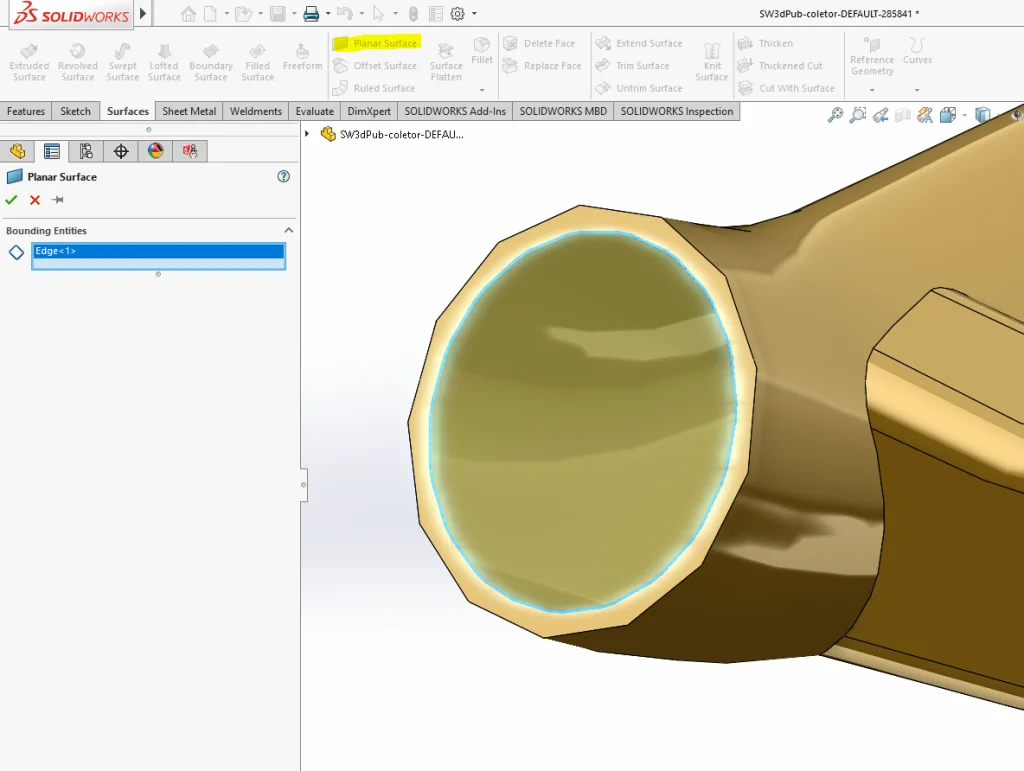
If your various inlets and outlets are planar, you can use the ‘planar surface’ command to cap that opening.
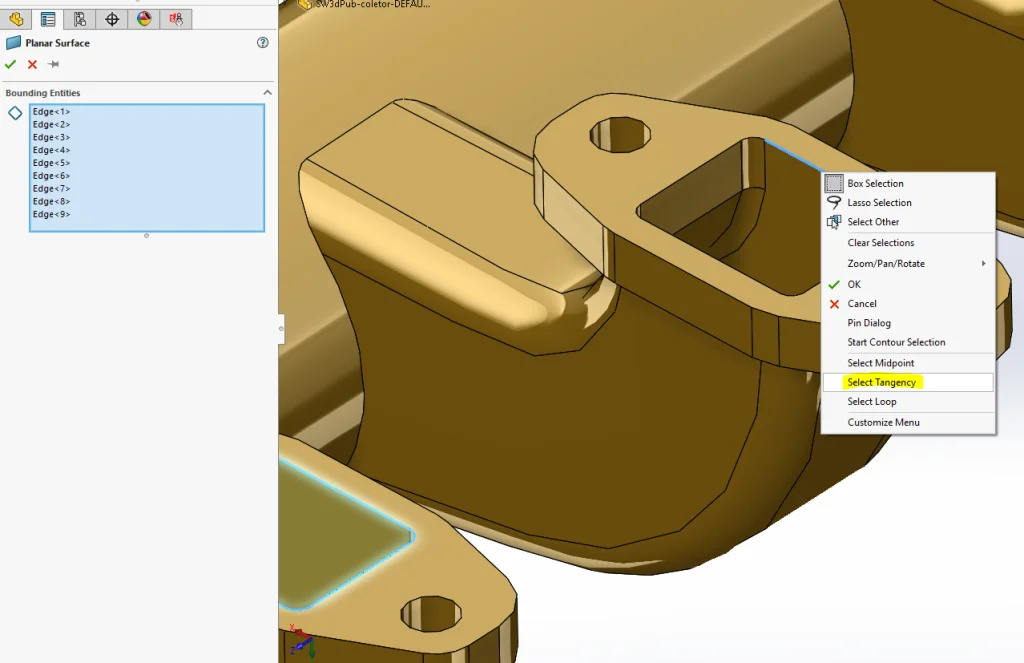
There can be multiple openings assigned to a single ‘planar surface’ command. Additionally, if you have an opening comprised of multiple tangent segments, you can right click one of those segments and ‘Select Tangency’ to add all of them to your selection at once.

If you have multiple openings that would share the same plane, you can create a reference geometry plane to cover all those openings rather than a separate surface for each one. Remember that a plane stretches infinitely in all directions which means it may possibly intersect your internal volume as well, this is why some openings it is better to use the planar surface command rather than a plane for every opening.
If your opening is not planar, then you can also use commands like ‘boundary surface’ or ‘lofted surface’ found in the Surfaces Command Manager to cap those openings.
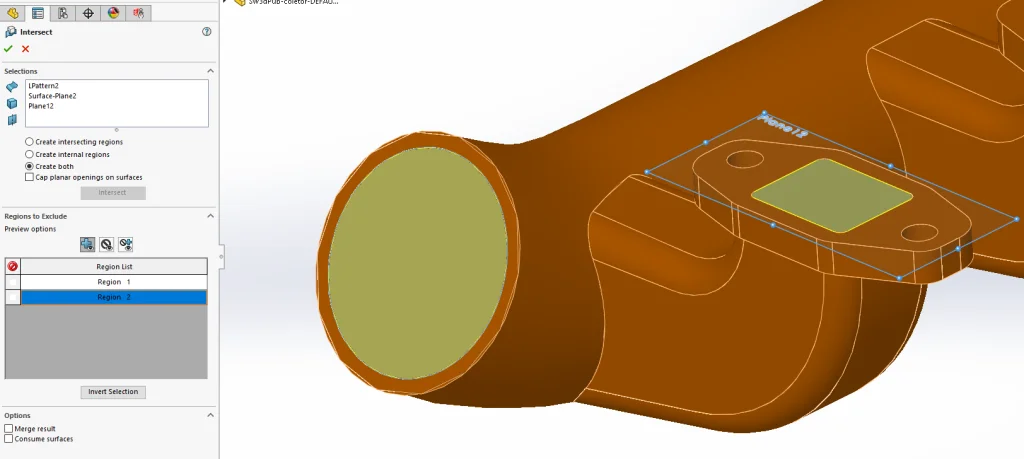
After capping all openings, use the intersect command found under ‘Insert’ > ‘Features’ > ‘Intersect’. Select all your surfaces used to cap the openings, as well as the part itself, and click ‘intersect’ for it to calculate the resulting solids. In the ‘Regions to Exclude’ section you can check the box for which bodies you want to get rid of.
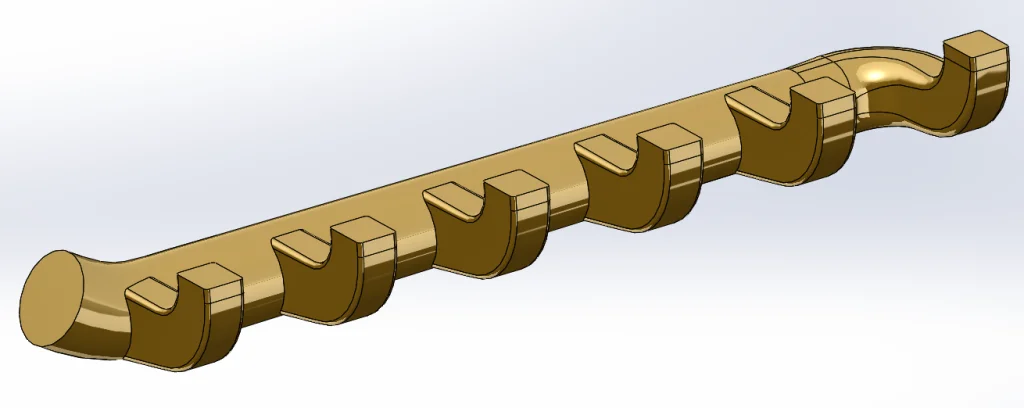
After selecting the green check mark, what is left is the solid body of the internal volume. The mass evaluation tool can now be used to determine the volume and weight.
Braden Leasure is a Support Engineer at Computer Aided Technology, a SOLIDWORKS Value Added Reseller with locations throughout the United States. He is a regular contributor to the Computer Aided Technology Blog.
