

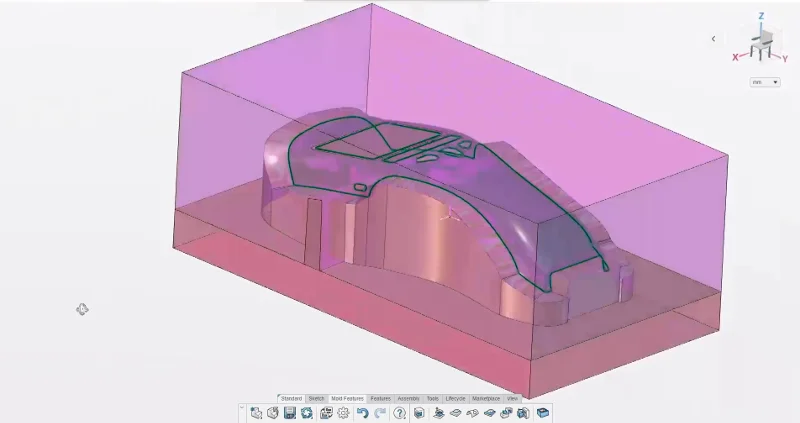
With 3D Mold Creator creating a core and cavity split has never been easier. 3D Mold Creator is a browser-based role that runs on the 3DEXPERIENCE platform for design of the mold core, cavity and inserts geometry, available in the 3DEXPERIENCE Works portfolio.
If you haven’t had a chance to check out 3D Mold Creator, you’re in luck. My buddy Rob Jost presented a session at this year’s 3DEXPERIENCE World annual user event, and it’s available on-demand.
Rob, an expert in SOLIDWORKS, is a Product Definition Senior Manager, who works in R&D at SOLIDWORKS with 20 years of experience in the SOLIDWORKS community. Currently he works with the browser-based apps, including 3D Mold Creator and 3D Sculptor. You may recognize him from his work on the SOLIDWORKS Magic Wheelchair project, where he designed a sleigh led by cats with a princess castle, designed in 3D Sculptor. Yes, you heard that right, cats on a sleigh. Check out the project here.

While that is a really cool project, today I want to focus on the automation tools in 3D Mold Creator and provide a recap of Rob’s presentation from 3DEXPERIENCE World, “Core and Cavity in the Cloud With 3D Mold Creator.”
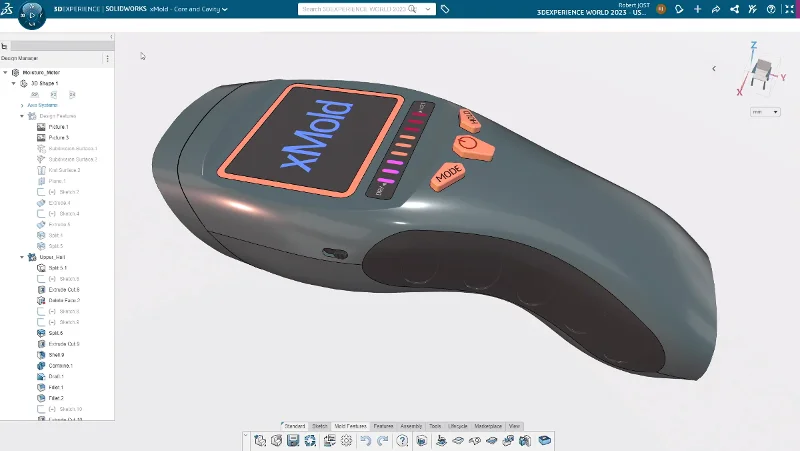
3D Mold Creator includes the xMold app that provides all the tools you need to create the core and cavity separation of a plastic-molded part, without all the headaches of getting your tooling split correct.
While you cannot create parts from scratch in 3D Mold Creator, you do have some basic design capabilities. For instance, you can draft a face or if the designer forgot a round you can easily fill in a corner if you need to. If you need to account for shrinkage, we’ve got you covered with scaling tools. It also has some assembly tools, in addition to import and export functionality.
You’re going to see a lot of things that are familiar to SOLIDWORKS Desktop. Take the Feature Manager Tree, for example. We call it the Design Manager in 3D Mold Creator, but it’s the same tree we all know and love, it is history-based, and all your features are there.
Many of you have used the mold tools in SOLIDWORKS Desktop, which has some good automation tools, which we’ve took even further in xMold with tools for:
- Parting Line Calculation
- Workflow Guidance
- Tooling Split Creation
- Assembly Creation
I want to walk you through some of these tools and steps for creating the cavity in core that Rob discusses in the presentation that you can catch at the end.
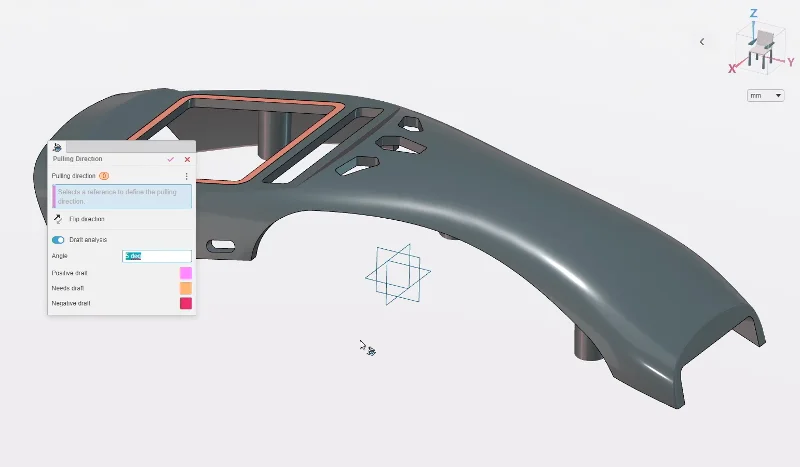
Pulling Direction
First thing you want to do is create the pulling direction to determine the way the mold is pulling from, which you can easily do using the Pulling Direction command. You can also perform a full draft analysis of your angles at this time, by enabling that option in the Pulling Direction dialog.
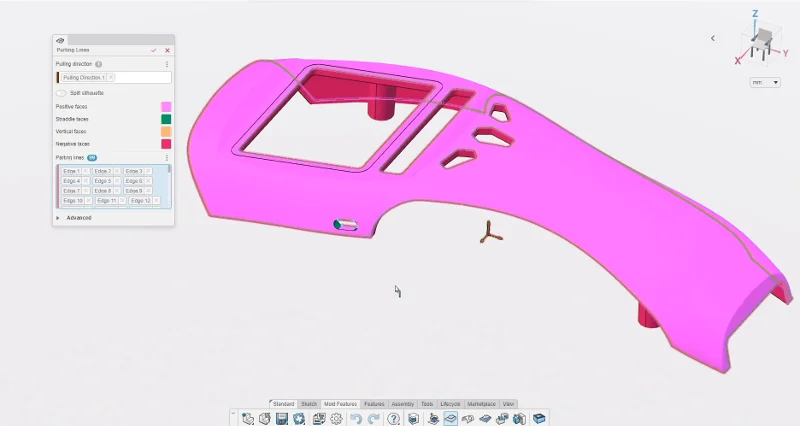
Parting Lines
The next step of the process is to create a parting line. This step requires you to input the pulling direction to calculate where the edges are and where the separation should occur. If you have only one, it will automatically pick that one for you. If you have multiple pulling directions, you can specify which one to use in the drop-down list.
Also, if you see any blue dots on any of your faces that means you may have an error in your parting line, which means you must have missed an edge, so look for the blue! If you come across that situation, you can easily choose “Remove open edge selections” and get rid of that selection and then you’ll need to come in and redefine it yourself. You will get an alert when the parting line is complete, and you will no longer see the blue dots.
There’s also a Split silhouette option that will split the faces for you.
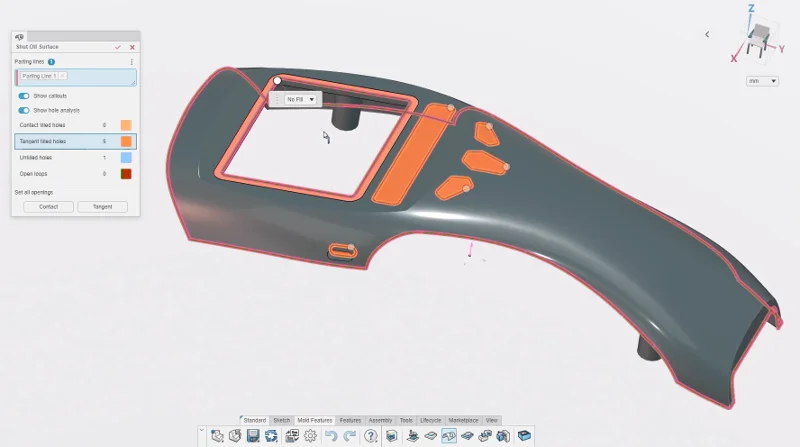
Shut Off Surface
When you hit okay in the Parting Lines command, you’ll get a pop-up for the Shut Off Surface command, which is signaling there are holes in the part (multiple parting lines) that you need to shut off to create the surfaces. At this time, you can get visual feedback on the holes in the part, whether they are tangent filled holes or unfilled holes. And you can control the continuity of the holes and determine if you need to do some surface modeling or have it automatically create the surfaces if it looks good to you.
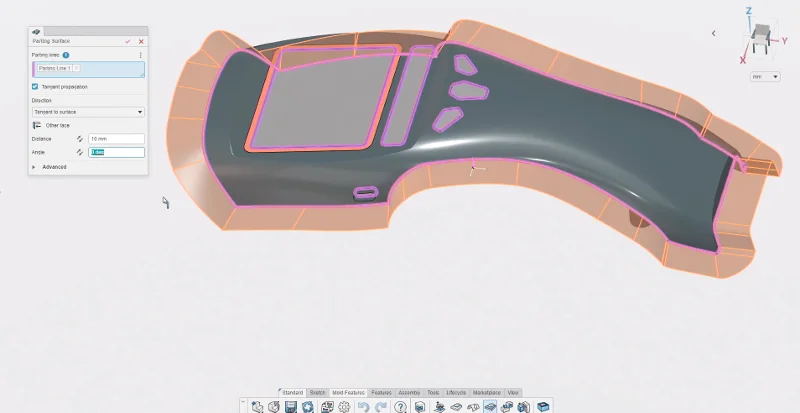
Parting Surface
The whole process relies and feeds on information of the previous step so again when you launch the Parting Surface command you will need to choose which parting line you are working on, if there are multiple, or it will choose it for you if there is only one. You also need to specify the pulling direction at this time, which includes options like Tangent to surface, Perpendicular to pulling direction, etc.
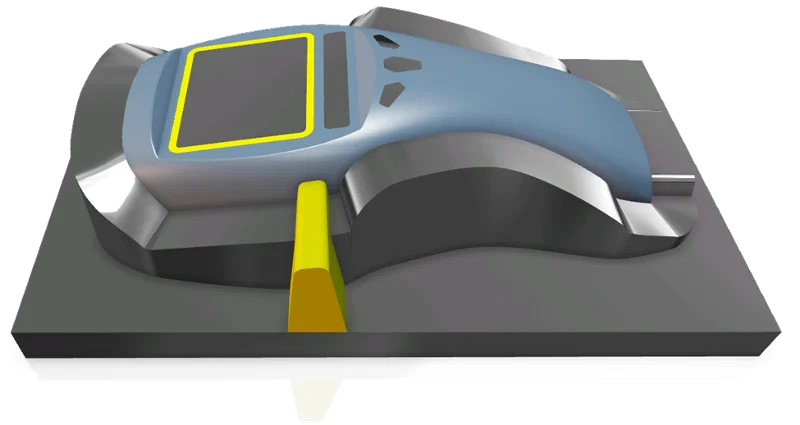
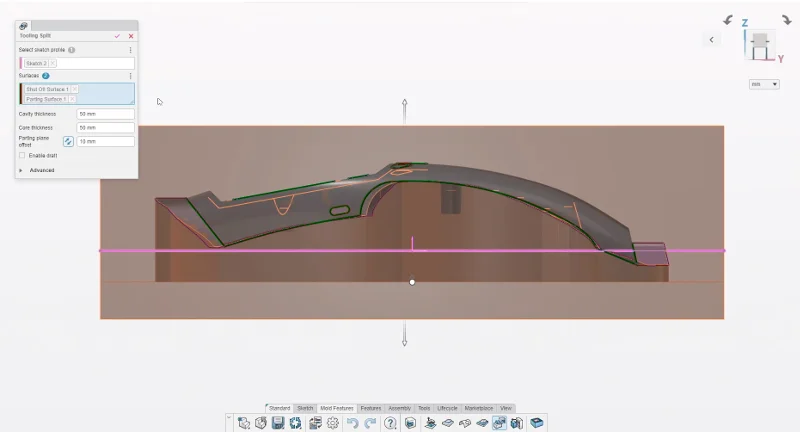
Tooling Split
The next step of process is to create a tooling split, and this is where you actually split the A and B parts of the mold. During the Tooling Split process, you do need to include a sketch and it just so happens that xMold and all of the xApps include the Sketch tool, so you can quickly create a sketch and complete the process. Once it has the sketch, it will gather the surfaces it needs and give you some default.
At this point you can thicken up your core or cavity by tweaking the values. There’s also a Parting plane offset where you can tweak that value as well. You can also add Draft during this phase and there are other advanced options.
Sharing Downstream
Once you’re done with your mold, it can easily be shared downstream with another designer or brought into another solution for further modifications. For instance, if it needs injector pins or other cuttings.
Just save the part and easily create a new part for sharing from 3D Mold Creator using the Create Assembly from Sets command. This feature automatically creates a new assembly and inserts all the bodies into that assembly to make up the mold. It’s made up of individual parts, rather than bodies within another part so you could hand off to someone else to create the mold base.
Or if you have 3DEXPERIENCE SOLIDWORKS, you can insert the bodies from your core and cavity and use the tools in there to hack away at your mold.
Also, if you want to stay within the xApps, such as 3D Creator, you can easily click the Switch app command to access the xDesign app from within 3D Mold Creator to use the parametric tools on your mold.
A few things that make 3D Mold Creator stand out from other mold design solutions not only does it have specialized tools for mold design, but it includes other tools for viewing and presenting data, brainstorming, managing data, and for collaboration.
3D Mold Creator really does have a lot to offer. I haven’t even touched on the analysis tools it includes, like Undercut Volume analysis. Stay tuned for my next blog in which I’ll cover the analysis tools and some other pointers.
In the meantime, you can catch Rob’s World presentation here on 3DSwym with a free 3DEXPERIENCE ID log-in. The automation features covered in this blog start about 20 minutes in, but the full presentation is full of tips and tricks you don’t want to miss!
To access more on-demand presentations from 3DEXPERIENCE World go here.
See my last blog for a glimpse of some my favorite features in 3D Mold Creator here.
If you want to expand your toolset to include 3D Creator and 3D Sculptor (for subdivision modeling) and more power tools, check out the SOLIDWORKS Cloud Offer.