Happy New Year! It’s that time when we start off the year with New Year’s resolutions. You know when we plan to mold ourselves into the best version of ourselves or get into shape or whatever.
And speaking of molding, one power tool that’s going to help you meet your goals (at work) is 3D Mold Creator, our browser-based role for the creation of mold core, cavity and inserts. Here at SOLIDWORKS we want to continue to help you be as productive as possible in the new year so I want to share with you my top five favorite features so that you can start taking advantage of them in the new year if you’re not already.
The latest iteration of 3D Mold Creator features a number of tools and enhancements that automate tasks and speed up your component and assembly designs.
Here are my top five features:
- Create Assembly from Sets – speed up your mold component and assembly designs.
The Create Assembly from Sets command in the Assembly toolbar enables you to create an entire mold assembly from sets. You can also customize the mold assembly and component names as well as select the Collaborative Space you want to save it in from the Create Assembly from Sets toolbox.
I think you’ll find It really comes in handy when making assembly and mold components, such as core, cavity and side actions.

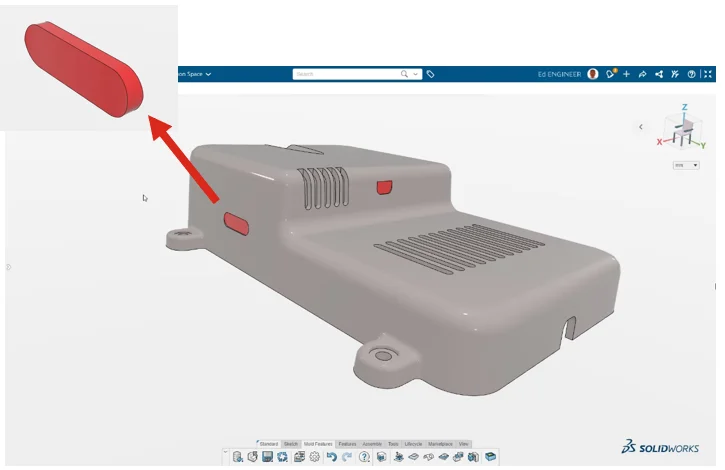
- Visualize Material Volume Trapped by Undercuts – validate manufacturability faster and more accurately.
The latest enhancement for undercut analysis enables you to detect the volume of material that would be trapped by an undercut. Simply define the pull direction for the mold and all undercut volumes will be created automatically.
This enables you to easily validate manufacturability of plastic and cast part designs faster and more accurately.
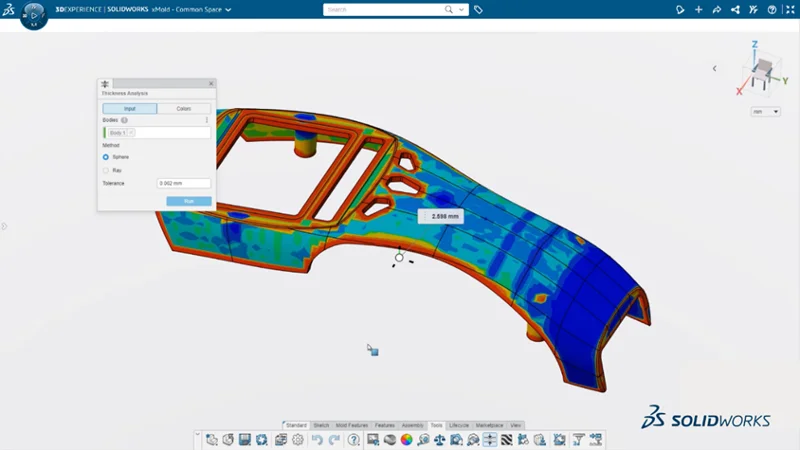
- Perform Thickness Analysis – ensure parts are the proper thickness and prevent sink marks.
For plastic parts you typically want a consistent material thickness, because a plastic part that is too thick will shrink and create a divot as the part cools down during manufacturing. The new Thickness Check tool lets you perform two methods of analysis to prevent these kinds of issues: 1) the rolling ball method, called Sphere, or 2) normal distance between faces check, called Ray.
Prevent sink marks, evaluate structural design integrity, and validate a part’s capacity to fill properly with this new tool. Also, you can manually check thicknesses at specific locations by clicking on an area. Color coding enables you to easily see areas of the model that are too thick or thin.
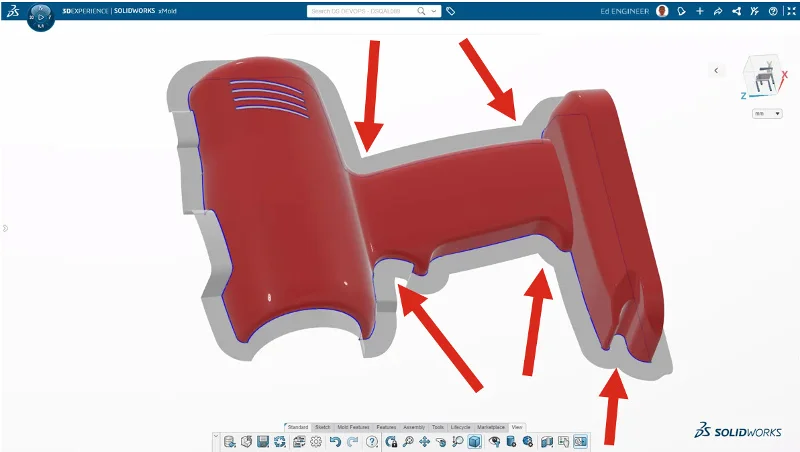
- Parting Surface Automatic Merge of Inside Corners– save time with better handling of self-intersections.
Handle inside corners more easily when creating a parting surface for your mold designs with self-intersections that automatically merge to create a smoother, more continuous surface.
This enhancement not only speeds up parting surface creation but makes your molds easier to manufacture. The manufacturing team will thank you!
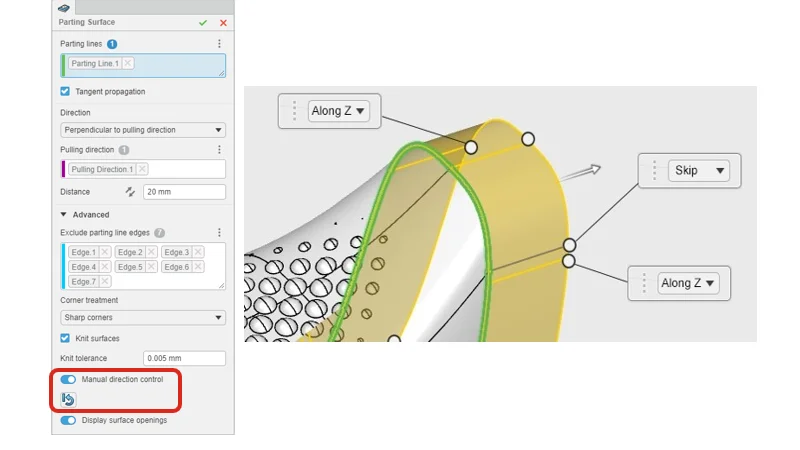
- Parting Surface Extension Direction Control – save time with less manual work on parting surfaces.
My number-one favorite feature is the ability to use the new “Manual direction control” option, giving you more control than ever of your parting surfaces. You can use it to control the parting surface extension direction relative to a coordinate system or smooth rough areas in your parting surface by automatically blending between adjacent faces. Plus, you can control parting surface extension direction relative to model geometry such as planes and sketch curves.
This option adds an extra level of control, enabling you to override the alignment for any seam edge along a parting surface or when you get undesired results, such as intersecting or unmachinable parts.
The end result is faster creation of the final part surface with less manual surface work, and molds that are better quality and easier to machine.
That sums up my top five features. Let’s not forget 3D Mold Creator runs on the cloud-based 3DEXPERIENCE platform, giving you built-in data management capabilities that I hope you are also taking advantage of.
While 3D Mold Creator has you covered in the mold department, you’re on your own with your resolutions. However, I wish you the best in both areas. Happy New Year, and happy molding!
What are your favorite capabilities or tips? Share your insight in the Comment section. And tell us what else you’d like to see in future releases of select software, such as 3DEXPERIENCE SOLIDWORKS or 3D Creator by submitting your ideas to the Top Ten List of requests, now open for submissions.
Learn more about 3D Mold Creator at www.solidworks.com/product/3d-mold-creator. And look out for sessions on 3DEXPERIENCE Works browser-based roles at the upcoming 3DEXPERIENCE World, annual user event, taking place in Nashville, TN, February 12-15, 2023. Check out the list of sessions and register here.