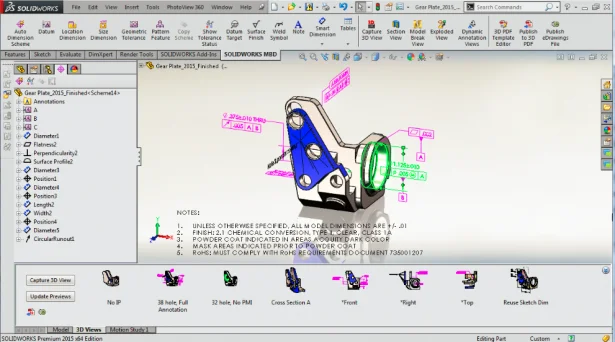
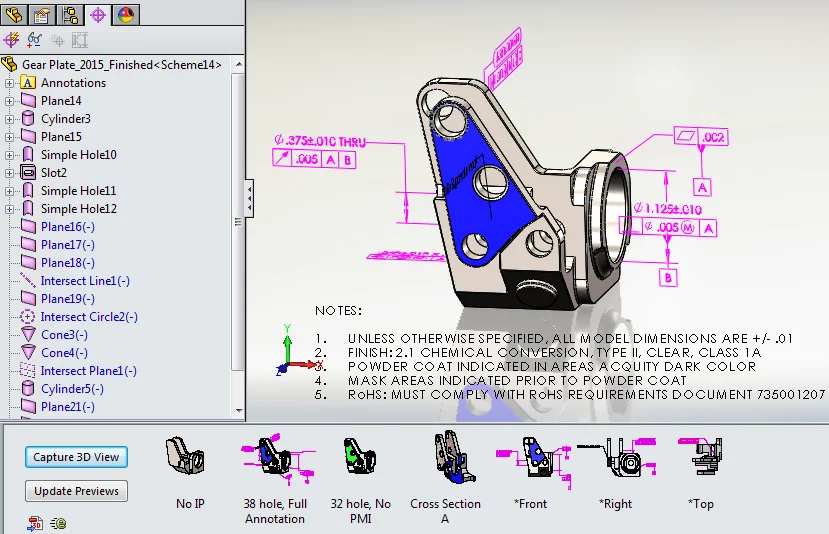
Many of us are using DimXpert today to define products in 3D space, instead of 2D drawings, to reduce the number of documents to manage, leverage the intuitiveness of 3D, and avoid problems with 2D drawings. One of the common challenges, however, is to organize all the 3D dimensions, tolerances, surface finishes and so on in a clean and structured way. Otherwise, a fully annotated 3D model could look like a messy fur ball.

3D Views with SOLIDWORKS MBD 2015 will come handy to clean it up. It’s like the traditional drawings views in 2D detailing, except that it’s in 3D. In the Beta program, many engineers picked it as a favorite:
“3D Views look very useful. I will use this a lot when highlighting and capturing parts of the model for design changes from review meetings.”
“3D Views allow user to create the first view as an ITAR statement, which puts SOLIDWORKS in compliance with MIL-STD-31000A.”
Now let’s find out why it’s so useful:
- First 3D Views are comprehensive, capturing not only model position, orientation, zoom scale, but also view settings such as cross sections and exploded views; not only annotation views, but also configurations and display states. Now just imagine this function like a camera taking pictures for a baby laughing or crying, crawling or sleeping, dressed in green or blue… 3D Views cover them all. By the way, we engineers and designers do cherish our designs like a baby, don’t we?
- That being said, of course, 3D Views are visual. In the image below, we can see a list of views created with the model, dimensions, tolerances, notes and so on. Just at a glance, we can tell right away which view is which, just like photos. Furthermore, move the mouse cursor over and the tool tip will tell us which configuration, display state, and annotation views have been remembered. So the visual snapshot conveys not only graphical displays, but also the rich information included inside.
- Powered by the comprehensive and visual representation, 3D Views offer very flexible ways to use. Let’s look at several examples:
- Most traditionally, we can illustrate multiple perspectives with them: Front, Top, Right…
- Or more interestingly, as mentioned in the Beta feedback above, it can help design changes and reviews like a graphical note pad.
- Or we can create a set of 3D Views for different job functions: Engineering with design dimensions, Manufacturing with tolerances and technical notes, QA with inspection dimensions, Purchasing with Bill of Materials (BOM), or even suppliers with a De-featured model to protect your IP.

All 3D Views created in SOLIDWORKS are integrated with eDrawings and 3D PDF as well. You can show certain 3D Views in eDrawings or select which 3D Views to include into 3D PDF so that your perspectives, intentions, use cases, and controls can be respected and reflected in light viewable for your collaborators.
How would you like to use 3D Views? Let us know by leaving a comment.
If you would like to learn more about SOLIDWORKS 2015, you can fill out the information below to have a SOLIDWORKS employee contact you.

