
Read the Entire Series: (Part One: The Basics, Part Two: Appearances, Part 3: Scenes, Part 4: Lighting)
Different Types of Lights
There are several different types of lights that can be utilized in SolidWorks. The lights are housed in the DisplayManager on the Scene, Lights, and Camera tab. There should be a folder called Lights. There is always an ambient light, and only one. This cannot be deleted. It simulates real world light, and the brightness level. All the lights present in your model will be listed in this folder.
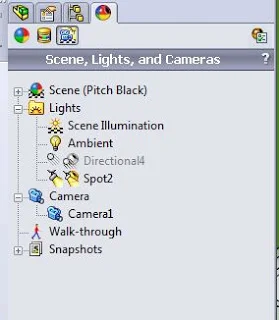
Next to directional, point, and spot lights, there are two icons. If the first one is yellow, it is on in SolidWorks; if the second icon is yellow, the light is also on in Photoview 360 renders. If the icons are gray, then neither one is on.
To add a light, right-click the Lights folder and click Add __ Light. To adjust a light, right-click the light and click Edit Light. You can also choose to show the lights in the SolidWorks window, (Right-click >Show Lights)
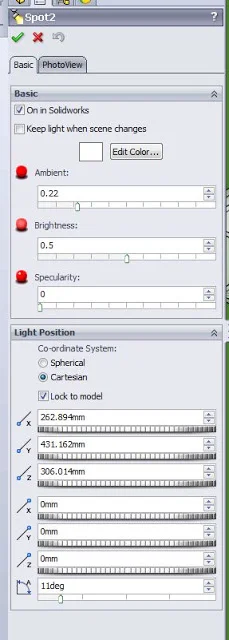
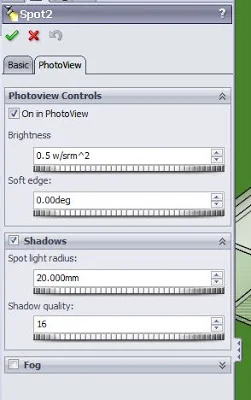
As a light is added, the Property Manager has two tabs: one for SolidWorks and one for PhotoView. On the basic tab, you can change the color of the light, select the ambient, brightness, and specularity, and the light position. On the PhotoView tab, you can turn the light on in PhotoView, adjust the brightness in PhotoView, and also add shadows and/or fog to the light. Depending on the type of light, there are more or fewer controls. For the spot light, there is control over the funnel angle, and also in PhotoView the softness of the edge. Fog cannot be added to directional lights.
Below is a description of the types of lights:
- Ambient Light – simulates real world light from all directions. It is brightness control for the entire scene. There is only one ambient light and it cannot be deleted.
- Directional Lights – a light source that is infinitely far from the model, with rays in a single direction, and the center points directly to the center of the model.
- Spot Lights – a restricted light with a cone shaped beam that can be aimed at a particular area of the model. The position, distance from the model, and cone angle can be adjusted.
- Point Lights – a very small light source with light emitted in all directions, much like a light bulb.
(Study Source: Photoview 360 Step by Step Guide)
Scene Illumination is a tab in the Edit Scene box. It has three controls:
- Overall Brightness of the scene
- Rendering brightness
- How reflective the scene is from the HDRI environment
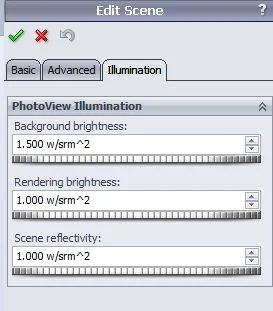
These tabs enable the user to control the brightness of the scene.
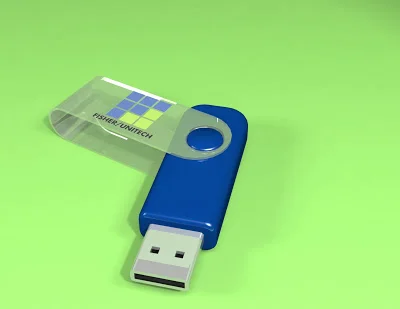
For our USB model, we will add a spot light focused on the center of the model from overhead.
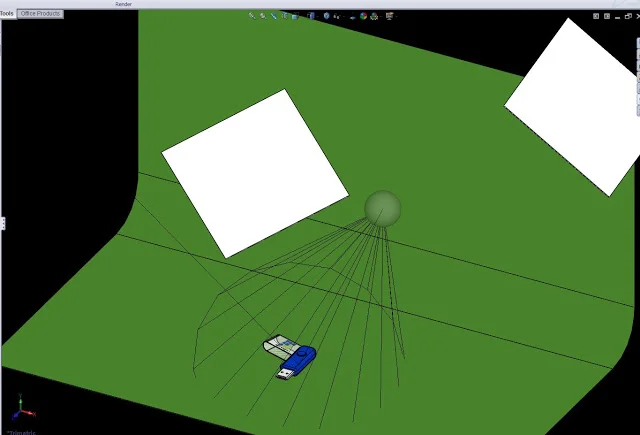
The render with the spot light added looks like this:
The next snapshot will cover cameras and different viewpoints.
***
Katie Huffman is a Customer Support Engineer at Fisher/Unitech, a SolidWorks Value Added Reseller with locations across the Midwestern and Northeastern United States. She is a regular contributor to the Fisher/Unitech blog.
Want to try out SolidWorks? You can request a free SolidWorks trial on our website.
Want to see how SolidWorks can help you win new business and get to market faster? Request a SolidWorks demo today.