
One of the SolidWorks tools that I think gets overlooked for the unlimited number of possible uses is the Indent feature. Below are 3 different examples of how I have found that the tool can be used on an everyday basis to help speed up what could take hours of modeling otherwise.
Packaging
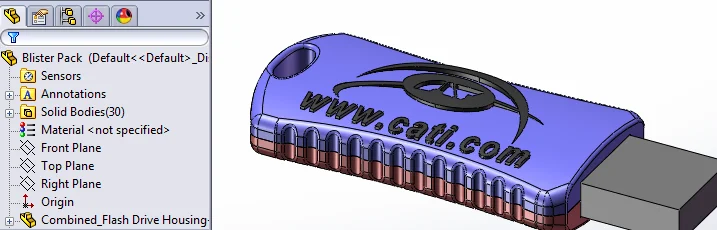
Taking a product that you have designed or a customer part and creating a blister pack for that part is something that can be frustrating if you are trying to use tools such as Offset Surface and making sure that you have selected every single face only to find that you missed something along the way or even worse when a change to the model happens and what should be a 5 min fix can take you half the day to create the new package.
For this example we:
1. Took an Assembly and saved it as a Part file, then inserted it into a new Part file.
2. Added the necessary features to simplify the overall shape and make sure there were no under cuts or negative draft.
3. Next we added a Planar Surface that matched the size of the package we wanted to create.
4. Indent was used to “wrap” the surface around our part, note you can add a clearance around the part if needed.
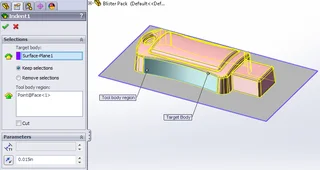
5. Our last step was to add a thickness to our surface.
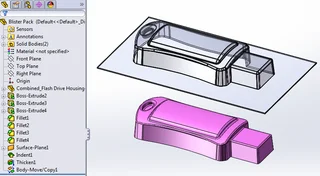
Note: Move Copy Body was used to move the parts away from each other for illustration purposes.
Fitting parts to parts
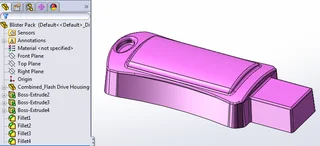
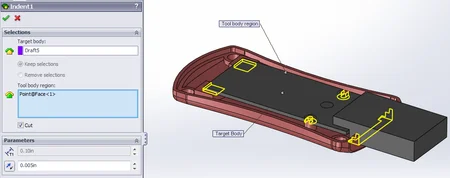
For this example we created our housing based upon purchased PCB which we inserted as a Part into our Housing Part and to create an exact fit for our PCB we extruded several mounting bosses up through our PCB. We then use the Indent tool with the Cut option turned on to remove the material where the Housing and PCB “interfere”.
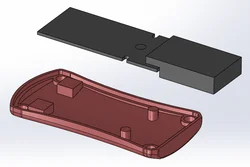
Indent Faces have been colored in yellow for illustration purposes.
Tooling Fixtures and Assembly Fixtures
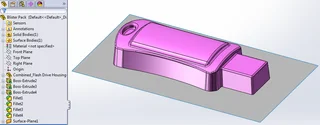
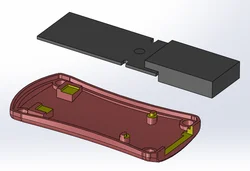
Similar to our first example we inserted a Part into a Part and added the necessary features for clearance and proper fit into our tooling block. We then built our tooling block and used the Indent feature once again using the Cut option to remove material from our tooling block. Lastly we finished up by adding some holes for screws and a slot for the flash drives to be easily removed from the tool.
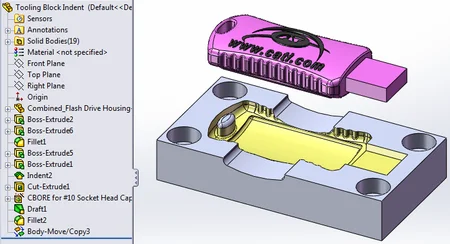
Indent Faces have been colored in yellow for illustration purposes.
For a copy of all files used for this article, please download the attached file.
Download Indent_Example_Files_4-18-12
Thanks for reading,
Josh Altergott, Support Manager
***
Josh Altergott is Support Manager at Computer Aided Technology, a SolidWorks Value Added Reseller with locations in Kentucky, Missouri, Kansas, Indiana, Wisconsin and Illinois. He is a regular contributor to the CATI Tech Notes blog.