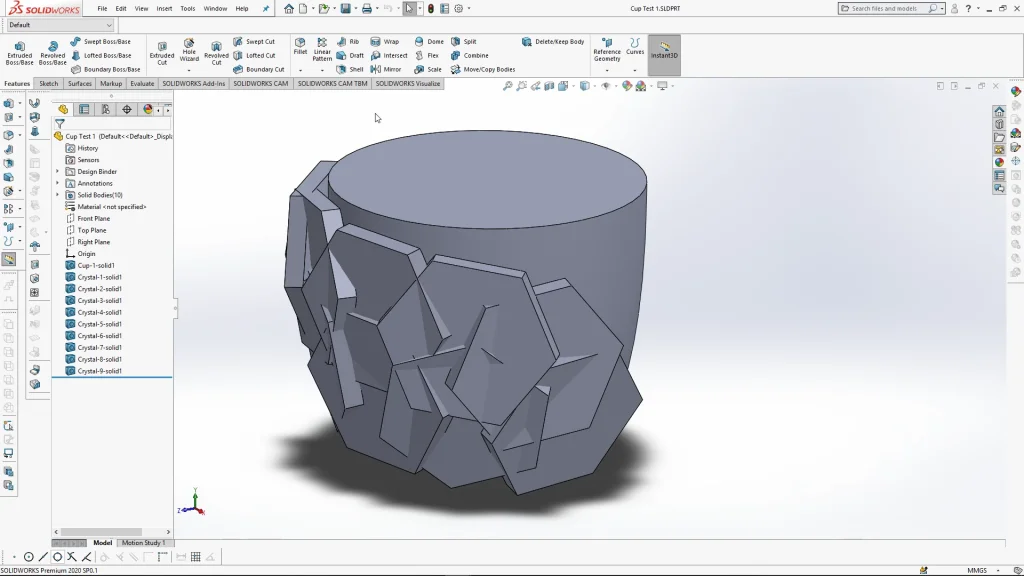
This SOLIDWORKS Tutorial for a Insulated ceramic coffee cup focuses on the use combine tool, during the tutorial you will follow and create a cup template and a crystal part to use within an assembly. Using an assembly multiples of the crystal part are pushed into the cup in a pattern, the assembly is then saved as a part. Opening the part up, the combine tool is used to cut away the crystal bodies to reveal a pattern that is both part of the visual design, but also how the cup is held.
The tutorial demonstrates how to add a new plane center to the cup and revolve cut out a cavity for liquid to go, and the base of the cup is shelled out as a cast cup would be. The final cup is then filled using revolve, and the amount of liquid that can fit into the cup is assessed using mass properties, and converting the volume of the cup from cubic millimeters to fluid ounces. Real image decals are applied to the top of the liquid body in the cup to create a realistic rendering in SOLIDWORKS Visualize.

Decals for the tutorial are available to DOWNLOAD HERE. You can use several different coffee top decals to create a range of finishes for your coffee cup.