
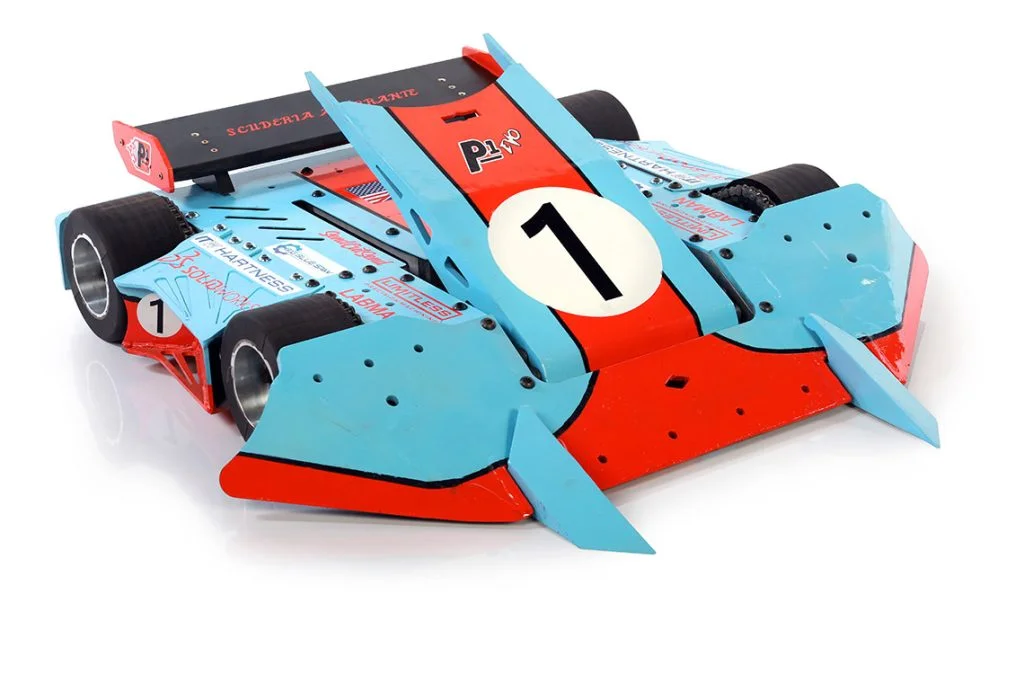
My name is Brandon Zalinsky and I am the Captain and Manager of Aberrant Robotics, LLC, a New Hampshire company that builds combat robots. I have been building fighting robots since 2015 and competing on the Discovery Channel TV show BattleBots since 2019. My team at Aberrant Robotics has built three robots that have participated BattleBots, the most recent being the bot “P1 Evo” for the 2020 season, designed entirely in SOLIDWORKS and rendered in SOLIDWORKS Visualize.
Since we have been competing on BattleBots for a while now, there are quite a few lessons we have taken to heart from our experience. Chief among them, though, is to solve every possible problem we can at the design and CAD stage. It is critical to think of how we are going to put every single bolt and screw into our design, and how we’re going to weld every seam. Some aspects of the design we would just “wing it,” which never paid off, and we learned our lesson from that experience.
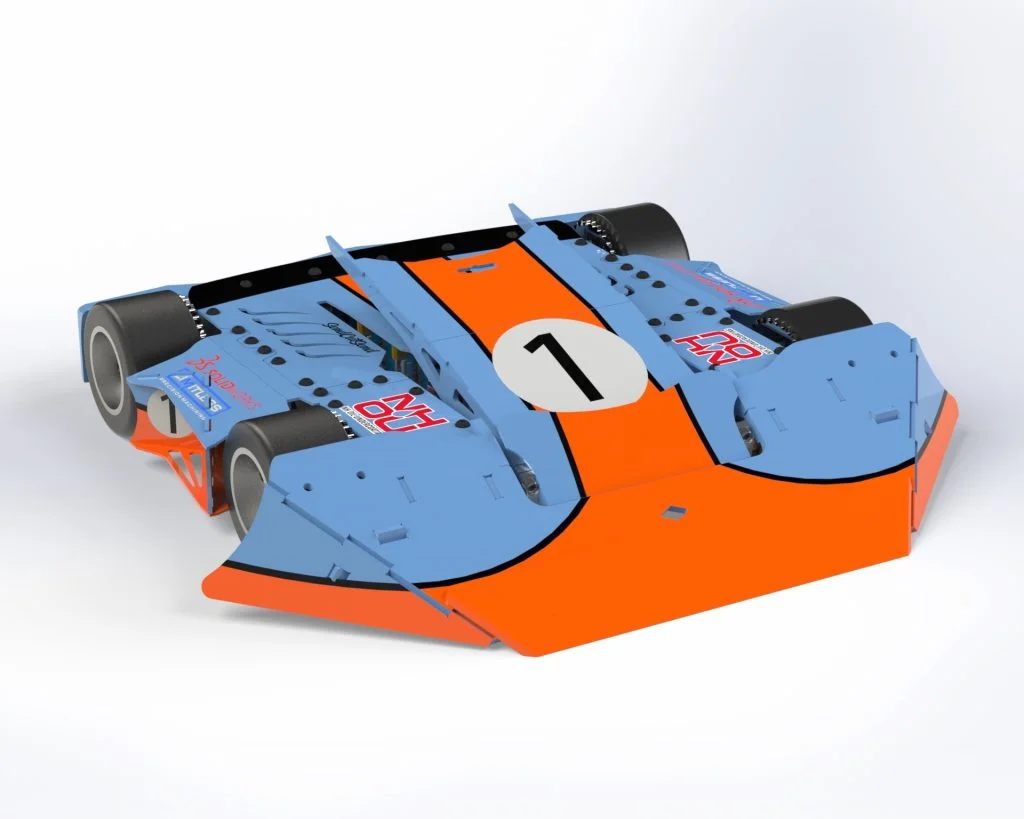
With this foresight, we eliminated hours of headaches down the road in the building and assembly stages. A result of this approach is that we have highly accurate SOLIDWORKS CAD models of the robot in every possible configuration. This foresight also means that we have the first step toward an intermediate product that is not only useful in helping other people see what your final product will look like, but is also helpful in getting accepted to BattleBots. This intermediate product is accurate design renders.
I am a mechanical engineer by trade and have always been at home in parametric CAD systems. I don’t have a good eye for art or composition, and as such, rendering software always scared me a bit. The software’s strange menageries of lighting effects, positioning, and background options created a confusing and impenetrable challenge that I’d typically just pass off to someone else with more experience. As such, I approached SOLIDWORKS Visualize with trepidation. Would this just be another software I learn for a few dozen hours and then just forgot?
My first few hours slowly alleviated my worries. Adding and manipulating models, lights, and appearances were simple and easy. Anything that could not be figured out intuitively was just a few clicks away in an online tutorial. After learning the software for a while, I was ready to create our renders for our BattleBots submission.
The first step was to prep the SOLIDWORKS model itself for rendering. I added thin features to the surfaces of the robot’s armor that made up stripes and large patterns in the paint scheme. This allowed me to parametrically define the curves of the livery. Once this was done, I chose which configuration to display the robot in, unsuppressed all the hardware, and hid all components I did not want shown in the render. I then saved and booted up SOLIDWORKS Visualize.
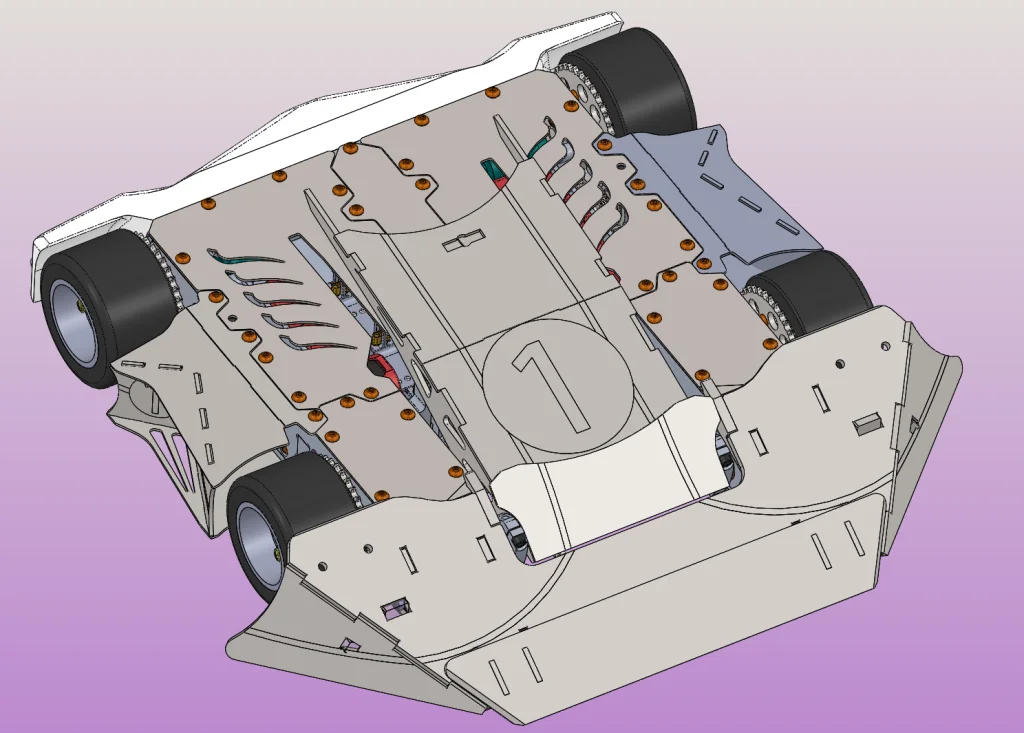
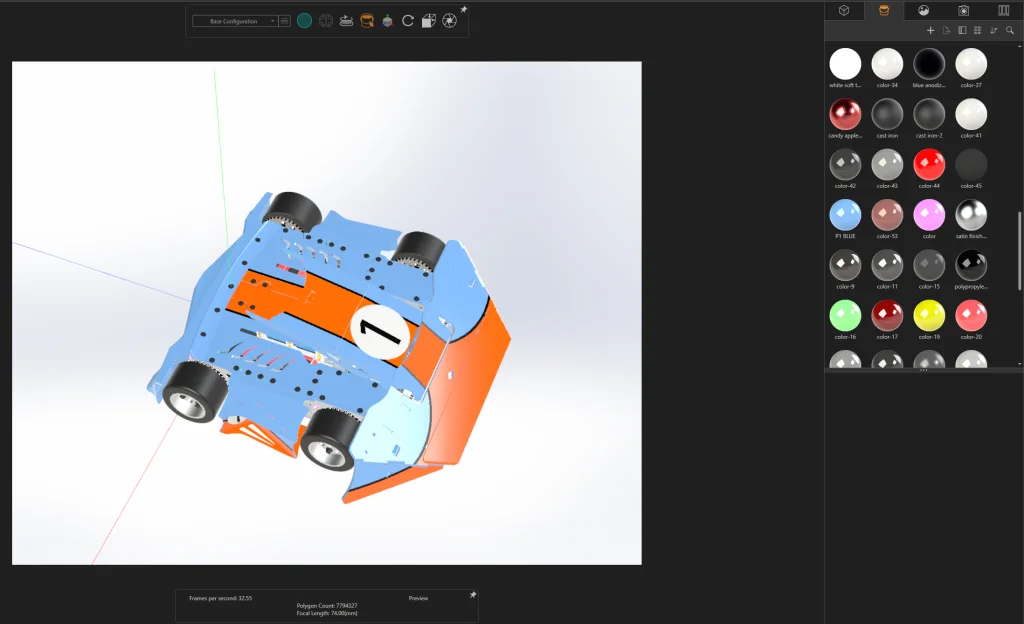
Once in Visualize, I imported the model and used the Manipulate tool to place the robot exactly where I wanted it in the scene. The next step was to make the robot look photorealistic by defining all the appearances of the surfaces correctly. I set up paint colors using our team color palette and started simply dragging and dropping them onto parts. For parts that had stripes that I had added In SOLIDWORKS CAD, the “Split Part” tool was absolutely crucial in allowing those stripes to be a different color. Three or four clicks and the part was now multicolored.
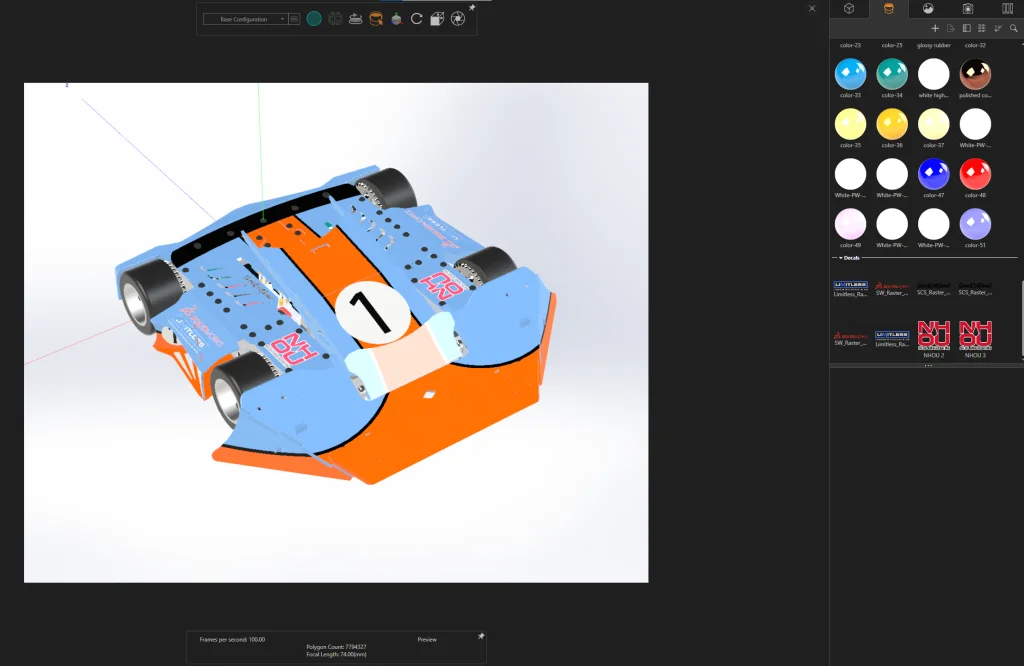
With appearances all set, decals can be placed. For us, these are the sponsors who help support the team so integrating them in our promotional materials is crucial. With a quick choice of “Add Decal” in the Appearances tab, transparent-background sponsor decals were quickly added to the model.
The last thing to choose was the scene. For this render, I just required a clean white background, but there are plenty of built-in scenes and backplates that are great for any application. In addition, there is plenty of the aforementioned available online if you need a specific scene to be represented.
The last task was lighting. The backplate I had chosen had a useable default lighting setup, but I wanted some more backlight to illuminate the model. This was a simple operation that involved locating two points in space that indicated the location of the light and the direction. Once this was done, I could just tweak minor settings with the lighting object to get the exact effect I wanted.
The render tool itself was also fast and easy, and did not require setting up of complex camera angles. It can be set simply to be the location of the viewport, and can save new default settings, so making a new render can be a two-click process.
With this done, I have high-quality renders ready to send off to BattleBots! These are also invaluable for team promotional material, often looking nearly indistinguishable from the real thing, and can be easily edited in image manipulation software to add to banners, shirts, brochures, and other products.
To learn more about BattleBots Team one and Aberrant Robotics, try these links: