SolidWorks Santa Greeting Cards Tutorial – Beginner Level


Feeling creative this Christmas? How about establishing your status as a 3D modeller by sending your friends a Santa that you made using Dassault Systemes SolidWorks in a greeting card?
All you have to do is follow this easy step-by-step tutorial:
1) Open a new SolidWorks Document and select “Part”
2) Select the Sketch tab and choose Top Plane on the left column
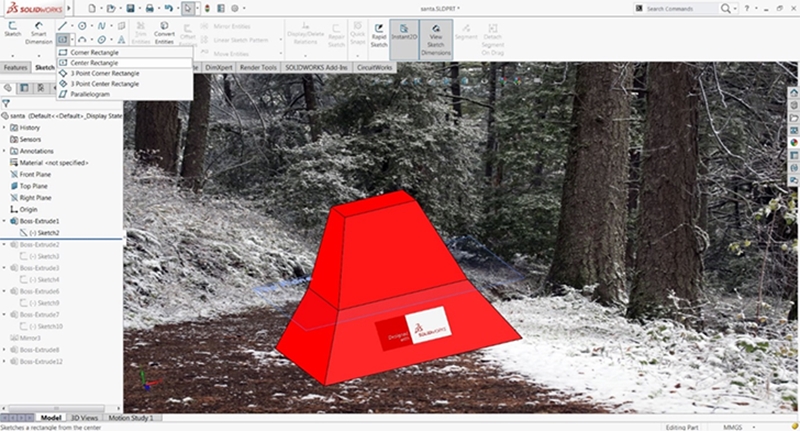
3) Click on the Rectangle tool on the top control panel to draw a simple rectangle shape
4) Select the Features tab and click on Extruded Boss/Base on the top control panel
5) Using the Blind option for Direction 1 and Direction 2 in the Boss-Extrude left column menu, adjust the length and angle for each direction to your desired Santa body shape (example shown below) and click the green click to accept the shape.
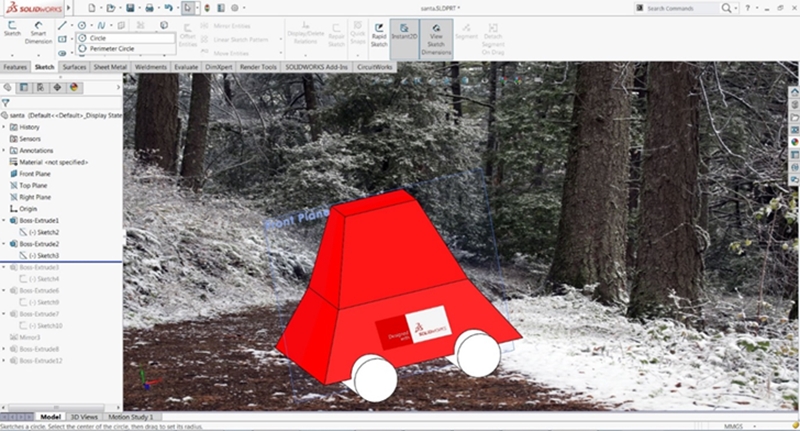
6) Select the Sketch tab and choose Front Plane on the left column
7) Using the Circle tool instead, repeat steps 3 – 5 to draw two legs for Santa (example shown below)
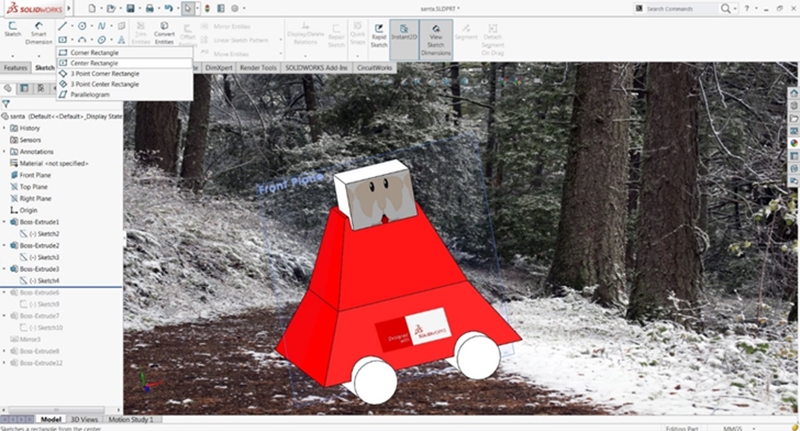
8) Select the Sketch tab and choose Front Plane on the left column
9) Using the Rectangle tool again, repeat steps 3 – 5 to draw Santa’s head (example shown below)
10) Select the Sketch tab and choose Front Plane on the left column
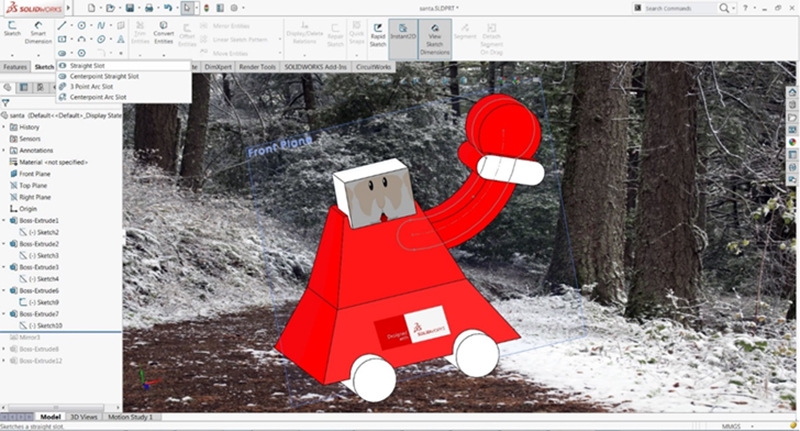
11) Using the 3 Point Arc Slot tool this time, repeat steps 3 – 5 to draw an arm for Santa (example shown below)
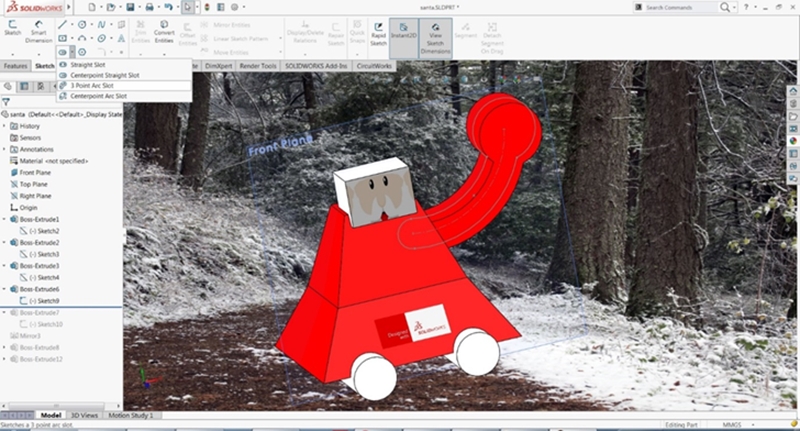
12) Add another element of Santa’s arm (example shown below) with the Straight Slot tool, using the same steps 3 – 5
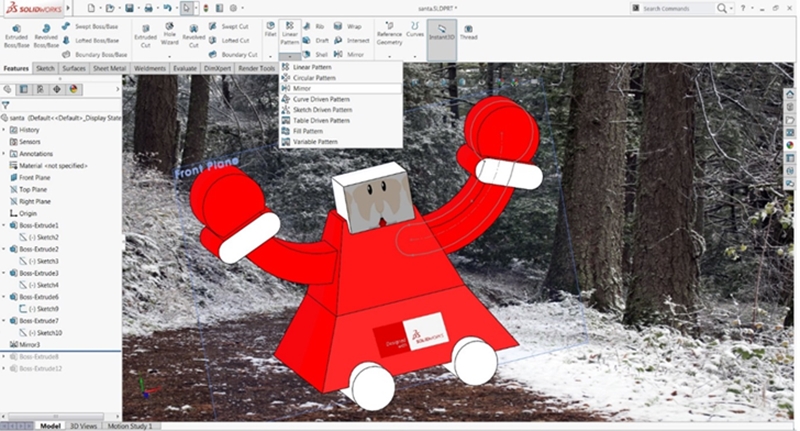
13) Select the Features tab, followed by Linear Pattern on the top panel and Click Mirror, select Right Plane, click Extruded
OR
Repeat steps 10 – 12 to draw another arm for Santa (example shown below)
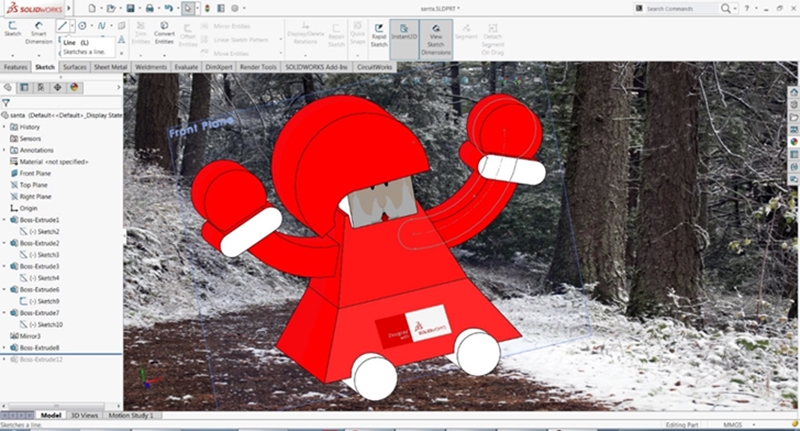
14) Select the Sketch tab and choose Front Plane on the left column
15) Using the Line tool this time, repeat steps 3 – 5 to draw a hat for Santa (example shown below)
16) Select the Sketch tab and choose Front Plane on the left column
17) Using the Circle tool again, repeat steps 3 – 5 to add a ball to Santa’s hat (example shown below)

And there’s your 3D Santa! Now to make it into a greeting card…
18) Click File, Save As
19) Set Save As type to: .jpeg or .png
20) Type the File Name, and then click Save
21) Open online design program www.canva.com
22) Sign up, or Log in if you already have an account.
23) Under Create a design, Events, choose Card
24) Click Uploads, drag and drop your SolidWorks image there
25) Play around with Layout, Elements, Text and Background to make your own original Christmas greeting card
26) When finished, click Download on the top right hand of the page, and download the image in any format you like
27) Now you have your very own original 3D Santa Christmas greeting card!
Print it out, or email it to your friends, the possibilities are endless.
Help us to celebrate the Christmas cheer by showing off your Santa model in the comments below! We’d love to see what you’ve created! Don’t forget to subscribe for our future tutorials by clicking the button below and we’ve also included the workfile for our Santa model shown above.


If you know someone you think should be featured on our blogs please email me at infoap@solidworks.com and tell me all about it. As always, thank you so much for reading and wish you a very Merry Christmas!