You may recall from my previous posts that after working at SolidWorks for 14 years, I’ve finally decided to learn how to use the software, starting with working my way through the tutorials inside of SolidWorks. Moving on from the Getting Started tutorials, I decided it was time to get into some of the basic techniques. Today, I learned to create Fillets. Before I started though, I wanted to build the part they were going to ask me to practice with.
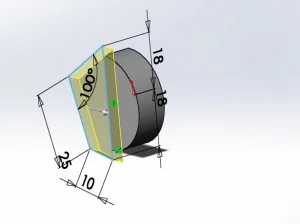
I hit the “step back” button a few times and began building the part, which would eventually be a burner knob for an oven. Getting right into it, I used a new tool called the Centerpoint Arc. It allowed me to draw a partial circle to any point where I stopped dragging the line. This brings me to the next thing I learned. Drawing a straight line from the bottom point of the arc moving up, my lines didn’t meet up correctly. Using the Merge Relation feature in the Property Manager, my drawing came together with symmetrical lines.
The next step was to draw four lines in a shape that is not touching the half-circle I just completed. I was confused as to why they wouldn’t touch the drawing. The next pitch was a curve ball. I connected them using a Collinear Relation. My friend Cholly Nachman walked me through what it actually meant, because I couldn’t find the option in the Property Manager. He explained that it makes two lines in relation to one another follow the same path. I clicked the line I wanted to relate to on the sketch, and the line I wanted it to follow. Then, I clicked Collinear Relation and the sketch came together! Well played SolidWorks…well played indeed.

With half of the part built, it was time learn the Fillet features. I started off by creating a Face Fillet at the bottom of the knob, smoothing it nicely from the mid area of Face Set 1 down to the edge of Face Set 2. For the second part, I created Constant Size Fillets on the sharper edges of the model. I struggled a bit here because I was having issues with getting some intersecting edges to dimension correctly and look right. This little mix up took up a good bit of time, and may have cost me the rest of my hair on the top of my head. If I had read the instructions better, they clearly state that it is good practice to add the larger fillet first. Whoops!

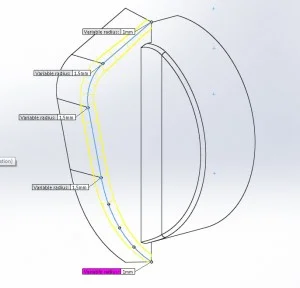
Variable Radius Fillets also took me a few tries to complete. I kept pressing Enter and finishing off my sketch prematurely, forcing me to go back and do it again. After a few tries I succeeded in getting all the correct dimensions along the edge that I needed. I like this function, both for functional and aesthetic reasons. Design is about lines and curves. Using a Variable Radius Fillet on an edge gives the model character that hopefully will make it into the end product on the shelves. It made the model real to me, instead of just feeling like a tutorial exercise. Strange, I know, but that fillet was the most impressive to use simply because of aesthetics.
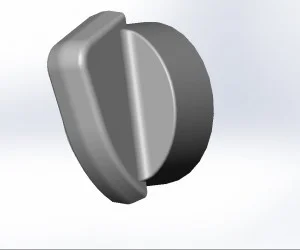
Later, Cholly came down for a quick talk, explaining the differences of mirroring a feature and mirroring the body. At one point I was trying to mirror the features instead of the whole body, creating errors galore. He showed me the error in my ways; I was using the wrong property manager. A quick lesson learned and the body was mirrored. I am now looking at complete burner knob.
Working my way through the rest of the tutorial went quickly and smoothly. My co-worker Steve showed me how to map the Library Features to the SolidWorks Library, and I inserted a keyhole in the back plane of the drawing.
I’m not going to lie; this tutorial took me a few tries, and the first attempt took longer than I expected. Once I was shown (or saw the error in my ways), building the part went quickly as the repetitions built up. Being someone with no CAD experience, I am ecstatic that I am slowly learning how to model in 3D, and I am happy that SolidWorks is making the learning curve that much easier by providing good instruction–and these tutorials!
And hey–I modeled a knob!

Want to see how SolidWorks can help you win new business and get to market faster? Request an in-person SolidWorks demo today.
