Understanding SOLIDWORKS Events, Interoperability, and How They Can Transform Your Macros
Many of us have recorded a macro using the built-in VB editor in SOLIDWORKS, hoping to run it later successfully. After all, not every SOLIDWORKS command can be recorded. Others have opened the editor and tried to build a macro from scratch, guided by the abundance of tutorials, forums, and examples available online.
If you fall into one of these groups, or if you’re simply curious about what can be done with the VB editor, I want to introduce you to a couple of concepts the macro recorder does not take into account, concepts that not everyone knows about, but which open the door to a whole new world of automation possibilities:
SOLIDWORKS Events, Interoperability, and later, SOLIDWORKS Document Manager.
Let’s begin by understanding these events referred to as Delegates in the SOLIDWORKS API documentation.
What Are SOLIDWORKS Events?
As the name suggests, events are specific moments or actions within SolidWorks that the API allows you to “listen” to. Examples include:
- Opening a document
- Changing a custom property
- Selecting anything on screen
Internally, all these are events, and the API lets us respond to them programmatically.
The goal of this article is to help you understand:
- What these events are
- How to listen to them
- And how to leverage them so your automations don’t only run when you press a button, they can also react automatically to user actions inside SOLIDWORKS.
We won’t be building full macros here, but we will use code snippets to illustrate how everything works.
Exploring Events in the Local API Help
Open the local API Help installed with SOLIDWORKS.
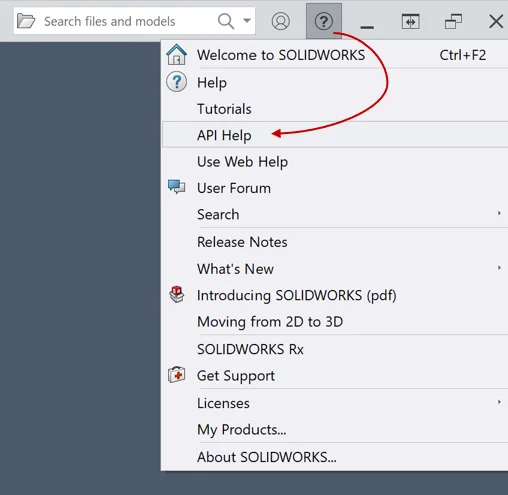
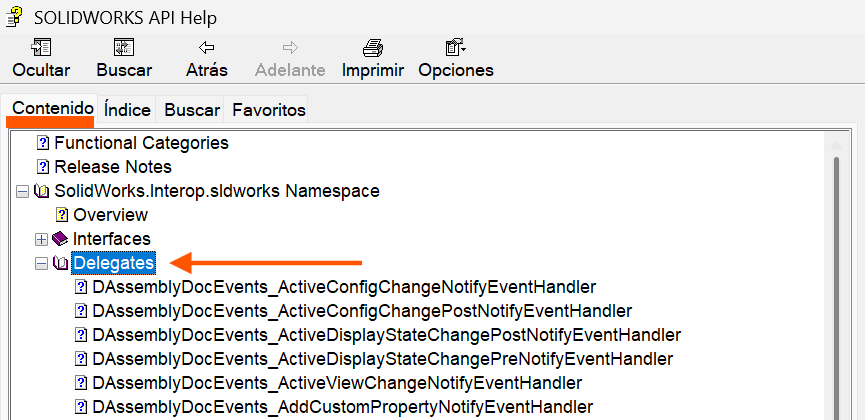
Inside the Content section, you’ll find a node called Delegates. This is where SOLIDWORKS lists all the events available for your installed version.
You can categorize them like this:
- Application: DSldWorksEvents
- Assembly: DAssemblyDocEvents
- Drawing: DDrawingDocEvents
- Part: DPartDocEvents
- Feature Manager: DFeatMgrViewEvents
- Model View: DModelViewEvents
- Mouse: DMouseEvents
- Property Sheet: DSWPropertySheetEvents
- Task Pane: DTaskpaneViewEvents
Personally, the ones I use most are the events tied to the active document, but it’s worth exploring them all, many are extremely descriptive and include detailed documentation right in the API Help.
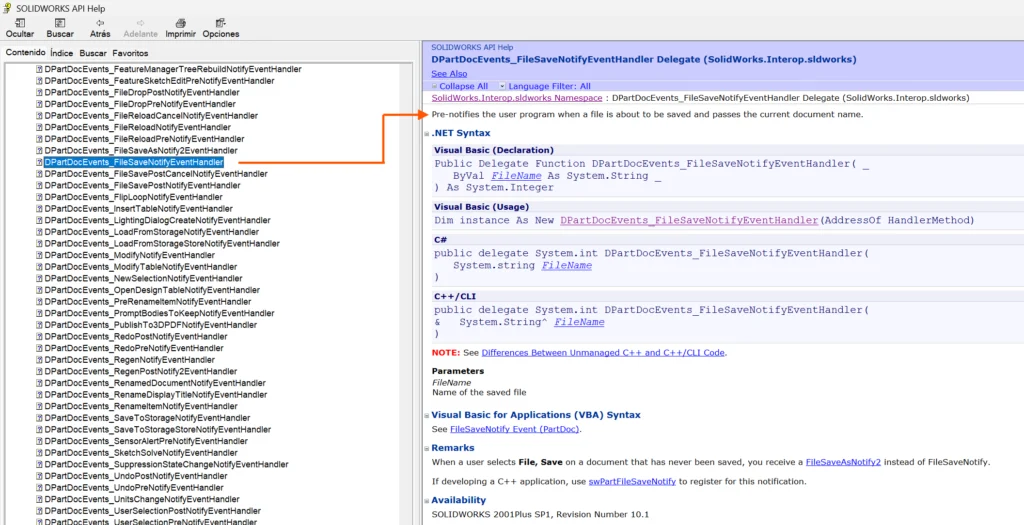
One important detail: these delegates cannot be called manually. SOLIDWORKS exposes them internally, and they fire automatically with the appropriate parameters whenever the event occurs.
Creating a Macro to React to Selection Events
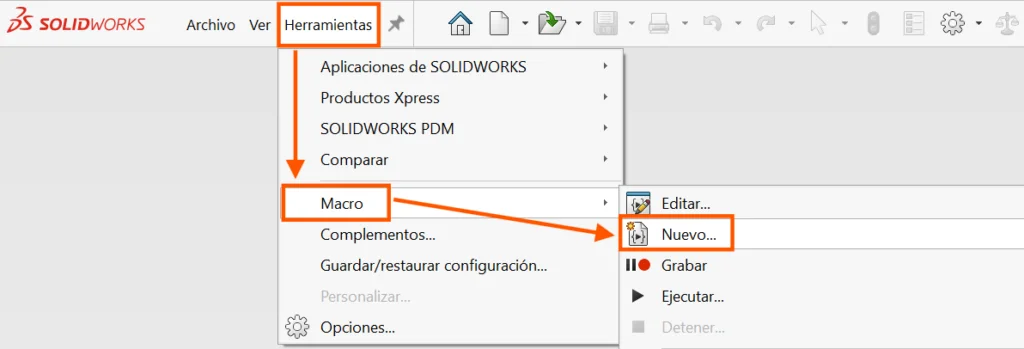
Let’s look at how to detect a selection inside the SOLIDWORKS interface. Start by creating a new macro in the VB editor.
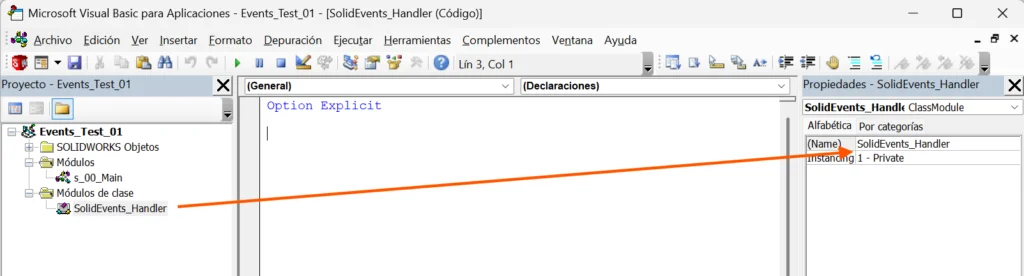
1. Clean up the default module
Rename the automatically generated module for clarity, I recommend naming modules using a simple pattern:
S01_Name
S02_Name
…
This keeps modules ordered by execution sequence.
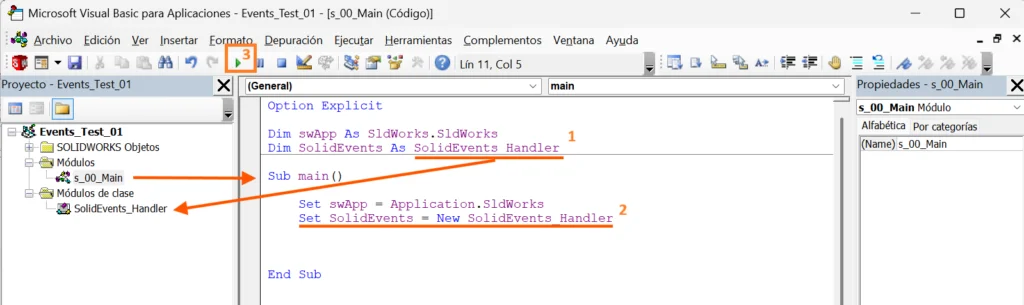
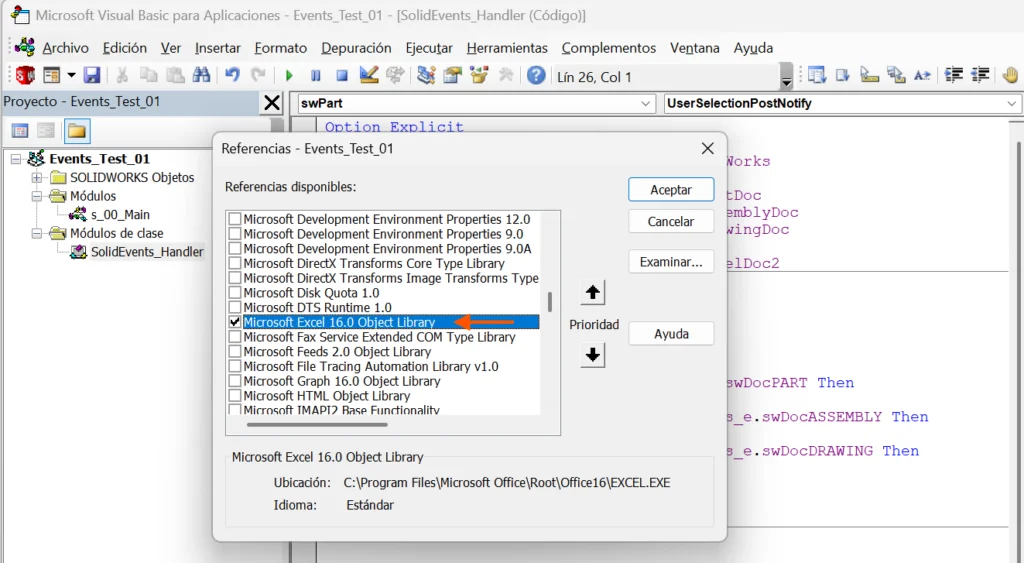
2. Strong-type the SOLIDWORKS application object
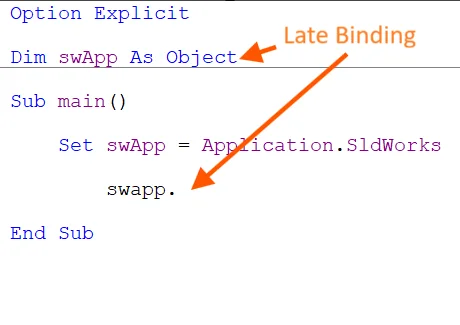
By default, the editor declares swApp as a generic Object.
Replace it with the explicit type:
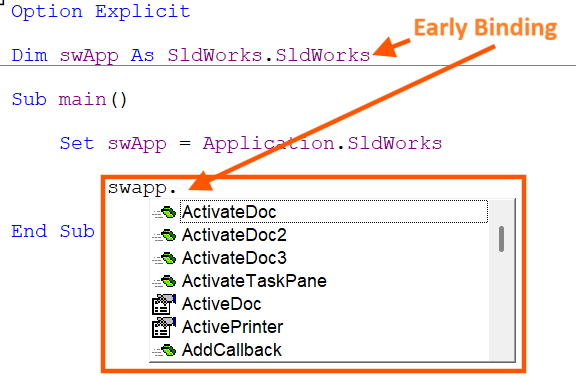
Dim swApp As SldWorks
This enables Early Binding, which gives you IntelliSense, making it much easier to explore methods and properties.
3. Create a Class Module for Handling Events
Right-click on Modules > Insert > Class Module.
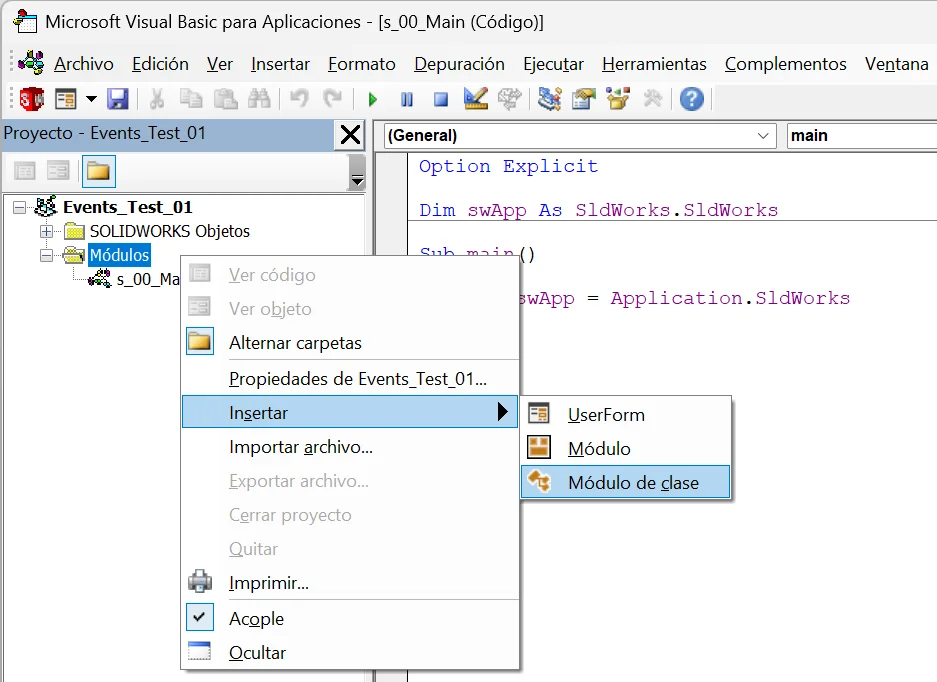
Rename it to something meaningful, for example SolidEvents_Handler.
Inside this class, declare variables for the objects whose events you want to listen to and use WithEvents:
Dim WithEvents swApp As SldWorks
Dim WithEvents swPart As PartDoc
Dim WithEvents swAssembly As AssemblyDoc
Dim WithEvents swDrawing As DrawingDoc
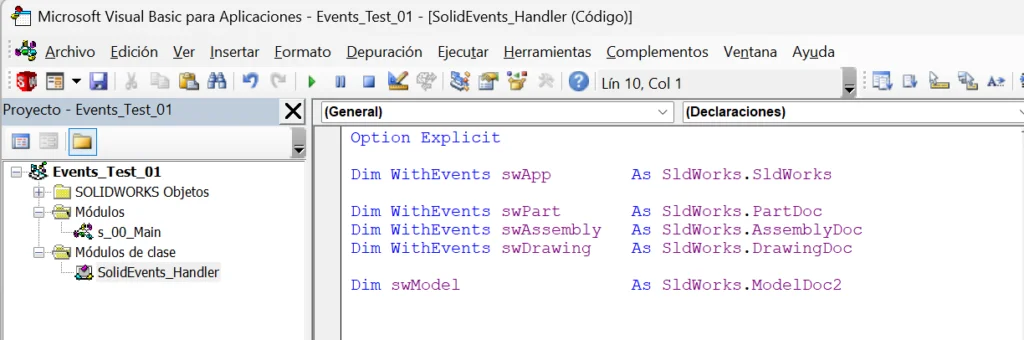
Add another variable of type ModelDoc2 to capture whichever document is currently active.
4. Initialize the Class
To instantiate a class, you need the Class_Initialize procedure.
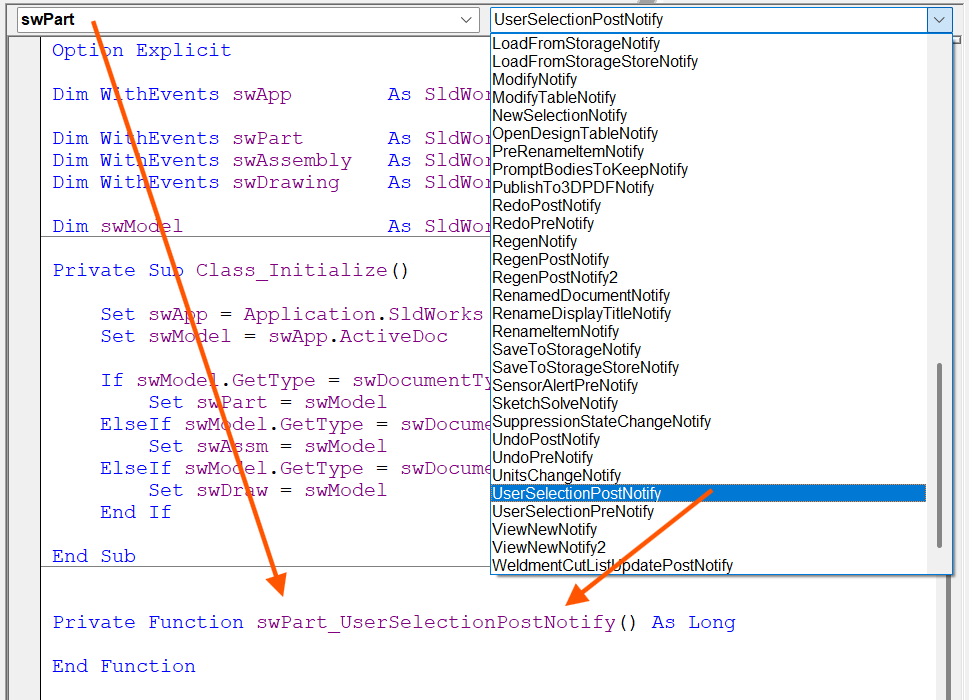
Select Class in the object dropdown and Initialize in the procedure dropdown.
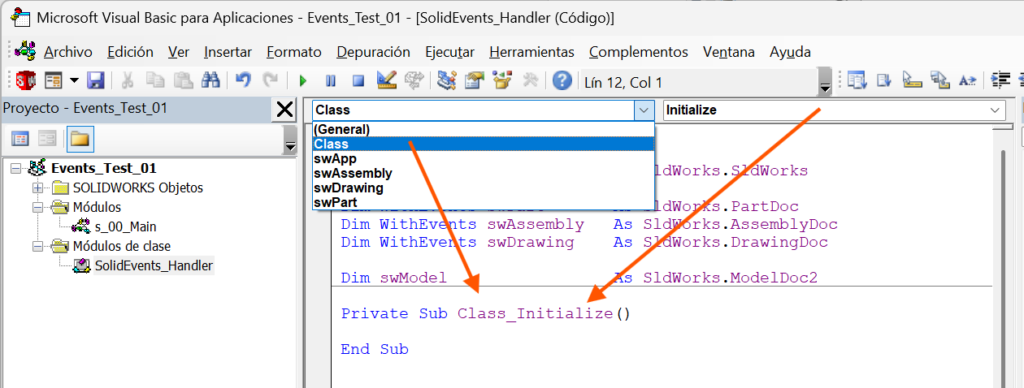
Inside this method, set up the main variables:
Set swApp = Application.SldWorks
Set swModel = swApp.ActiveDoc
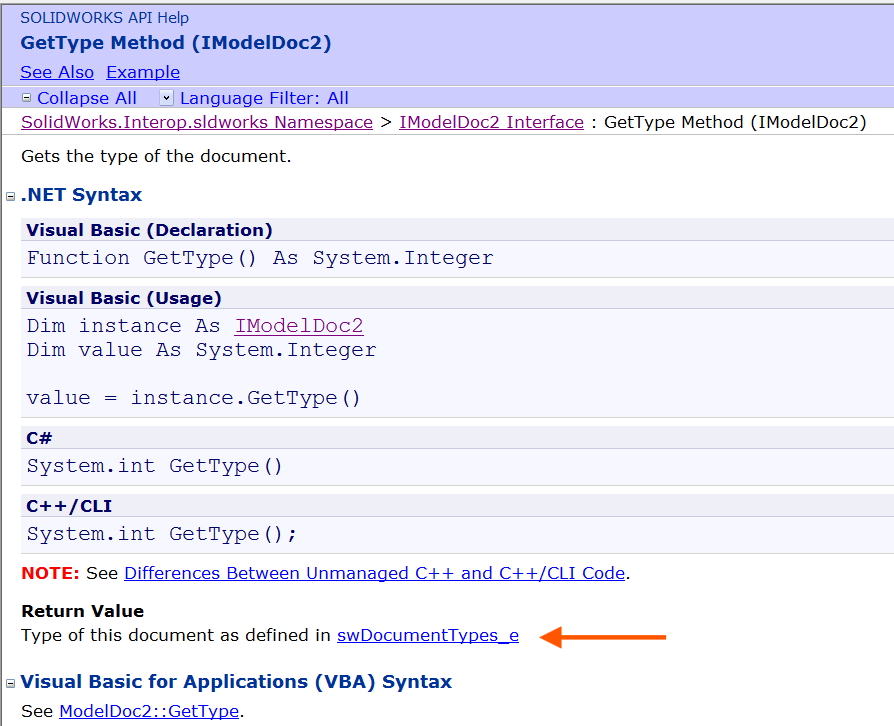
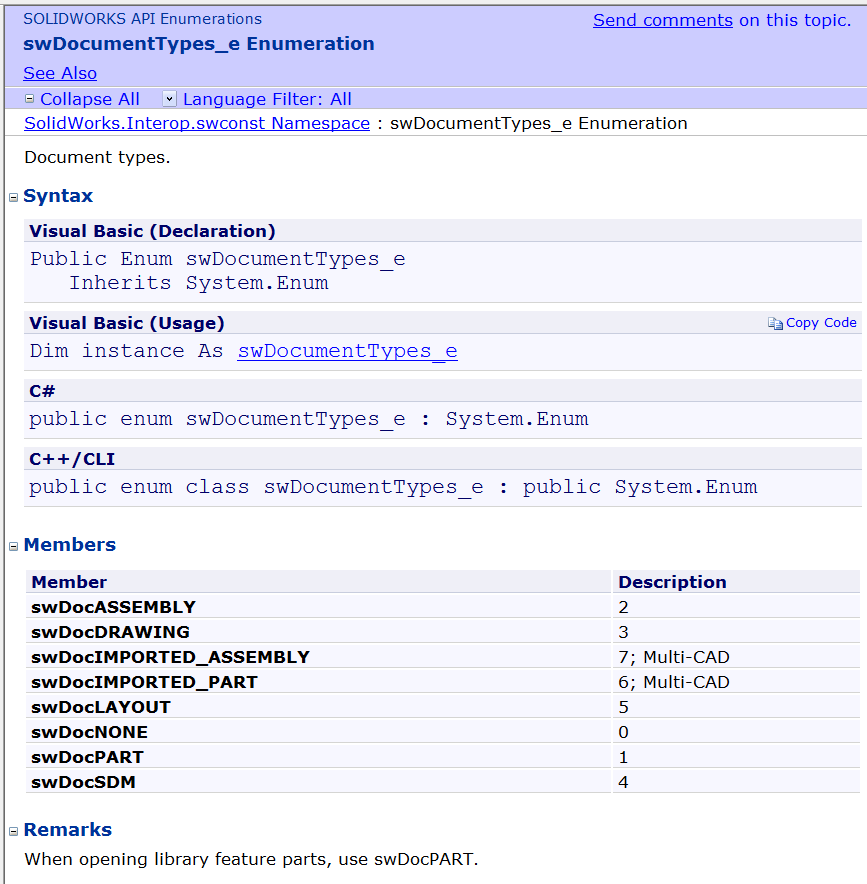
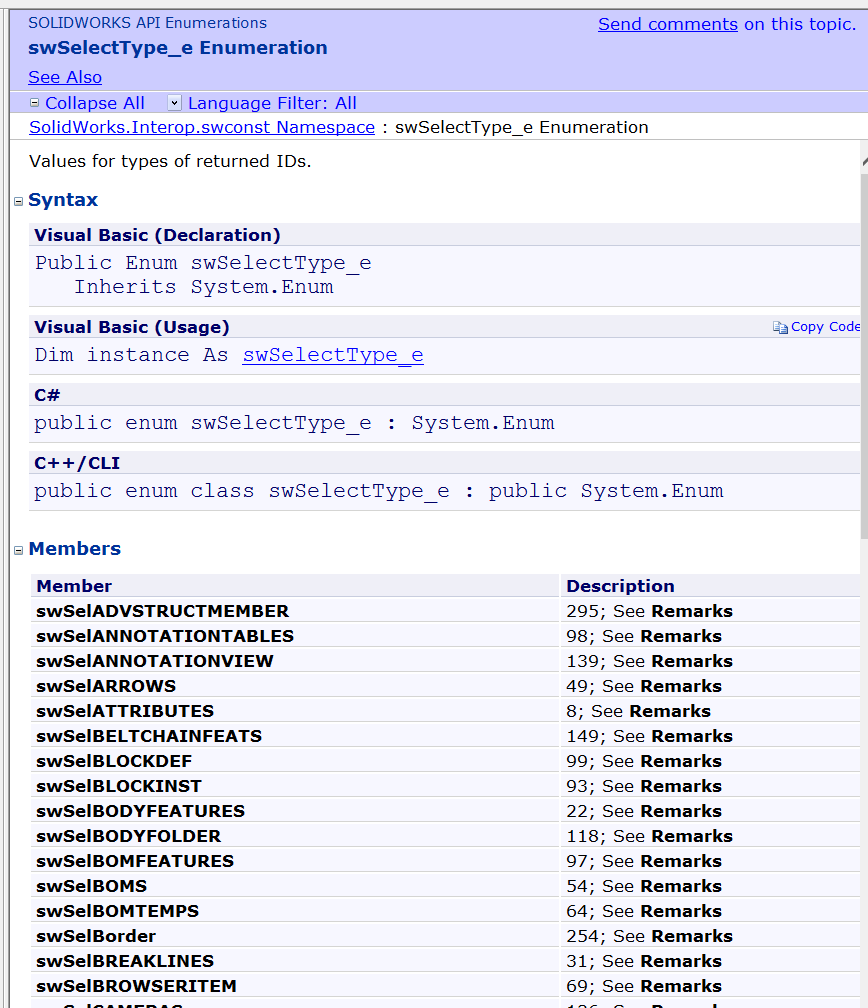
To determine the type of the active document, use:
swModel.GetType
This returns an integer defined in the API Help’s enumeration table.

Once initialized, you can begin capturing events

The 99% of the macro must begin with that sentences (1 and 2)to avoid use the wrong methods or properties into the wrong type of document, this avoid the macro crashes in the beginning, in this case we set every kind of document but if we only want to run the macro in a DocPart just put an Exit Sub inside de DocAssembly and the DocDrawing condition, even a messagebox to notify it to the user.
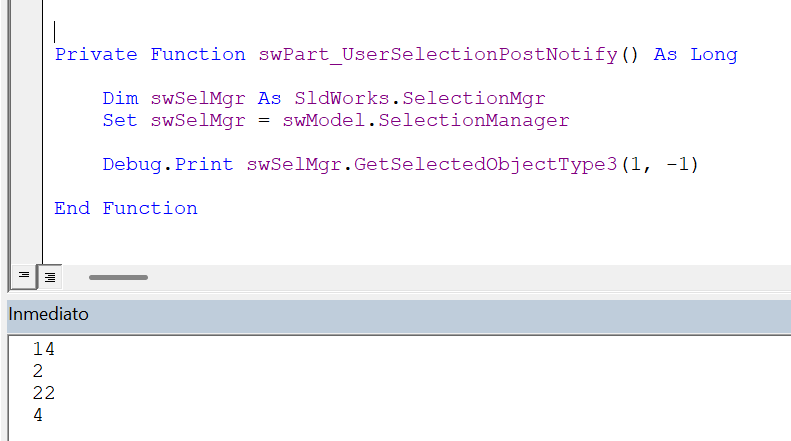
5. Capturing the Selection Event
For this demonstration, we will the UserSelectionPostNotify event.
This event fires after every time the user selects something in SOLIDWORKS
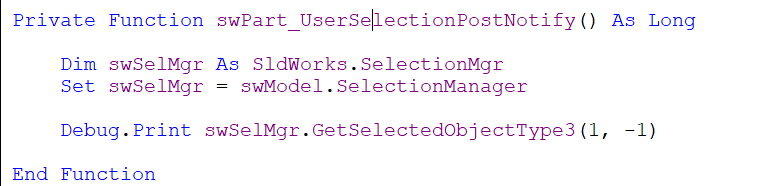
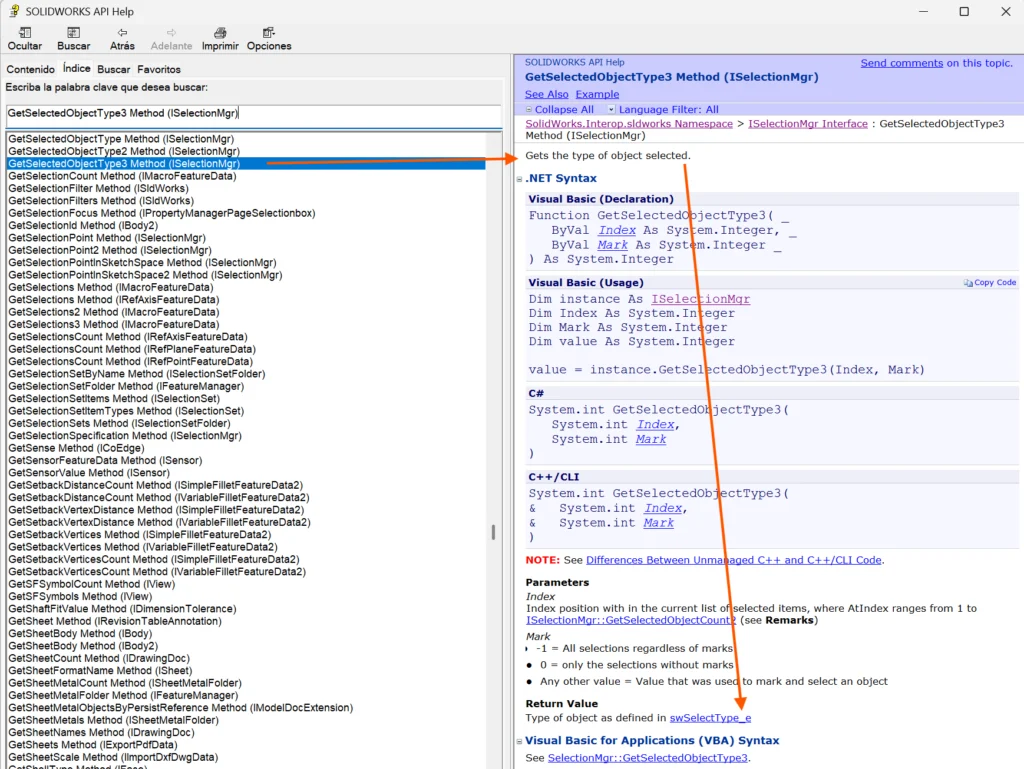
To inspect the selection, use the SelectionManager interface and its method:
GetSelectedObjectType3
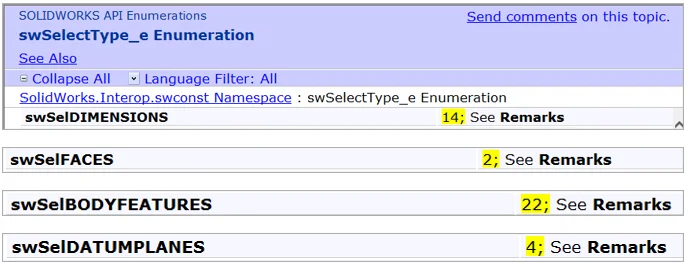
The returned Long value corresponds to specific selection types, as documented in the enumeration table.
At this point we have to run the macro and see what happens.
- Go to the Module that SOLIDWORKS creates and declare a variable as a SolidworksEfents_Handler (which is the class that we create before).
- Open a new part and model something, then run the macro from the Procedure called Main (the name Main in vba is not necessary, you can put whatever you want but it is a good practice to put “main” as an entry point, it is a convention behavior in programming and in some languages it is mandatory for).
Show the de immediate window to debug (Ctrl+G) to print the values returned from the event
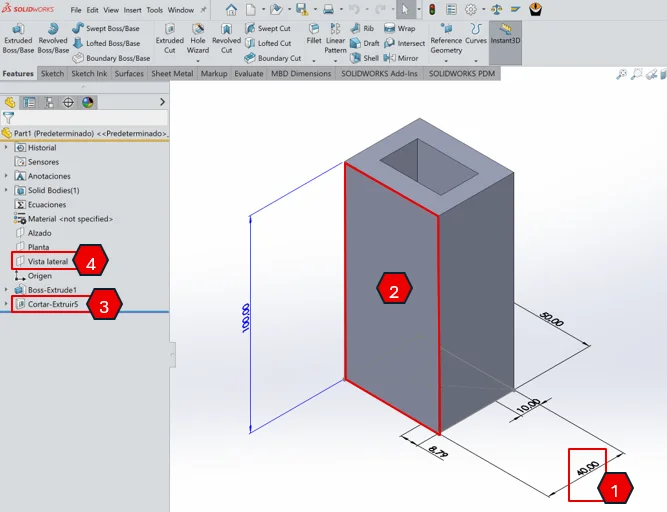
- 1 → Dimension
- 2 → Face
- 3 → Feature
- 4 → Plane
You can keep selecting whatever to see its long value from the enumerator
This is what the immediate window shows, one number for each selection that we been made
And this is what API Help says:
From here, you can add logic to react only to certain types. For our example, we will use Dimensions and Features to control them externally before.
Interoperability: Communicating Between SOLIDWORKS and Excel
1. SOLIDWORKS to Excel
Now let’s talk about interoperability, or how COM objects work.
COM stands for Component Object Model, and it’s what allows applications to communicate through their .tlb (Type Library) files.
Thanks to COM, SOLIDWORKS can talk to Excel, and Excel can also talk to SOLIDWORKS.
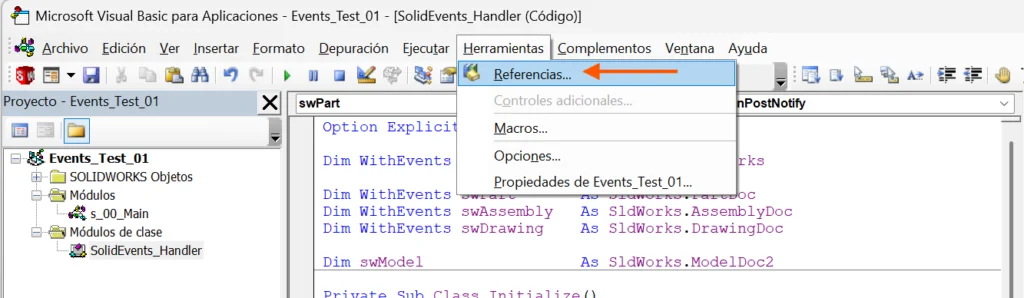
To use Excel from SOLIDWORKS, simply enable the Excel reference in the VB editor:
Tools → References → Microsoft Excel XX.X Object Library
Once added, you can use all Excel objects, methods, and properties just like in VBA inside Excel.
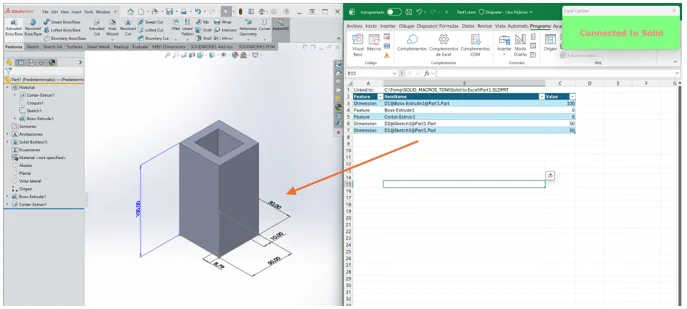
In the example macro, we will populate an Excel table with the dimensions and features selected in SOLIDWORKS.
When the macro runs:
- It will launch an Excel session if one isn’t already open
- It will create a new table with 3 columns in Sheet1
- A small non-modal form will appear, keeping the connection alive
- While the form is visible, any selection in SOLIDWORKS matching the defined types will be added as a new row in Excel (I tried to do a GIF, but I don’t have permissions to install third-party software; what I have is a video)
- When the form closes, all COM pointers are cleaned (set to Nothing) to avoid leaving dangling references
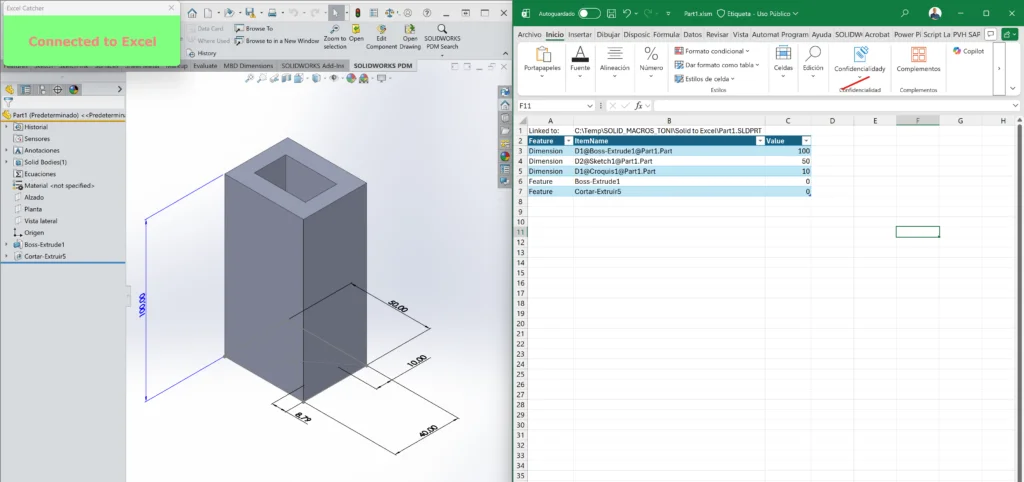
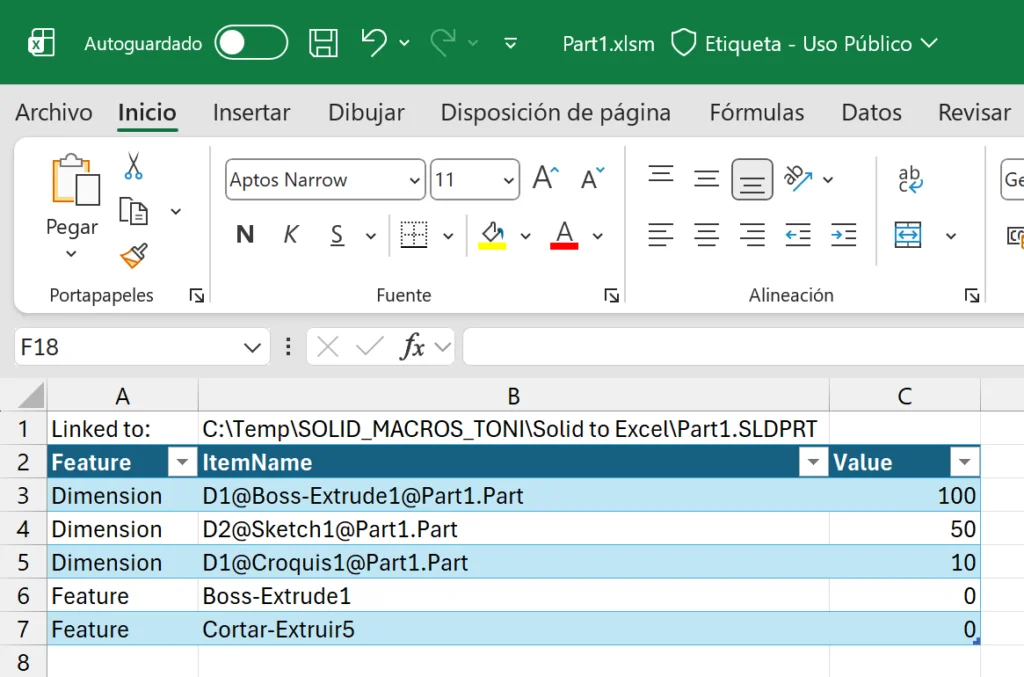
Notice two things: the file is saved as an Excel macro file (.xlsm), and the B2 cell has the path to the part from which we are taking data. We will use it after; just save whenever you finish picking dimensions or features.
2. Excel to SOLIDWORKS
Let’s go with the funny part. In the same way that we can drive Excel objects through SOLIDWORKS, we are going to drive SOLIDWORKS from Excel with events.
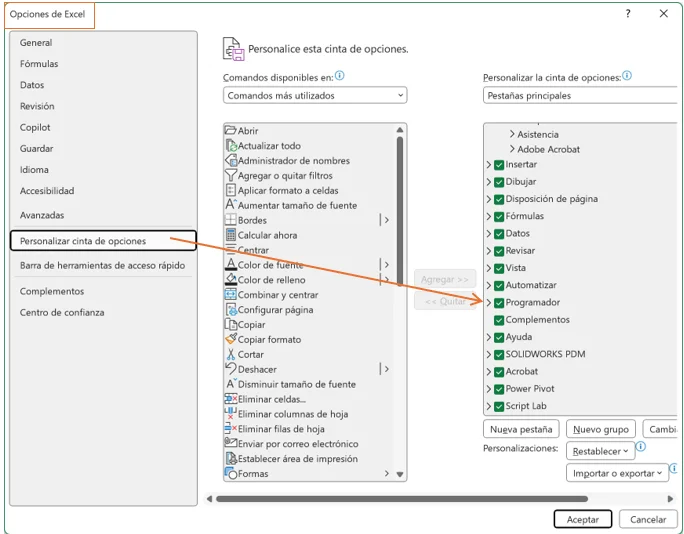
The first step, as before, is to add the references in an Excel VBA project. We need the Programmer tab in the Excel ribbon to launch the VB editor.
Normally, we get it through the Excel Options > Customize Ribbon > Programmer (check it)
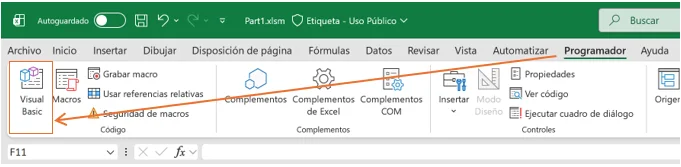
Now from the programmer tab we can launch de VB Editor
The Excel VB objects have some differences with the SOLIDWORKS VB Editor.
The first time we launch the editor, we see one object for the current session and one for every sheet in the workbook. In the sheet objects, we can use the Events that fire, for example, every time a cell changes.
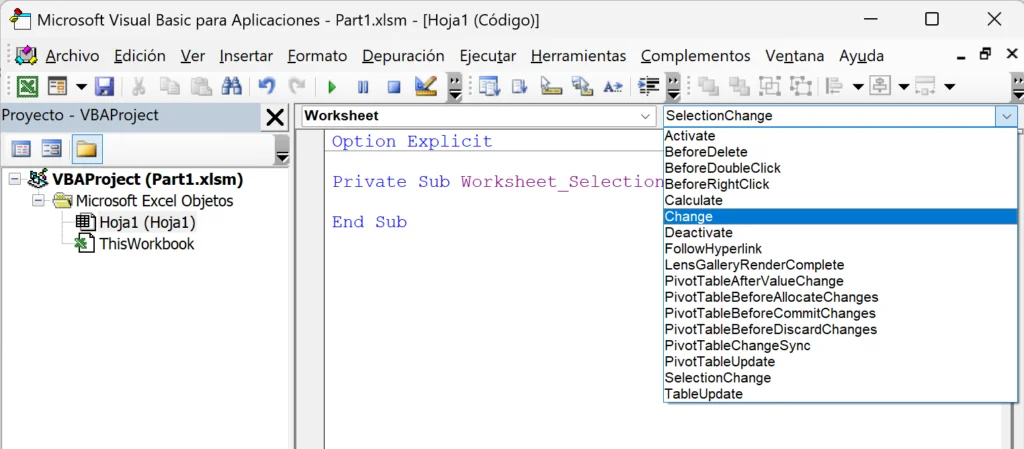
We will use this event to listen to every change in the columns that we have the dimensions values or even feature status.
Now we need the same structure that the SOLIDWORKS macro has:
- One module to use as a start point (main procedure)
- One class module to gets the Excel events (the WorksSheet object that we saw before)
- One form to keep the connection
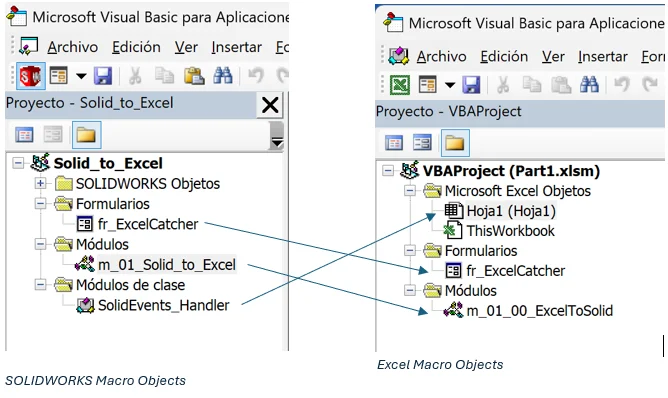
Just remember that we can take the form from the SOLIDWORKS VBE windows and drag it to the Excel window to get the same form.
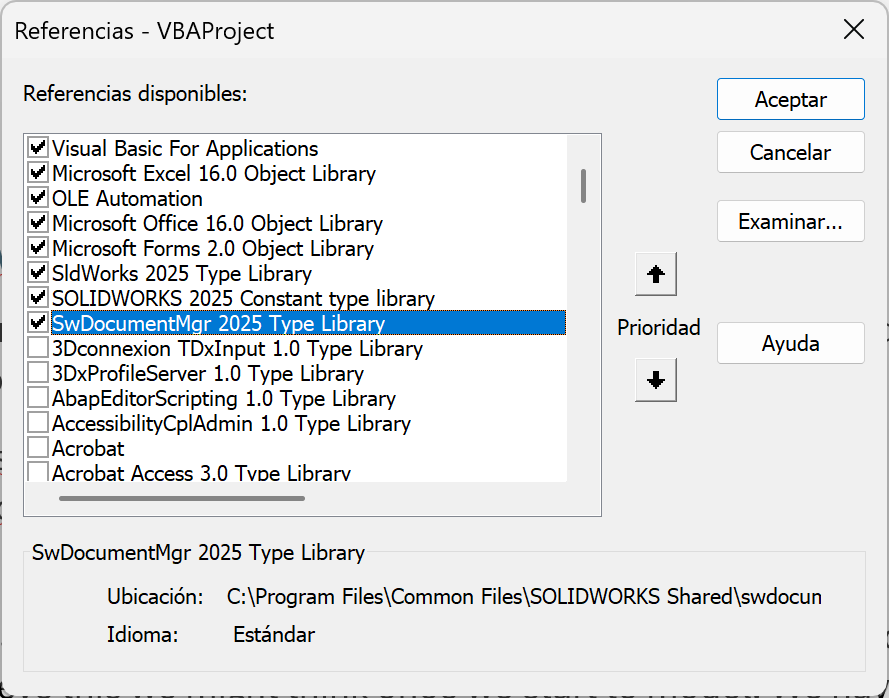
We have to load the SOLIDWORKS references as we did before in SOLIDWORKS.
Once we have the Excel code, we can launch the connection and see what happens.
3. Excel to SOLIDWORKS via Document Manager
There is another scenario to keep in mind, from what we have seen, we need an open SOLIDWORKS session to drive the model dimensions, feature states, etc.
But with SOLIDWORKS Document Manager, an API that allows us to read and write data within a SOLIDWORKS file, we can drive a model, change references and extract BOMs…
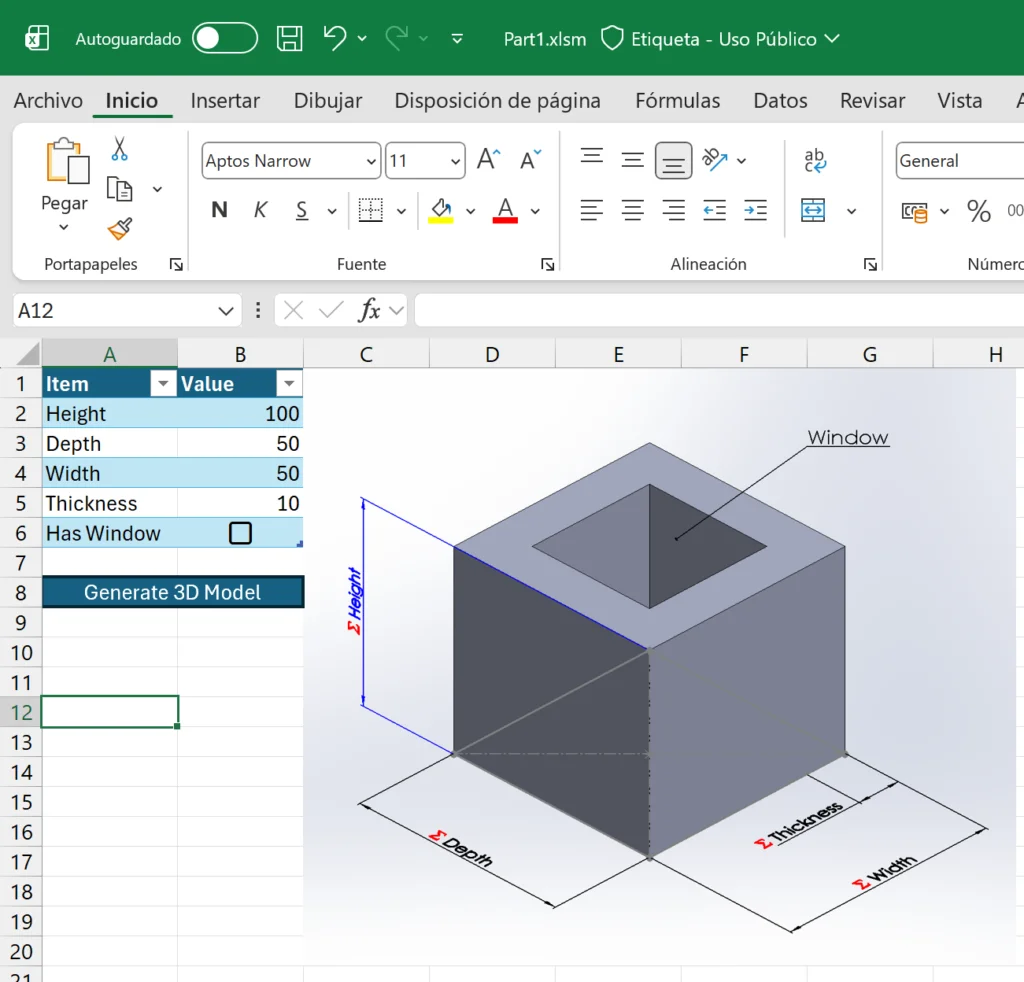
In this case, we want to configure a 3D Model using an Excel configurator. To achieve this, we might think once we start to model. We have to parametrize every single dimension that we want to be driven.
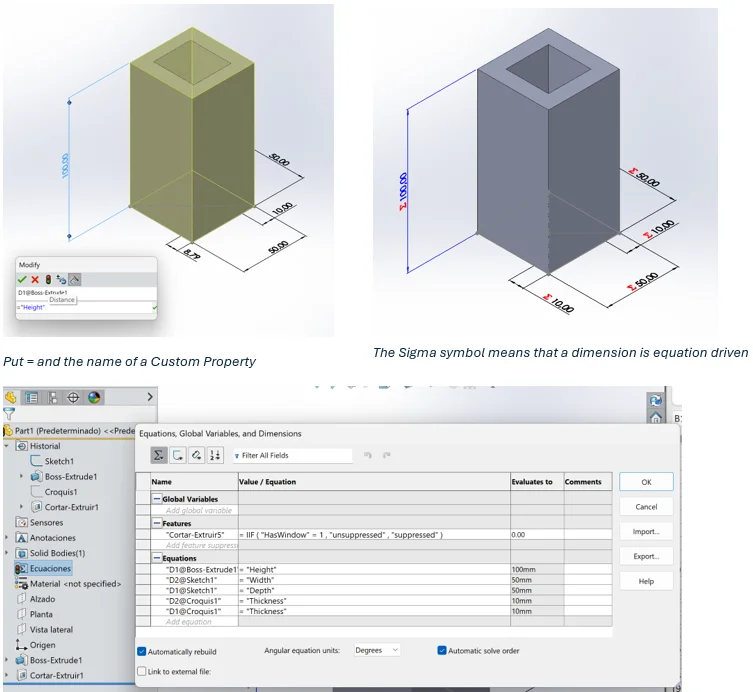
Put = and the name of a Custom Property
Equations can be derived with custom properties, which is something that we can also read/write without opening SOLIDWORKS, even without any license, just from the Document Manager.
The first step here is to request for an Document Manager API key, once we have that code we can install the Document Manager SDK and use it, in this case, from excel.
To do that, once again, we have to load its references in a VBA project

Then, using the Document Manager API Help, we can see an example to use it.
As we can see, the unique parameter that we need is the License Key, I recommend to have it in a separated file an read it rather than write the entire key in the vba project.
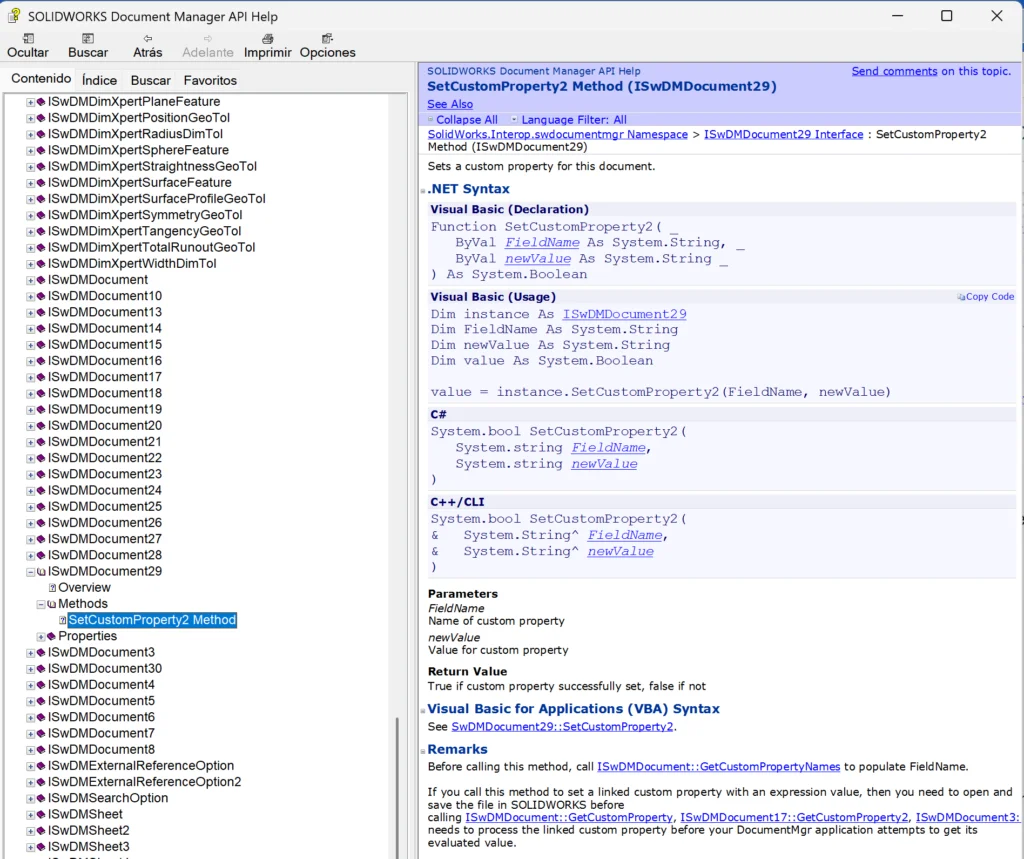
The next step is to open the file through Document Manager.
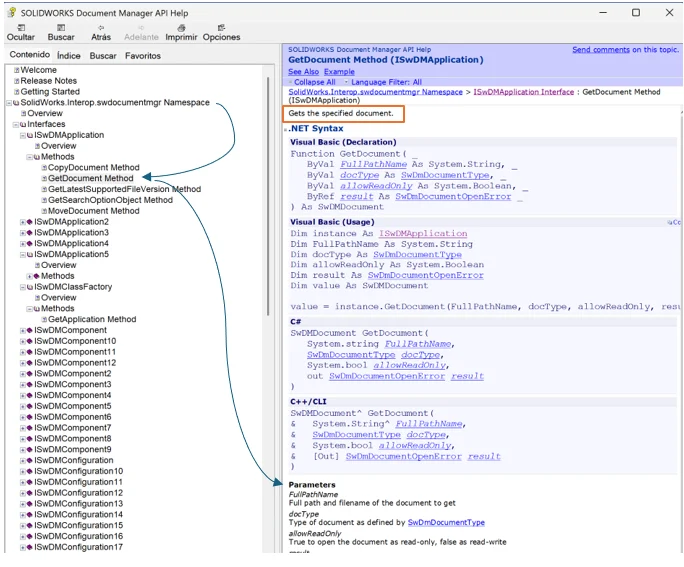
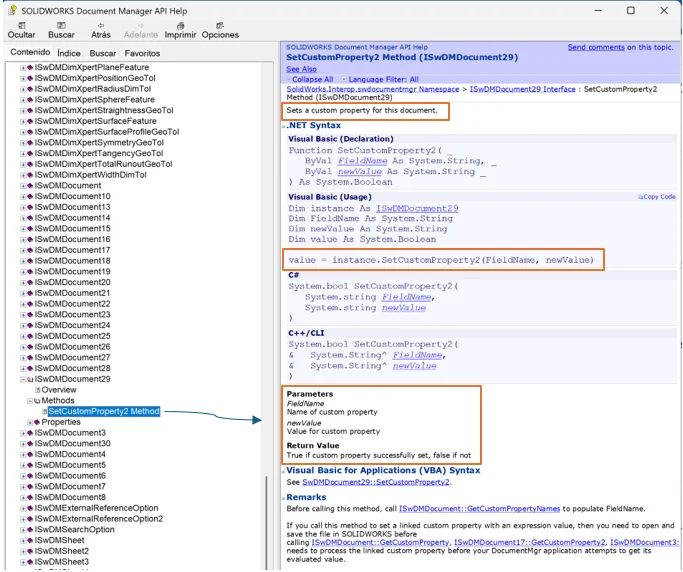
After getting the doc that we want, that is the one the excel file has the path, we modify its Custom Properties.
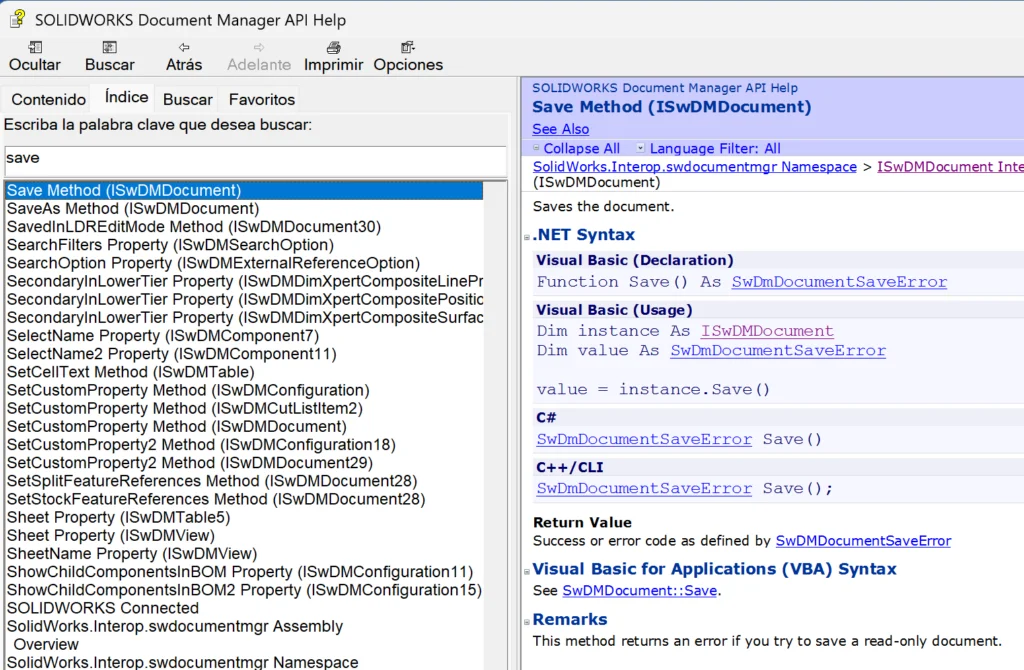
The final step is to save the file.
Here there is not events to be fired, just a button to execute the procedure.
We just have to set every single cell with data to its proper Custom Property, next time that SOLIDWORKS file is opened just rebuild it.
This is how to build a kind of configurator for offers, for example, with a 3D generator: