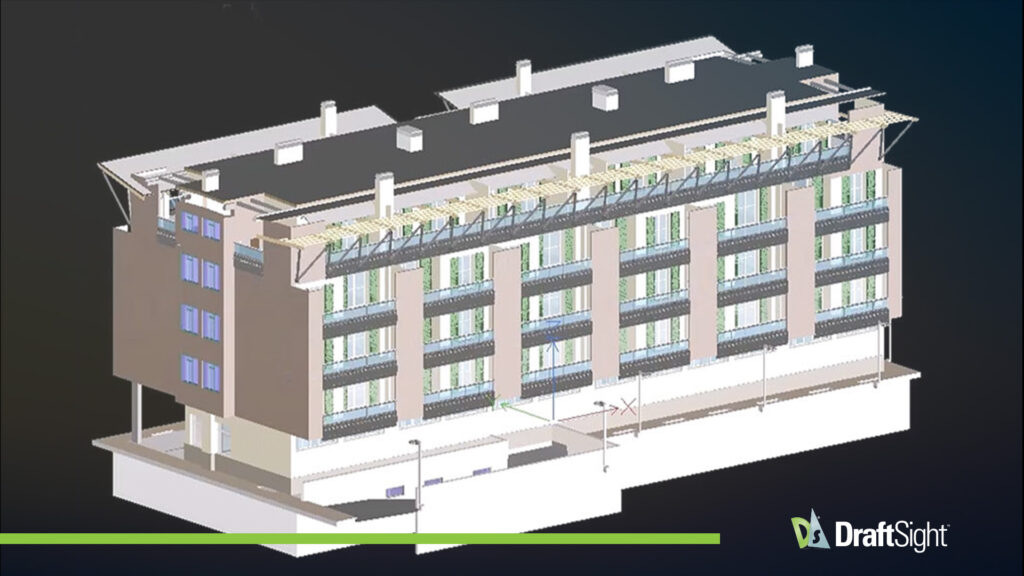

Many CAD professionals have experienced some version of this moment. You receive a BIM model from an architect or consultant. Then comes the real work. You need labeled, scaled, and readable floor plans that can be reviewed, marked up, or issued as PDFs.
For many drafters, this is where friction creeps in. Translating a BIM model into accurate 2D drawings requires a series of workarounds, including additional steps, tools, and cleanup.
DraftSight’s BIM Module was built to simplify and improve this process, and the Mastering the BIM Module in DraftSight guide walks you through it from start to finish.
Download: Mastering the BIM Module in DraftSight
Start With the BIM Model
The workflow begins by bringing the BIM model directly into DraftSight. That means you can skip the redrawing or rebuilding of geometry.
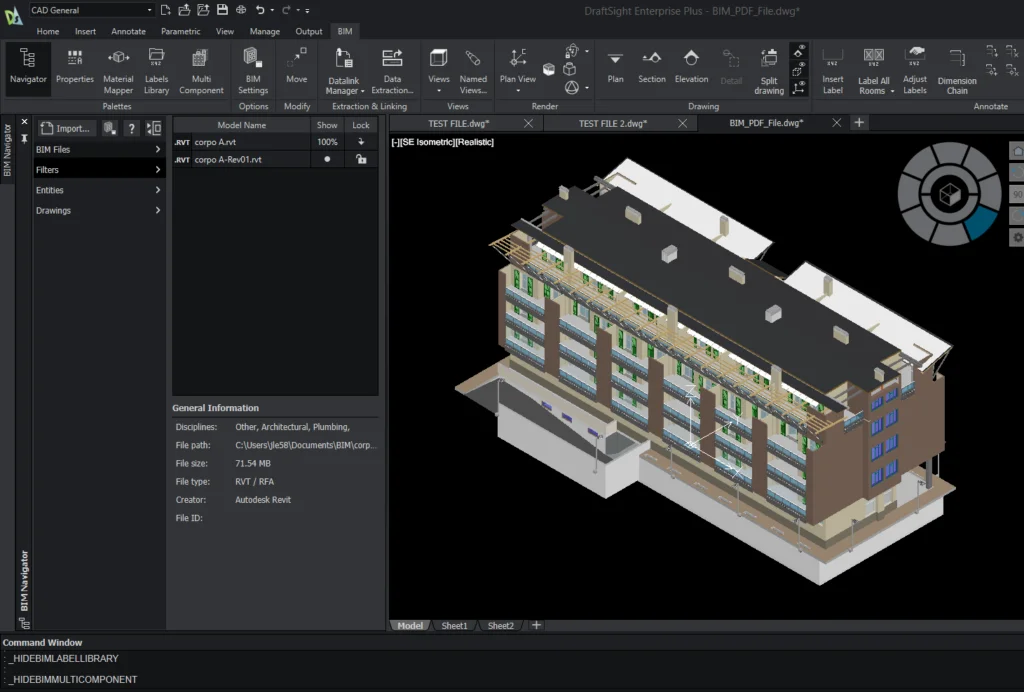
Once imported, the model behaves as expected for 2D drafting. Building levels are clearly defined. Elements are organized. You are working with a model that already understands how the building is organized. That clarity matters. It means your time goes into producing drawings, not into figuring out how to prepare the file before you can begin.
Turning 3D Information Into 2D Plans
From there, floor plans are created by selecting the appropriate level and generating a 2D view. The result is real linework that behaves like native geometry.
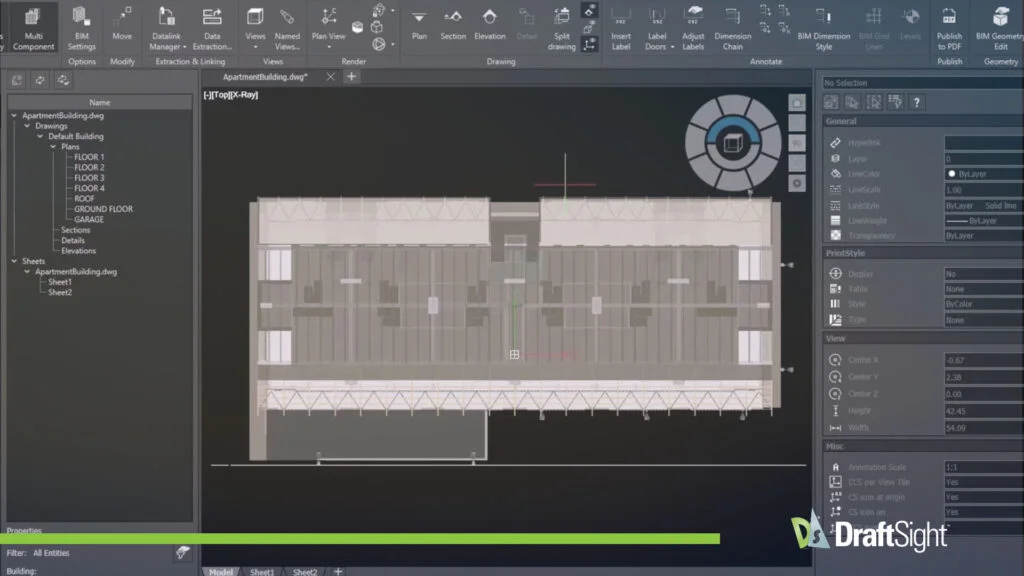
You can snap to it. You can edit it. You can work with it the same way you would any other DraftSight drawing. This is where many users feel the shift. You can draft with confidence, knowing the 2D plan is grounded in the underlying model. DraftSight’s BIM Module lets you control what appears in each drawing view and keeps drawings clean.
Details That Make a Plan Usable
Once the plan is in place, room names, numbers, and other labels can be added with awareness of the BIM data they represent. That means labels are tied to the model’s structure rather than being manually guessed or duplicated. At this stage, your work feels like drafting again. You adjust text, manage layers, and fine-tune the layout to ensure it communicates clearly.
The Mastering the BIM Module in DraftSight guide covers best practices for keeping drawings organized and readable as projects evolve.
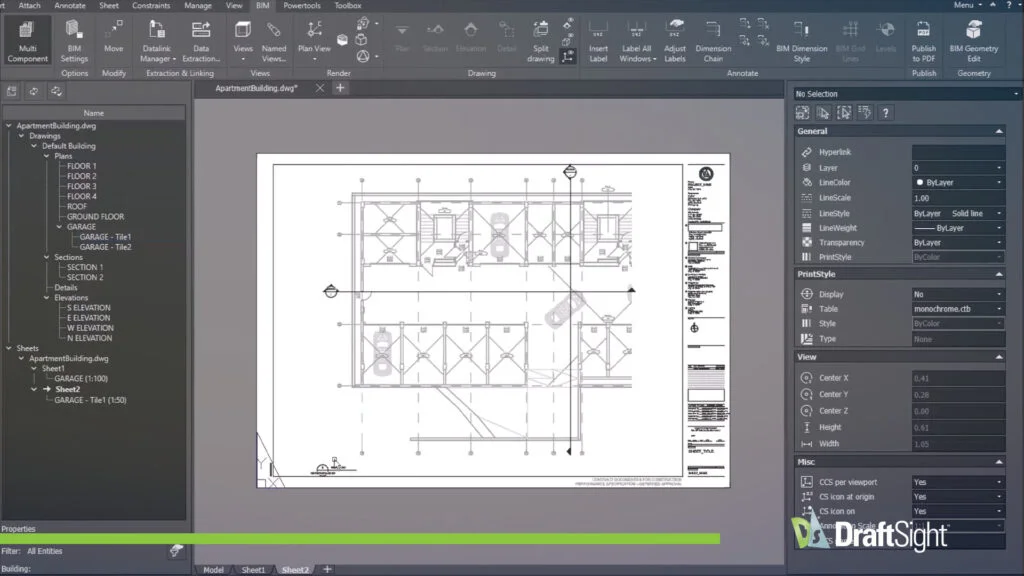
Printing to PDF
The last step often determines how confident you feel about the entire process. Printing.
With the BIM-based floor plan set up correctly, printing to PDF becomes routine. Scales behave as expected, and line weights stay consistent. What you see on screen is what ends up in the file.
There is no special export routine or last-minute cleanup pass just to make the drawing presentable. The plan is ready because the steps leading up to it were steady and controlled.
See the Whole Process, Step by Step
Mastering the BIM Module in DraftSight guides you through the full workflow, from importing the model to producing finished 2D floor plans and PDFs. If BIM files are already part of your projects, the BIM Module helps you work with them more easily in DraftSight.
Download the guide to see the full workflow in action.