My Introduction to SolidWorks: Drawing a Pressure Plate


The last time I did any sort of design work was back in 1999, using a drafting board with a drawing arm, T-square, pencil and paper. Modeling a part in SolidWorks was a new experience for me, and to be honest with you, it wasn’t as hard as I expected. The Introduction taught me a lot about the basics of the program and how to navigate the tool bars. In about one hour (I really though it was going to take longer) I learned how to create a base, extrude the base, create and extrude boss features, create holes and a few other basic functions of the program. I started writing this post as I was going through the tutorial and realized that 900 words might have been a bit wordy when I wasn’t even half way through the instructions. That just won’t do, so here is a list of features I learned and enjoyed!

Clickable Icons Inside of the Tutorial: Being new to the software package, this was probably one of the best features I have seen in instructions. It allowed me to get used to the toolbars and their layouts in the SolidWorks work space. It also helped me to memorize where items were as I went along.
Repetitive Work Flow: Sure this sounds boring, but when I had to draw a circle, and then a circle within a circle, it drilled into my head the steps to do so. Extrude Boss/Base – Choose Axis to Work With – Create Shape – Dimension Shape – Extruding the Shape you created – Saving the Part. Once you draw the first circle and then the second, the workflow starts to feel natural and ease of navigation becomes first-hand instead of awkward.

Standards View Toolbar: Yes I like this toolbar. Why? I can navigate any axis of the drawing I want with one simple click of a shaded cube. I can also look at it in a trimetric view at an ever-so-slight angle. So while many might not see this as a big deal, as a new user, I found it to be useful and easy.
Smart Dimensioning: When I first started drawing shapes, I wondered how my drawings would get dimensioned correctly. I didn’t realize it was as easy as clicking the Smart Dimension tool, clicking the area you want to dimension, and typing in the dimensions you want. When you type the dimension, the drawing changes. Again this is something that is probably not so much a big deal, but to me…MIND BLOWN!
Hole Wizard: Preexisting hole sizes with screw and thread measurements already in the software? I just place on the plane I want the holes to go in, and line them up with the center of the drawing? It seemed a bit to easy, but adding the holes, and then editing them afterward was a breeze.

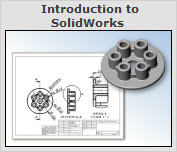
Circular Patterns Using the Center Axis: So this one put me in shock. I made six of the same same Boss Extrusions with less than 10 mouse clicks. It took me a couple of times to click the right geometries, but once I got it, all I could think about was the extreme time savings.
This brings me to the conclusion of the actual modeling of the Pressure Plate. I was honestly amazed at the few keystrokes and mouse clicks I had to do to get to the point of a finished part. Sure the part is basic, but how I got to the point where I am at, after building it a few more times from scratch, I was able to draw it without using the tutorial on my fourth attempt. I am looking forward to the next steps of this tutorial; bringing the part over to a Technical Drawing.
Some things I did when I was going through this first part of the tutorial and some of the struggles I had:
- I brushed up on a bit of the engineering and modeling vocabulary. x Axis y Axis z Axis, Boss, Plane, etc. are terms I had to get used to. I found that as I wrote things down I comprehended the words better.
- The first time I did the first half of this tutorial, not everything sunk in. If this happens to you as well, I suggest repeating it a few times until you can fully grasp the functions
- I struggled using the Circular Pattern tool the first few times. It takes some getting used to clicking on the planes you want to be included.
- Use the icons with the orange blocks around them inside of the tutorial. It is extremely helpful navigating through the toolbars, especially when you are new to the software!


Andrew Fontaine
Latest posts by Andrew Fontaine (see all)
- Bringing the Past into the Future with SOLIDWORKS - March 28, 2014
- Taking the SolidWorks Essentials training class - March 11, 2014
- Ian Baxter: Employee Number Seventy Something - February 28, 2014